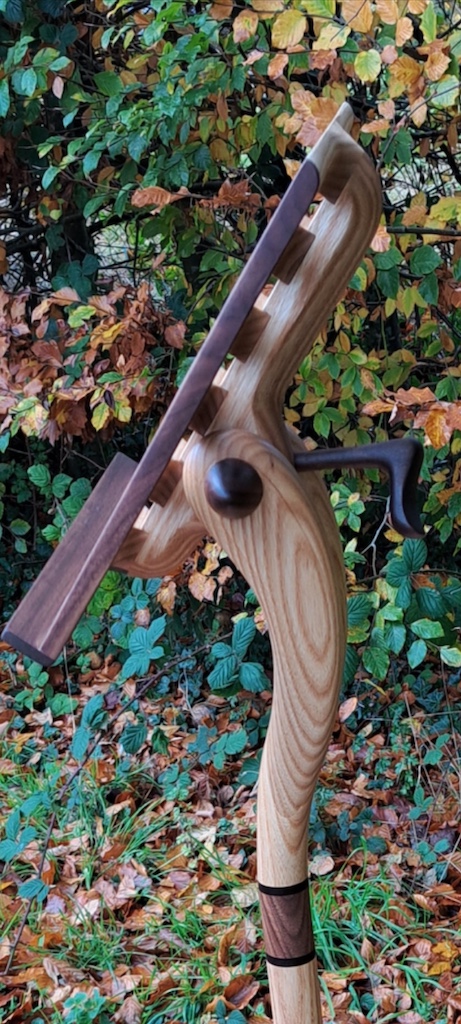
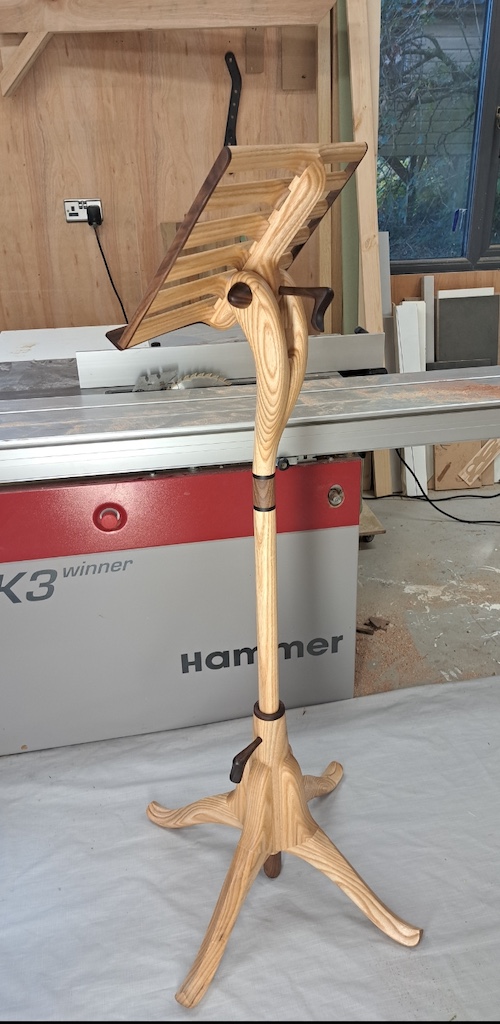
 Hey Scott. I finally finished the music stand. Alot of work and Alot of shaping in it but I found it very enjoyable. Your instructions were just brilliant. I'll send on a few pictures. Thanks for all the help Scott. You're a legend
Thanks
Hey Scott. I finally finished the music stand. Alot of work and Alot of shaping in it but I found it very enjoyable. Your instructions were just brilliant. I'll send on a few pictures. Thanks for all the help Scott. You're a legend
Thanks
Michael O.
 Hey Scott, hope you are well and as busy as you want to be.
While it’s been a ling time I am finally doing another build for my other daughter Daryl. After 8 years and about 100G for fertility treatments, her sister (Bailey who I did the first chair for) has offered to surrogate for her and with her and her husband’s last chance embryo is now carry her child. (My heart is exploding it’s so full with this news)
So I need to get to work on her chair, problem is I can’t find the CD after this long and a move of shop space.
Can I purchase another copy (or equivalent digital file) from you so I can get to work?
FYI the chair is still like new and sits proudly in Bailey’s home where she still rocks her kids when they need comforting and where I sit when there.
Hey Scott, hope you are well and as busy as you want to be.
While it’s been a ling time I am finally doing another build for my other daughter Daryl. After 8 years and about 100G for fertility treatments, her sister (Bailey who I did the first chair for) has offered to surrogate for her and with her and her husband’s last chance embryo is now carry her child. (My heart is exploding it’s so full with this news)
So I need to get to work on her chair, problem is I can’t find the CD after this long and a move of shop space.
Can I purchase another copy (or equivalent digital file) from you so I can get to work?
FYI the chair is still like new and sits proudly in Bailey’s home where she still rocks her kids when they need comforting and where I sit when there.
Tom T.
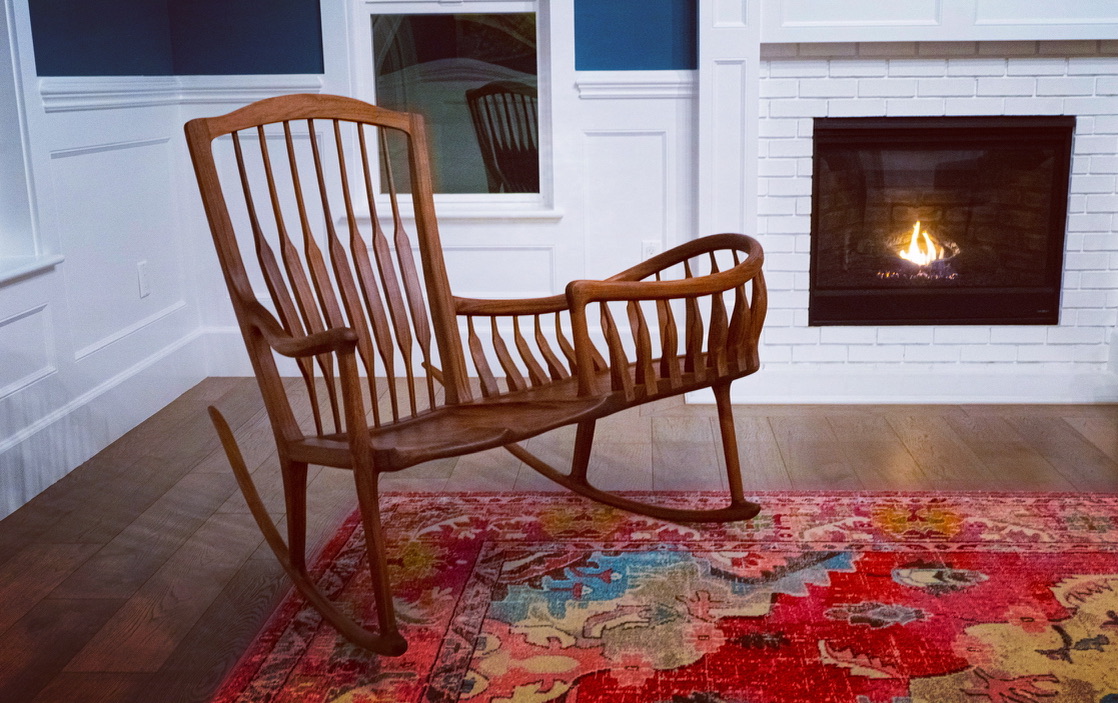 Thanks so much. No problem at all. Thanks for all the resources. Just for fun, here's a rocker cradle I built about 18 months ago with your help.
Zack S.
 Hi Scott,
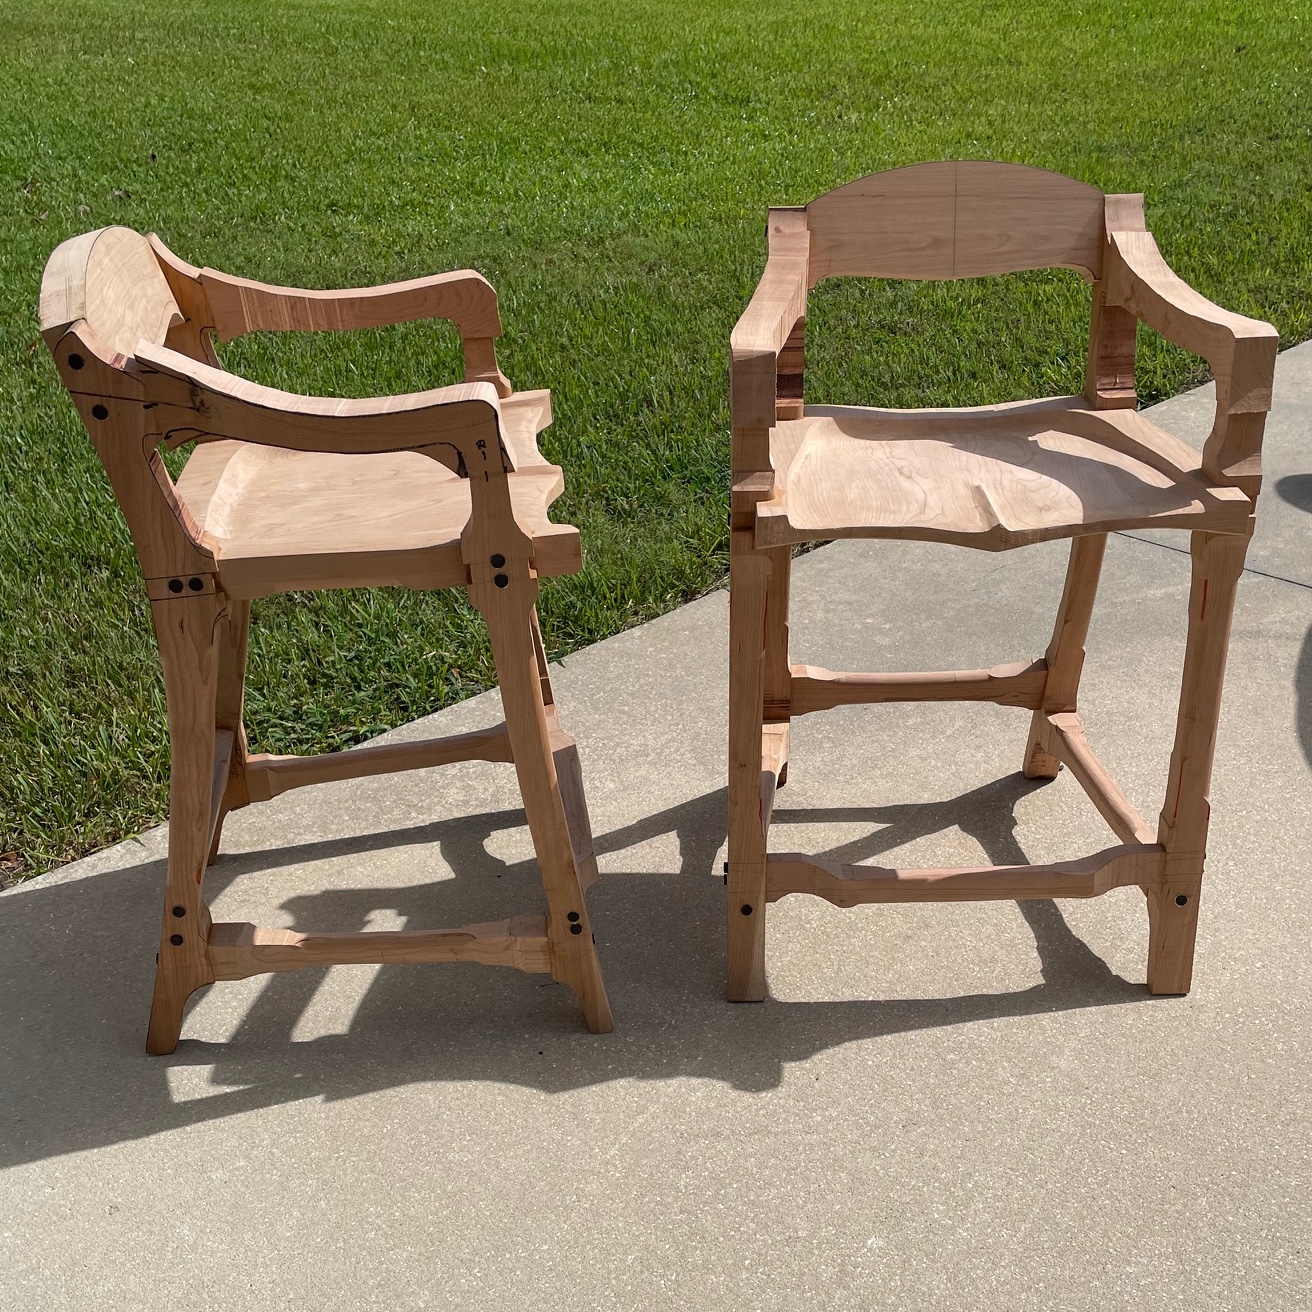
Thought I would share a picture of my bar stools, they are ready for sculpting! It’s just to hot in Florida to start that process now since I do it outside. Also sent a picture of me with my first segmented bowl….I just finished it and it was fun to make!
Regards,
Hi Scott,
Thought I would share a picture of my bar stools, they are ready for sculpting! It’s just to hot in Florida to start that process now since I do it outside. Also sent a picture of me with my first segmented bowl….I just finished it and it was fun to make!
Regards,
William P.
 Hey Scott,
Thanks for the information about the epoxy. It had been so long since I had finished the videos, I had completely forgotten that you talked about it.
I finished the chair today and delivered it to my son and his wife. They loved it. Thank you for your plans, videos, and support. This was such a rewarding project!
Here are a few pictures. It’s made of cherry with padauk plugs and “special feature”.
When I was routing the holes in the seat bottom for the splats, my router got away from me and hogged out way too much material. I did not want to start over on the seat since I had saved that for last, so I decided to use my CNC to cut the holes in a piece of padauk and then inlay that piece into a groove cut into the seat bottom. I’d rather not have this piece in there, but it worked and saved me a lot of time redoing the seat bottom.
Thanks again…looking forward to my next Scott Morrison project!
Hey Scott,
Thanks for the information about the epoxy. It had been so long since I had finished the videos, I had completely forgotten that you talked about it.
I finished the chair today and delivered it to my son and his wife. They loved it. Thank you for your plans, videos, and support. This was such a rewarding project!
Here are a few pictures. It’s made of cherry with padauk plugs and “special feature”.
When I was routing the holes in the seat bottom for the splats, my router got away from me and hogged out way too much material. I did not want to start over on the seat since I had saved that for last, so I decided to use my CNC to cut the holes in a piece of padauk and then inlay that piece into a groove cut into the seat bottom. I’d rather not have this piece in there, but it worked and saved me a lot of time redoing the seat bottom.
Thanks again…looking forward to my next Scott Morrison project!
Brian
 Thanks Scott. I see it now - always learning more!
BTW - here is my low-back chair getting its final coat of finish.
Thanks Scott. I see it now - always learning more!
BTW - here is my low-back chair getting its final coat of finish.
Alexis
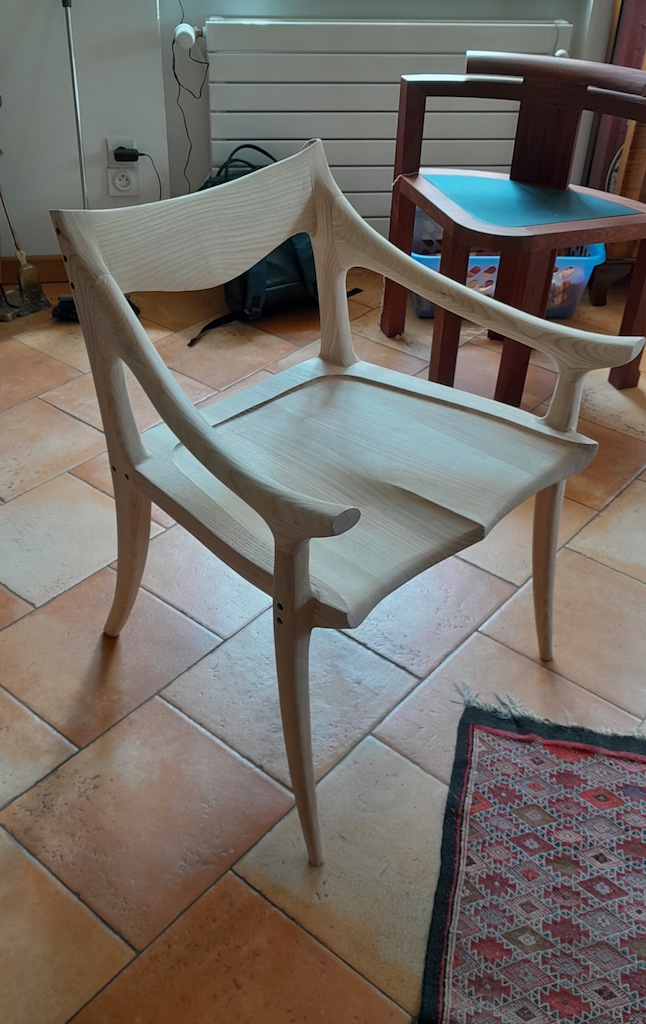 Hi,
I just finished the rough sanding of the low back chair and I can't resist sending you the first photo.
It has been done using ash tree.
On the joined picture, I still have to do the final sanding and put the oil and wax.
My main difficulties I encountered were with the seat grinding (difficult to be regular) and the joint between arms and back legs.
Also, the legs are a little short (missing a small inch) regarding the French standards of heights. I shall add an extra inch to the leg length of the future dinning room chair.
Regards
Hi,
I just finished the rough sanding of the low back chair and I can't resist sending you the first photo.
It has been done using ash tree.
On the joined picture, I still have to do the final sanding and put the oil and wax.
My main difficulties I encountered were with the seat grinding (difficult to be regular) and the joint between arms and back legs.
Also, the legs are a little short (missing a small inch) regarding the French standards of heights. I shall add an extra inch to the leg length of the future dinning room chair.
Regards
Yves
 Good morning to you. You may not remember me, but you help me build these two lovely chairs from your design and I realized that I now needed a chess table so I tried to mirror some of the shapes from your chairs. Just in case you’re interested really appreciated your help.
David W.
 Done.
Done.
Time to make one for myself. Thank you for the support and putting those videos online! They really came in handy.
Cory B.
 Howdy Scott,
Thought I'd give you an update, or at least continue the story of this shopstool. I was on Spring Break two weeks ago, so I took my daughter up to Aspen (actually Woody Creek) to the school where I used to work to meet my friends and spend some time in the winter wonderland. I brought up the shop stool legs to dado because my school's shop is still just inching along - I didn't realize how much re-tuning I'd need to do to all of our tools. Anywho, I thought it would be fun to have part of this chair made with an old friend, so I brought up the legs. We got some time in a nice, proper shop with a true craftsman, Ric. (I included a photo of my daughter outside the shop so you could see his view out the windows of the shop. Not bad, huh?)
Howdy Scott,
Thought I'd give you an update, or at least continue the story of this shopstool. I was on Spring Break two weeks ago, so I took my daughter up to Aspen (actually Woody Creek) to the school where I used to work to meet my friends and spend some time in the winter wonderland. I brought up the shop stool legs to dado because my school's shop is still just inching along - I didn't realize how much re-tuning I'd need to do to all of our tools. Anywho, I thought it would be fun to have part of this chair made with an old friend, so I brought up the legs. We got some time in a nice, proper shop with a true craftsman, Ric. (I included a photo of my daughter outside the shop so you could see his view out the windows of the shop. Not bad, huh?)
We got the cuts made, had fun, and came back to Austin. I finally got the stretchers cut this morning and can see the chair coming together. This has been an enjoyable project and I can't wait to share what I've learned with some of the folks I teach with. I plan on using this chair as a Professional Development class to familiarize staff with the tools and their proper usage and care (so the shop doesn't end up like I found it when I got here).
The last photo is where I currently am with the chair. It's "hidden" back stage to keep high school hands off of it. New bandsaw blades come in Thursday and the end is in sight!
Thanks again for your guidance!
Cory B.


 Good evening Scott. In some of your pics you have showed a joint that you refer to as a butterfly joint. This joint looks very unique and I would love to attempt it on a project with a chair. I have waited to see what you would come up with on this particular joint but have not seen anything yet. I have built your chairs (Elegant Rocking Chair, Sculptured Bar Stool, Sculptured Side Table) and loved every minute of the build and to tell you the truth you got me hooked. Please let me know if you worked this into a project as I would love to try to make it and expand my skillset. Thank you Scott.
Rick


 Hi Scott,
Well, a year after I started, the rocker is finally complete. I took 4 months off when my wife broke her hip. I needed the break (not hers) as I was really stumped with getting the spindles to align without snapping.
Hi Scott,
Well, a year after I started, the rocker is finally complete. I took 4 months off when my wife broke her hip. I needed the break (not hers) as I was really stumped with getting the spindles to align without snapping.
The chair is indeed as beautiful as I had hoped. I have used cherry before on furniture, but was surprised just how much character the grain and “defects” add to this piece. I was also surprised at just how delicate and elegant the rockers are when rounded over and shaped.
I learned a lot, made my share of mistakes. Thanks for the tips and encouragement you provided along the way. I really like your design and your instructional DVD’s.
With all the accumulated templates, jigs, router bits, etc, I really should make at least one more, but at 75, it’s a formidable consideration. I’ll work on some smaller projects for a year and then decide. If I do, it will be out of walnut.
Question: Do your streaming instructional videos for the Maloof rocker provide any updated information, or are they identical to the DVD’s I purchased?
Thanks, and take care,
Tim B. Bellingham, WA
 Hi Scott-
Thank you so much for providing great instructions and direction. Love the rocker.
Someday I will attempt your fancy one, maybe later this year.
I cut and milled this walnut about 11 years ago, it came from my construction site at Bidwell Sacramento River State Park.
Thanks again,
Hi Scott-
Thank you so much for providing great instructions and direction. Love the rocker.
Someday I will attempt your fancy one, maybe later this year.
I cut and milled this walnut about 11 years ago, it came from my construction site at Bidwell Sacramento River State Park.
Thanks again,
Jim West Redding, CA
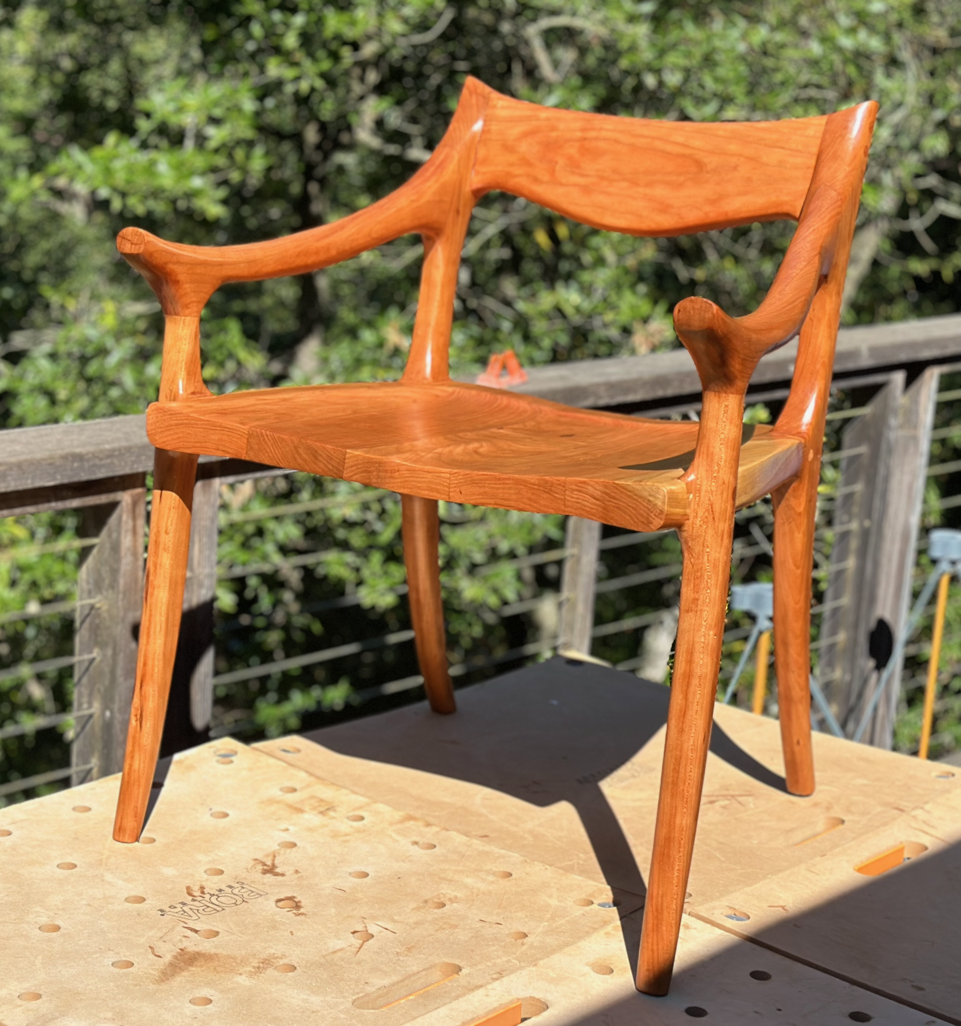
 Scott,
Thought you might like to see a couple pics of my completed chair. I showed it off at our woodworking club monthly meeting tonight and told them about your products. Appreciated your help along the way!
Regards,
Scott,
Thought you might like to see a couple pics of my completed chair. I showed it off at our woodworking club monthly meeting tonight and told them about your products. Appreciated your help along the way!
Regards,
Bill P.
 Nothing left but sanding and finishing!
Wiliam P.
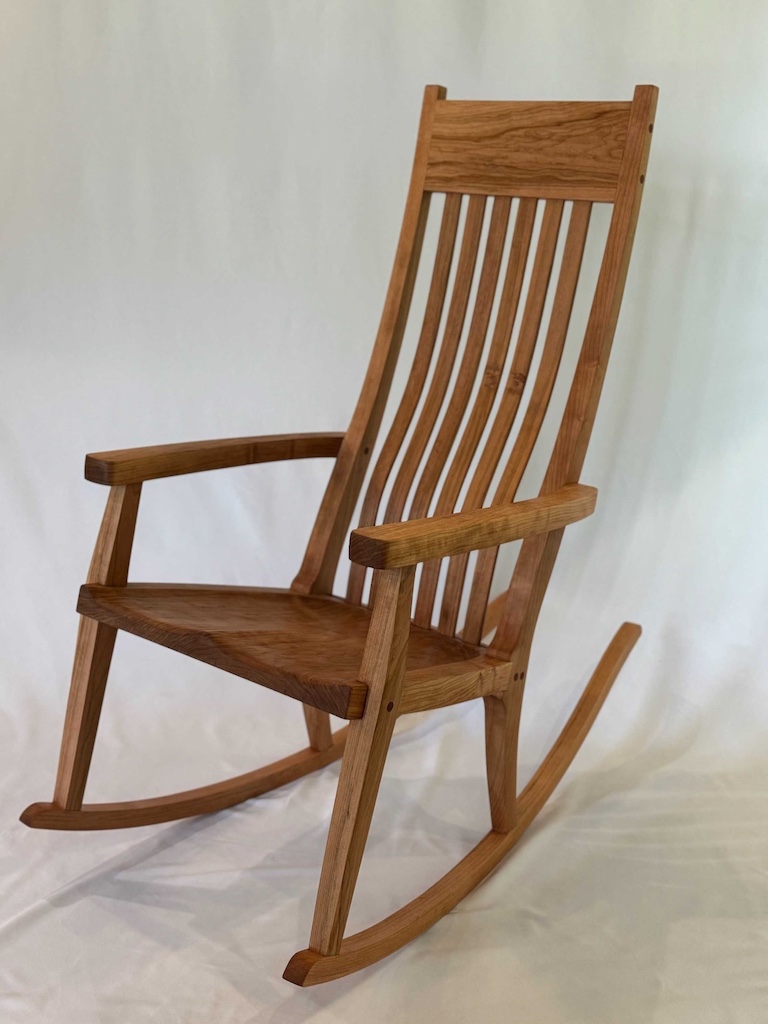
 I made the Simple Rocking chair for my daughter and son in law when they announced that they were expecting. I used cherry with ebony plugs. The videos were fantastic. The templates were great. The finished product was the best piece of furniture I have ever made. I was challenged and gained confidence as I went along. Now my first granddaughter gets rocked to sleep.
Jon Z.