 Cherry with Min Wax red mahogany stain, then the Maloof finishes. Very pleased with how it turned out. Taking to Lincoln. NE today. It is for a grandson and his wife . They had their first child six weeks ago. Merry Christmas to you and your wife. I have started on chair nine. I am always grateful for you getting me started on this great hobby.
Jim S.
 Happy Holidays To you and your family. Wanted to share theses pictures of my latest accomplishment, bar stools and the two rocking chairs.
Don P.
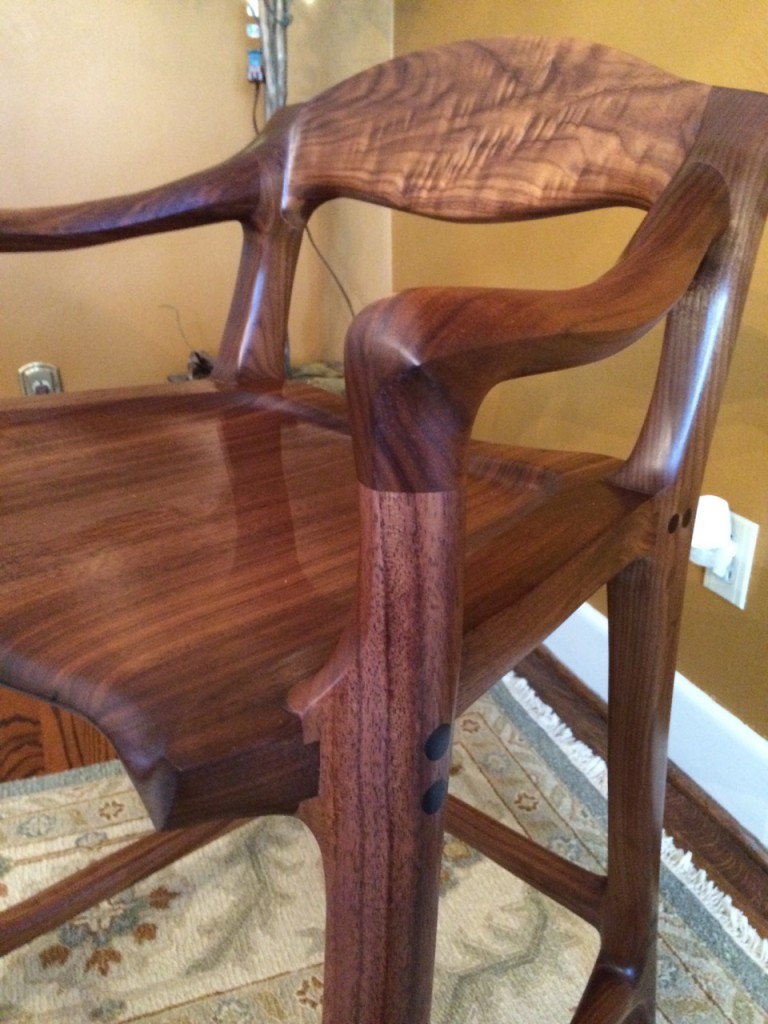
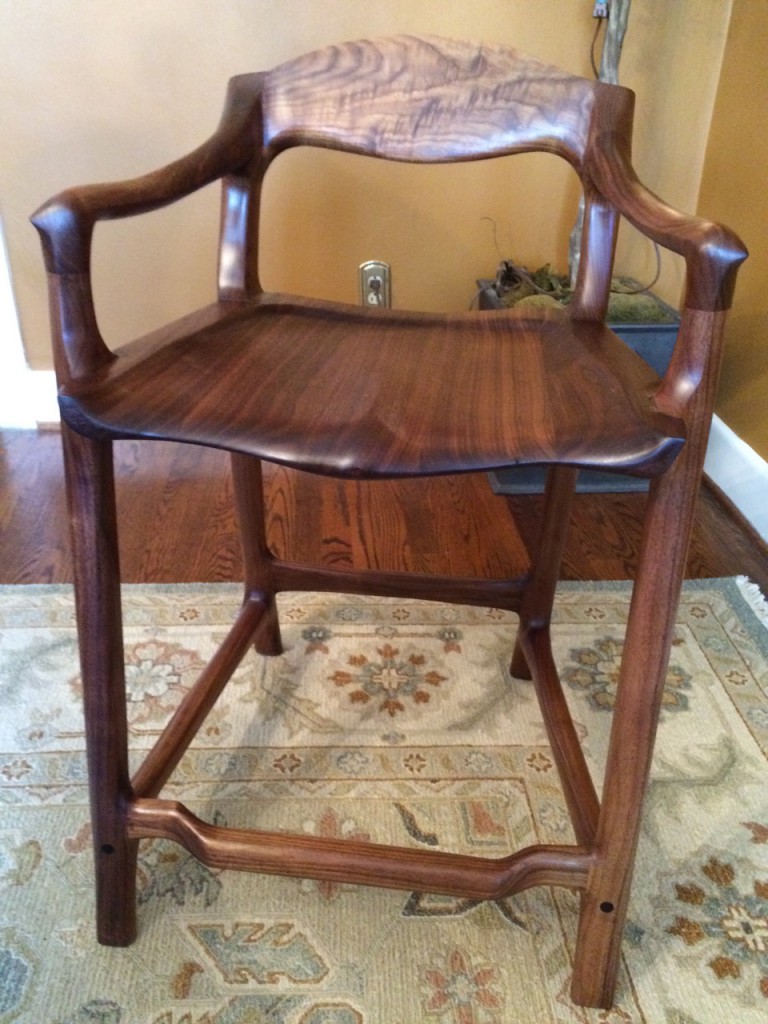
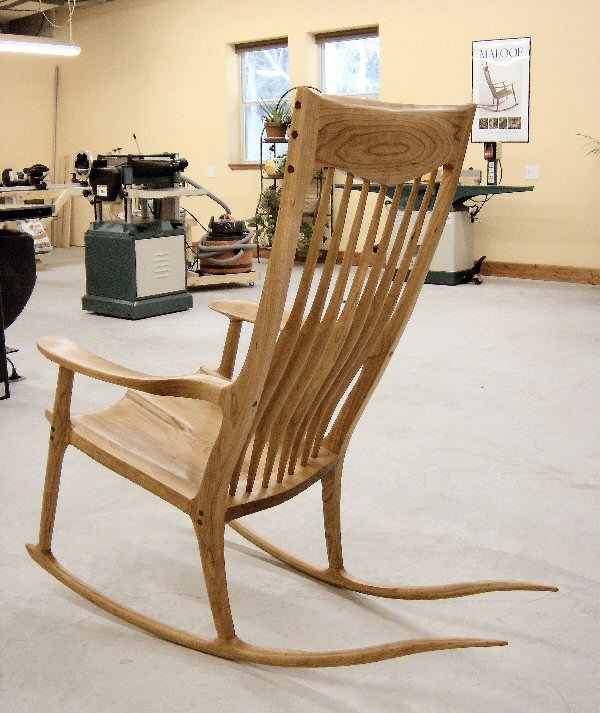
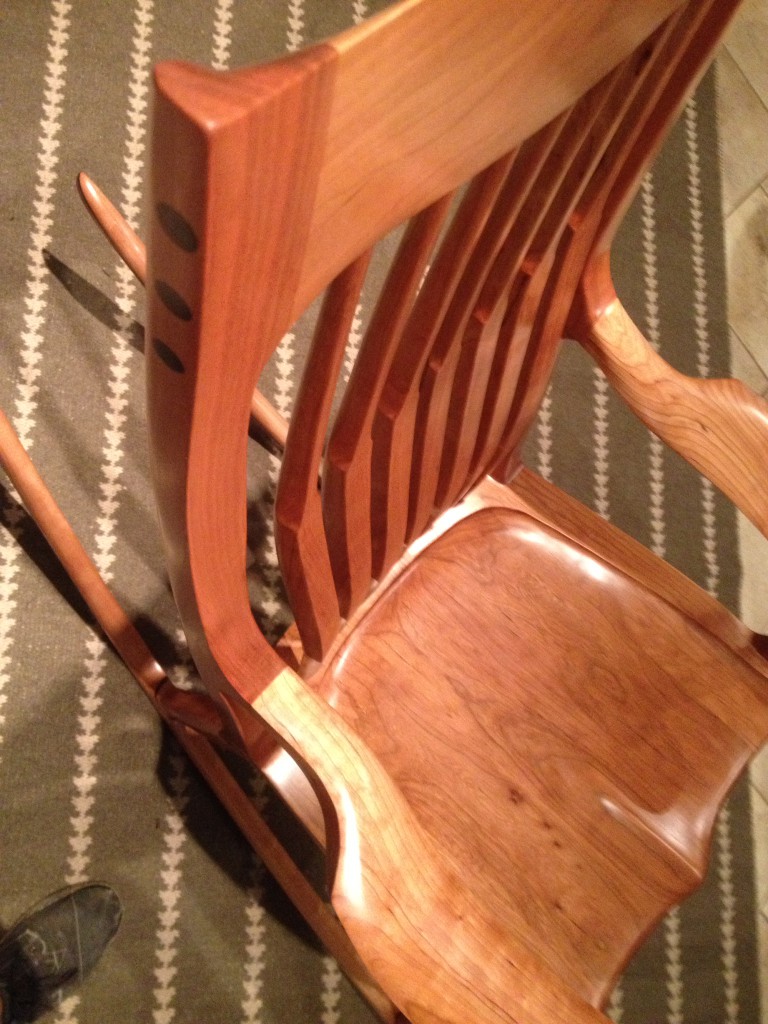
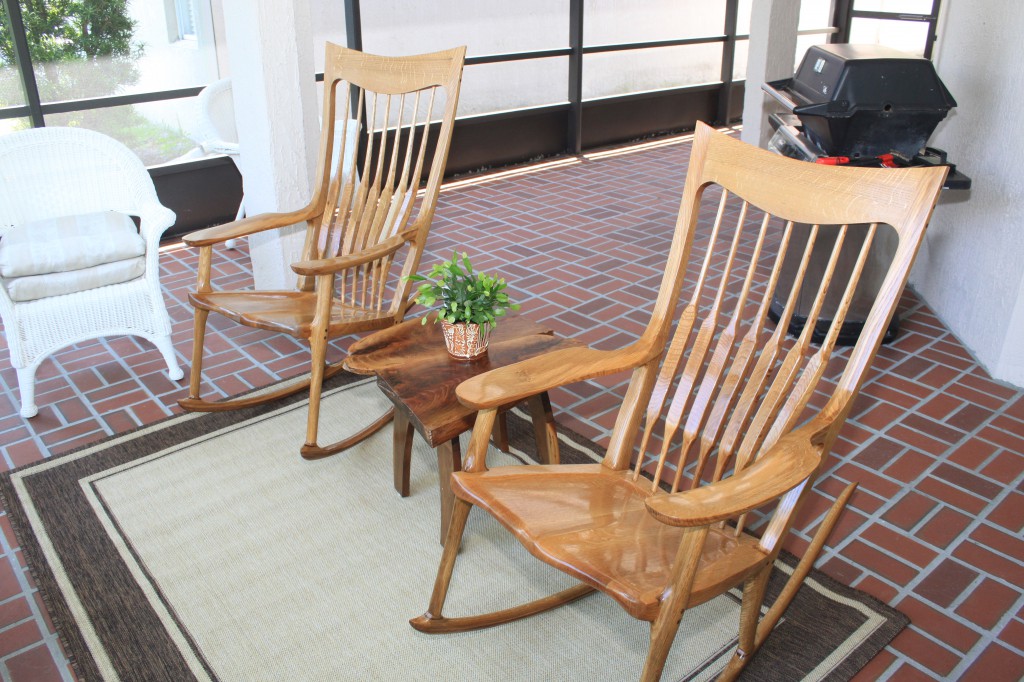
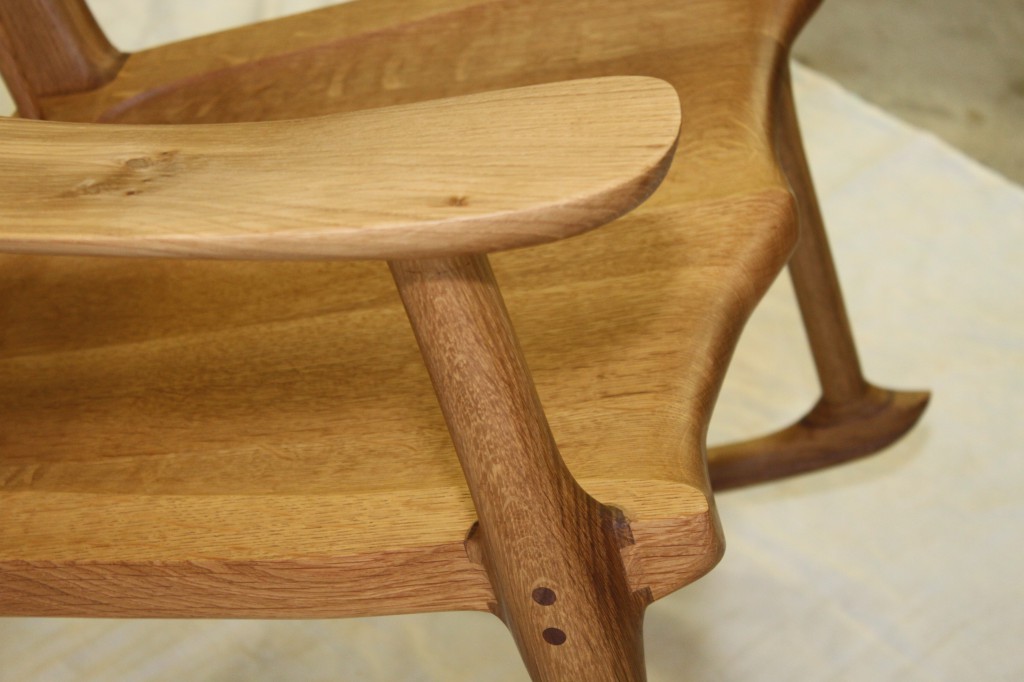
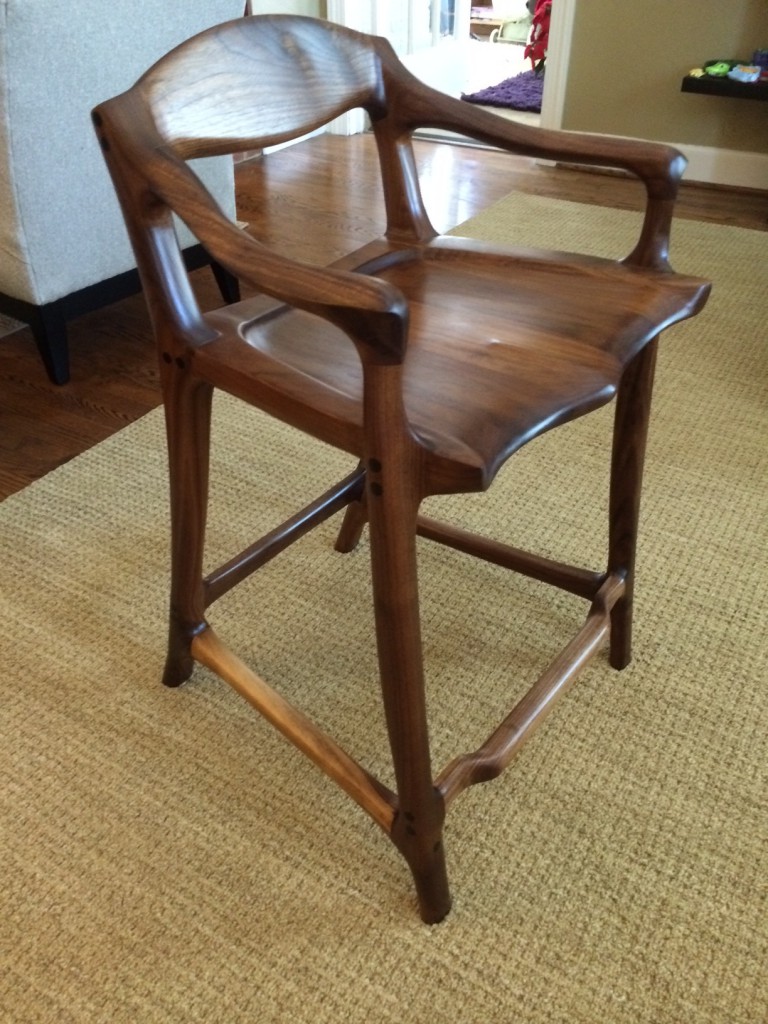
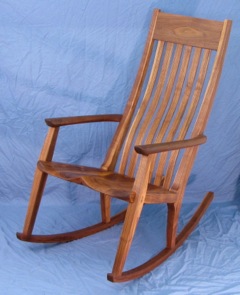
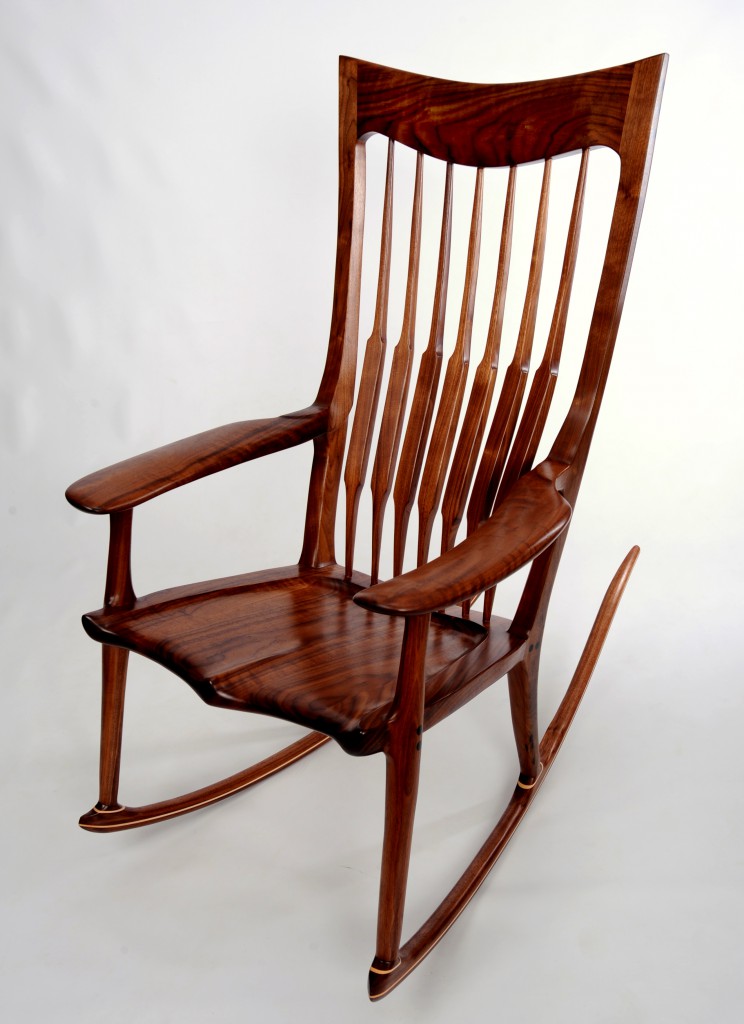
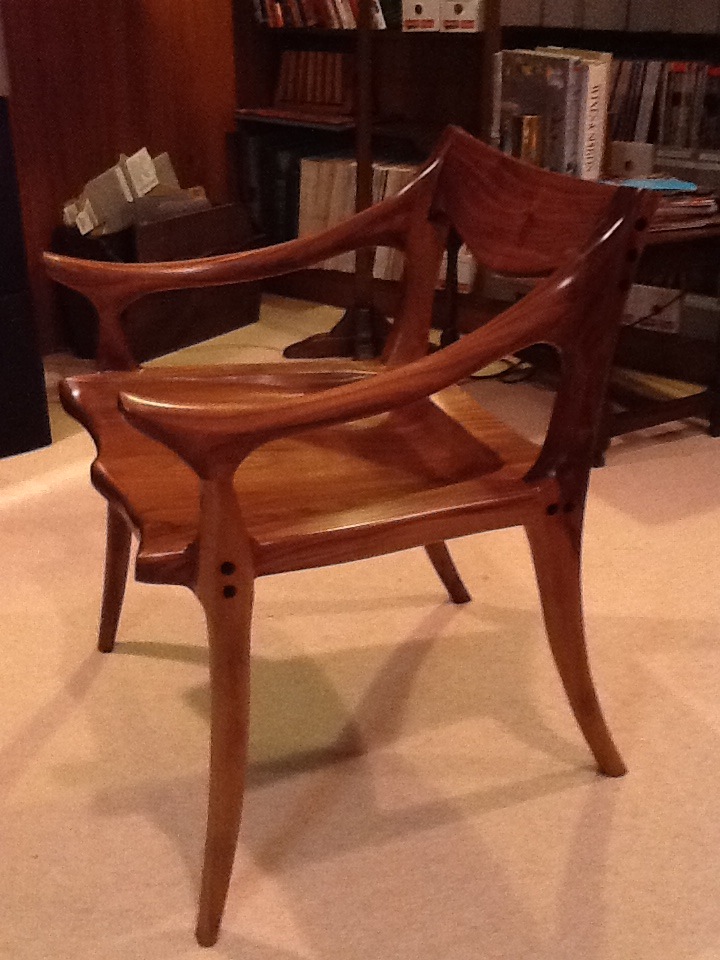
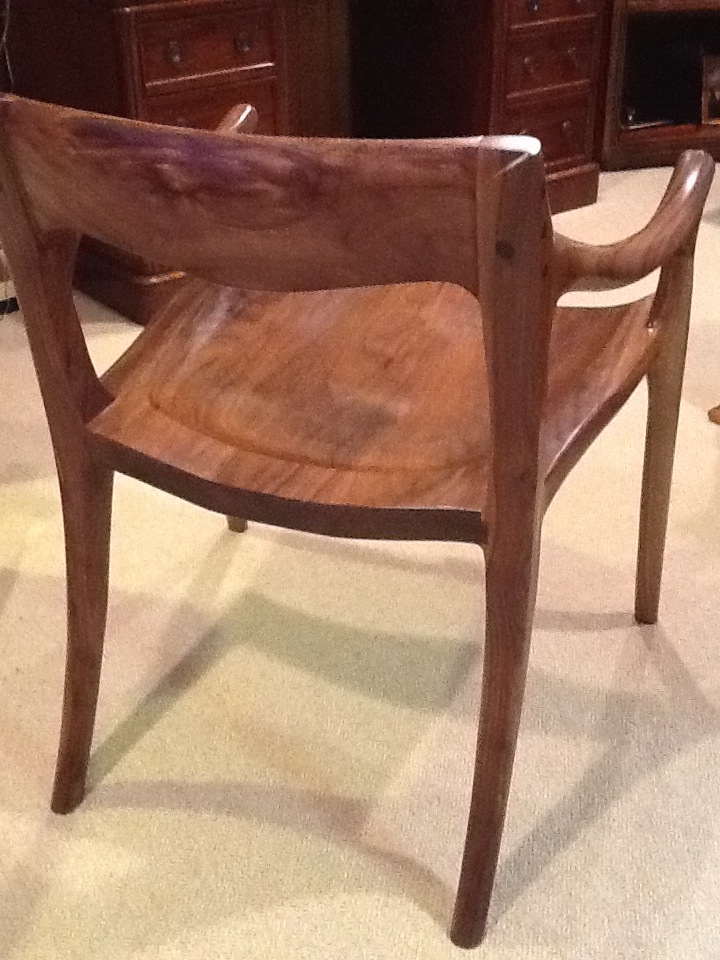
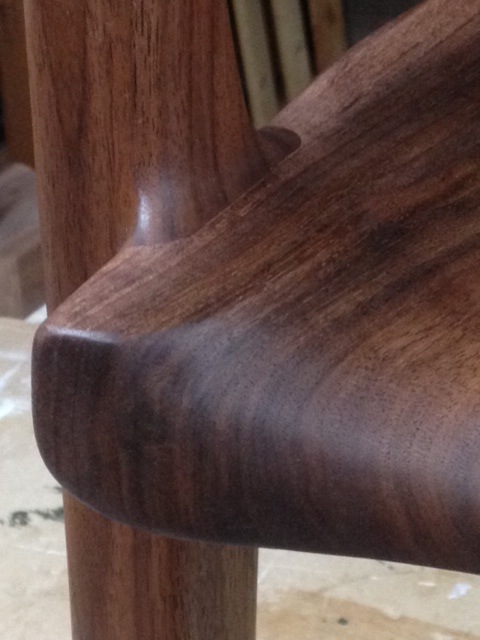
 Hi Scott, It is my previllege to show you the finished chair. It is water based clear laque by Zweihorn (Germany). Pictures are of high resolution as I wanted to depicts as much details as possible, well, I have so much to learn ... The building process was an excitement for me. The mixture of uniqe design and precise instructions always win. Thanks again, and hope that sometime I could visit your shop on my future travel to beuitiful Montana.
Pinhas G., Israel
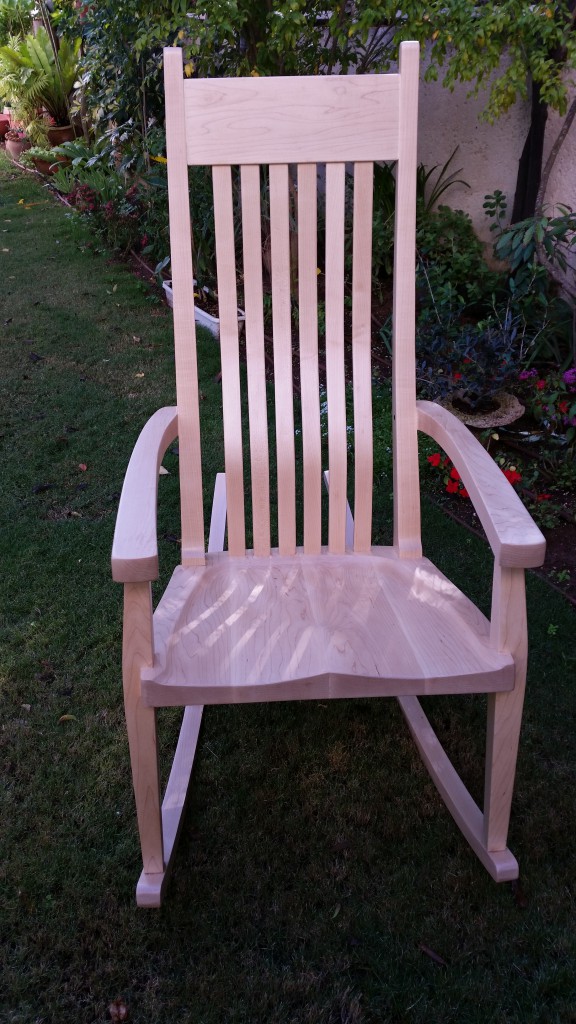
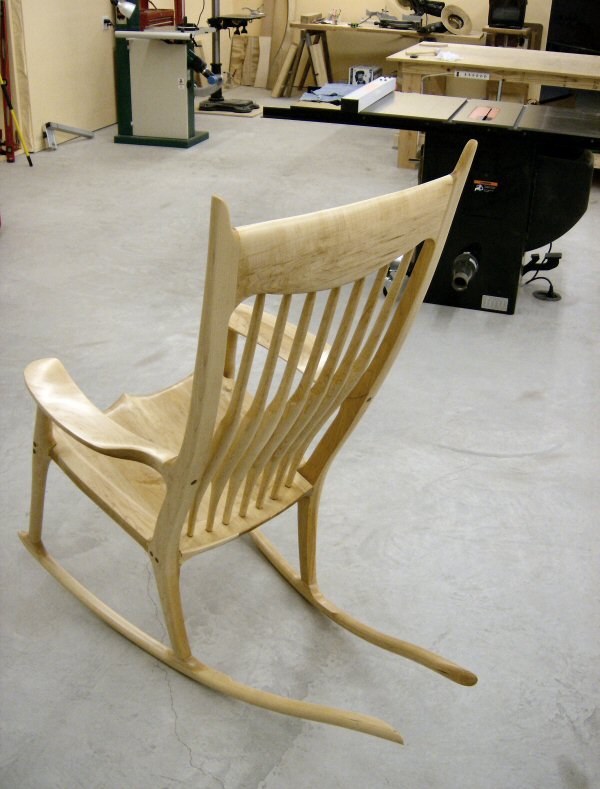
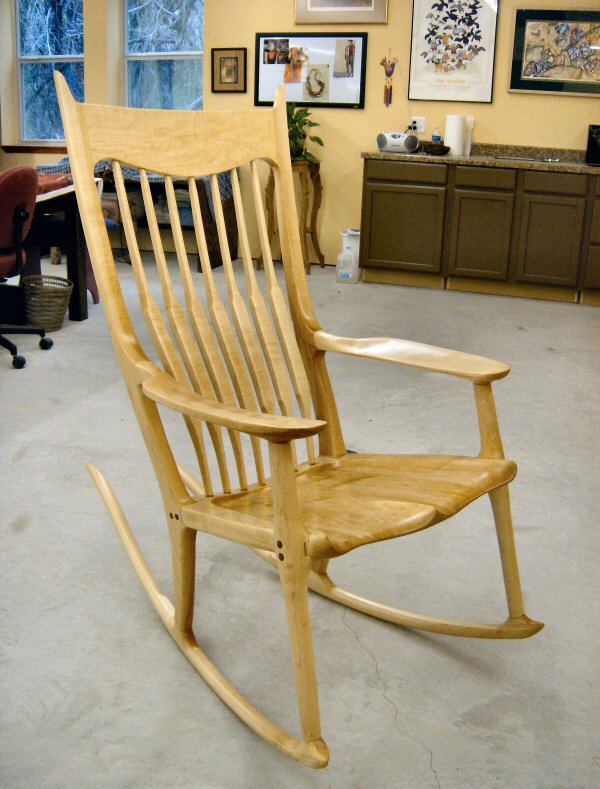
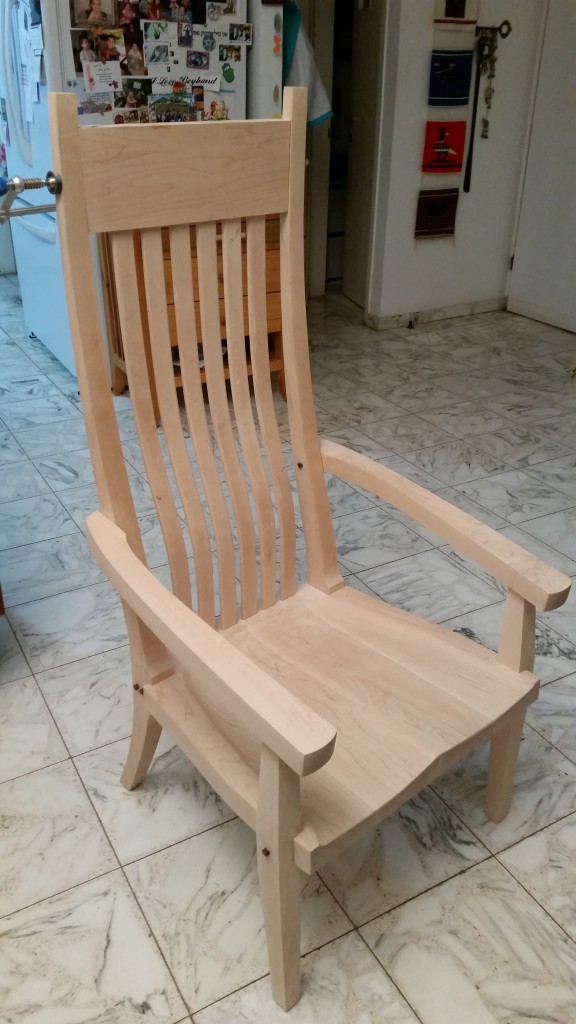 Hi Scott, Although the chair is not completed, I'm happy to show this picture. Have started 3 weeks ago. This is hard maple and so far I enjoy building it and found your instructions (DVD and drawings) effective. Thanks,
Pinhas G., Israel
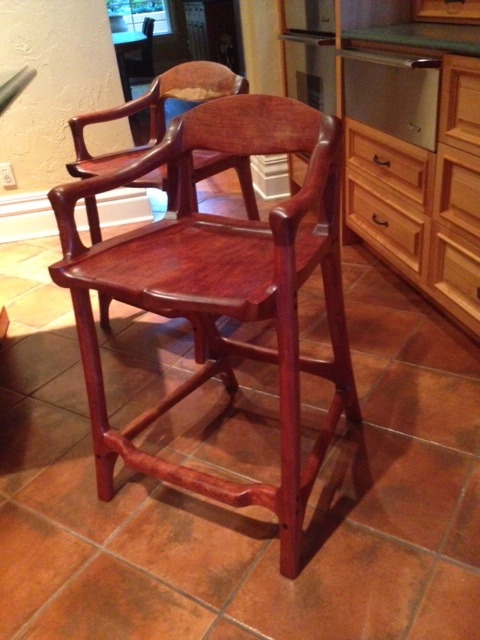
 Scott, It has been a while since I sent pics of the first completed barstool. I just finished the second one and I am really pleased with the way it turned out. the second one was easier in many ways but I had to fight the urge to rush through it after becoming an expert on the first one :-). As a new woodworker, I can’t thank you enough for the woodworking videos, as well as your assistance every time I had a question. I think it greatly accelerated my learning curve. It just wouldn’t have been possible without your excellent instruction. I hope you like the pics.
Steve M.
Scott, I had entered my Elegant Rocking Chair and a small table in the Arizona State Fair and both won first place Blue Ribbons. The chair won "Best of Show" Wow! The judging was by the Arizona Woodworkers Association and the ASU Furniture Design School. Quite an honor. You received full recognition for the design and inspiration as did Sam Maloof. The judges recognized your design work and joints. Second note: I have your bar stool entered in a Arizona woodworkers competition in Phoenix later this month. That darned stool was more difficult than the chair. (I am not into compound cuts) Plus, I figured I was an expert on your chairs, so tried shortcuts that cost me dearly in re-work. Hope to stop by next year on my annual travel trailer/fishing trip to Montana in July/August.
Eric L.
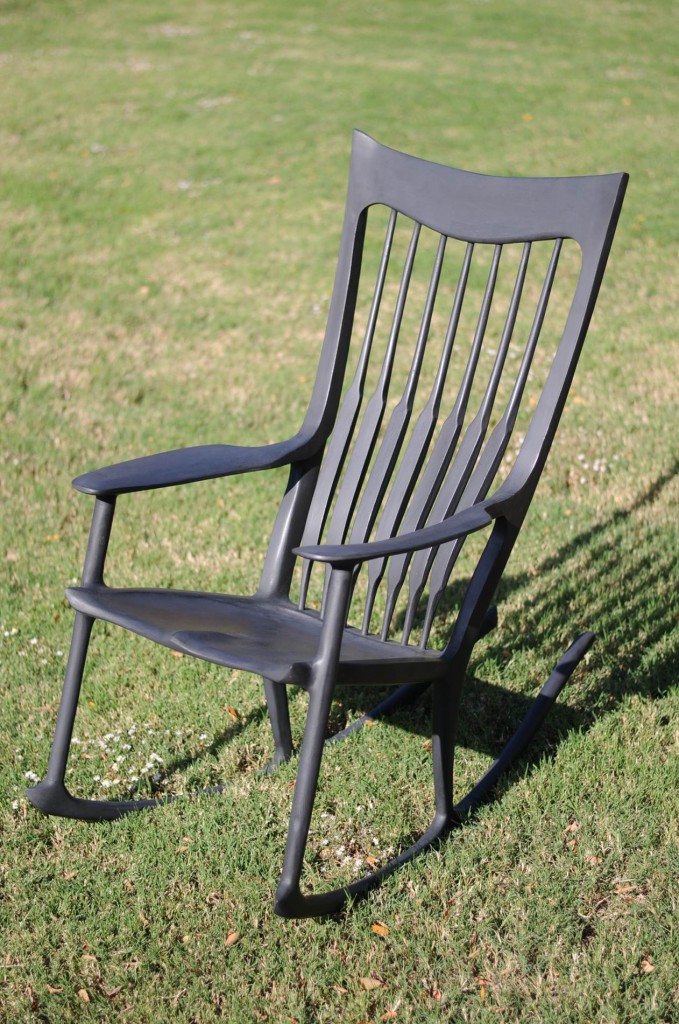 I used your plans and DVD to work up this chair. I painted it because I used maple and poplar for my first one in case I ran into problems. Your instructions were easy to follow even though I had to watch a few times to get the sequencing straight. I had to recut some pieces (spindle, headrest) because I cut them all out before watching the DVD closely enough. Thanks for producing a quality instruction product.
Ed C.
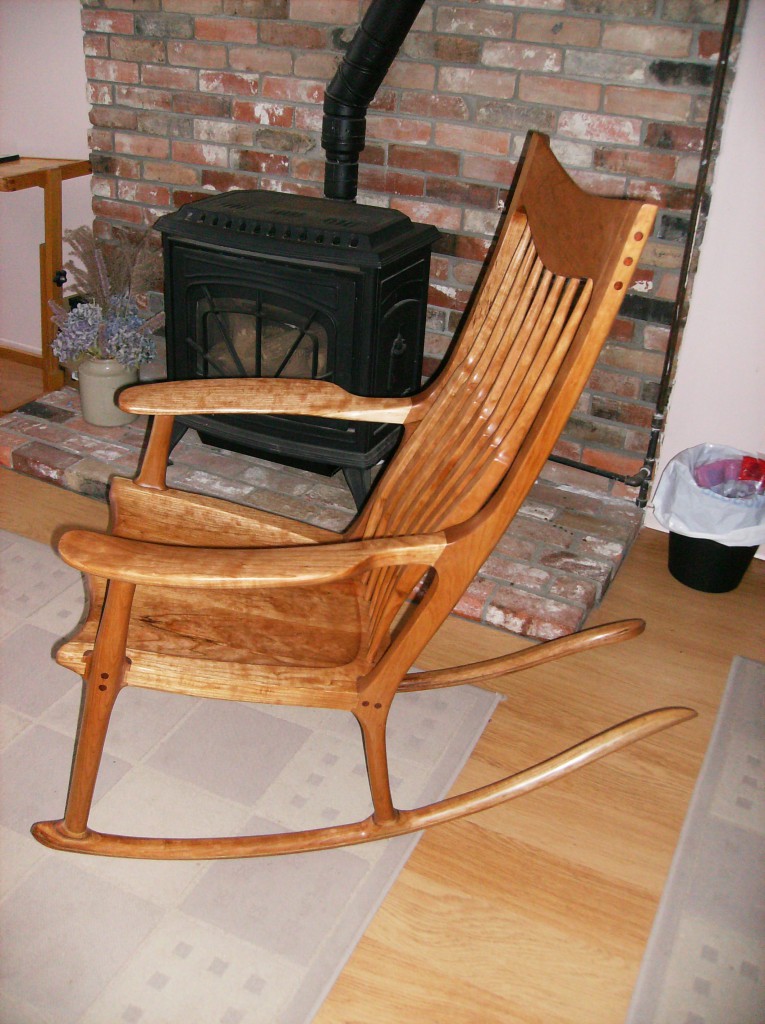
 Scott: This is probably like having someone show you their grandkids pictures, but here they are anyway. Got it finished a few days ago and it turned out far better than #1 with about half as many marks. Shortening the front legs 1/4" made it more comfortable for me. I also think I made the rockers on #1 a little fat which raised the seat some. Will start on #3 in walnut tomorrow. Need to find a better source for walnut and cherry. Local guys have very little of chair quality boards, but what I've got works fine for now. Thanks for your continued help.
Jack S.
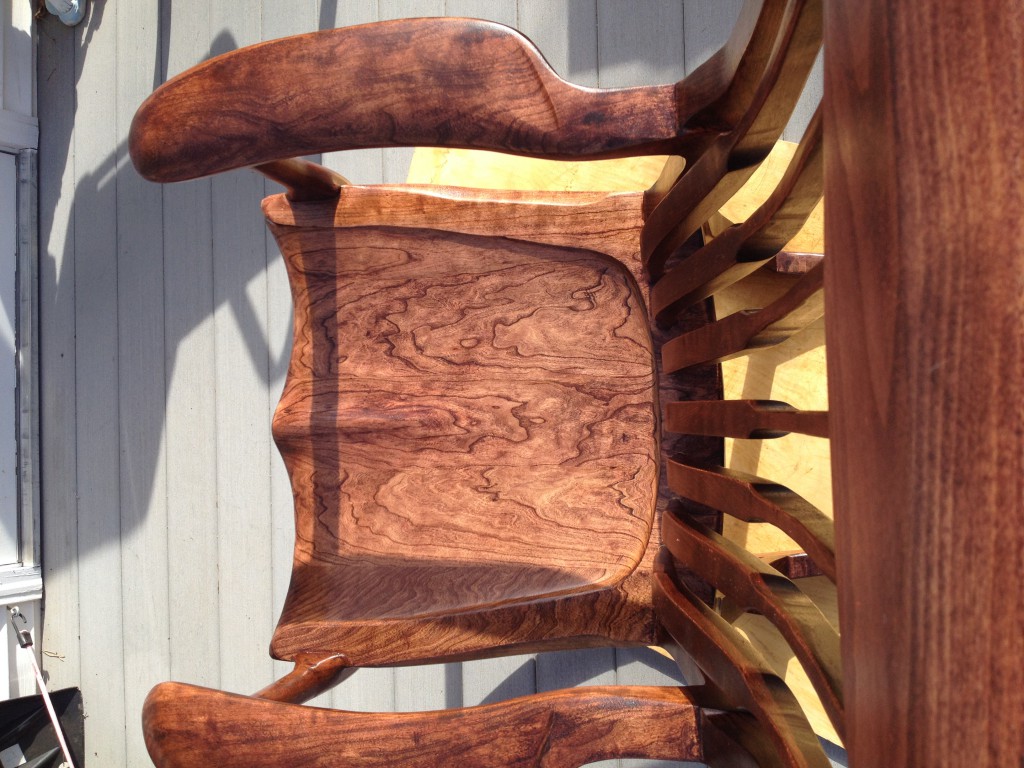
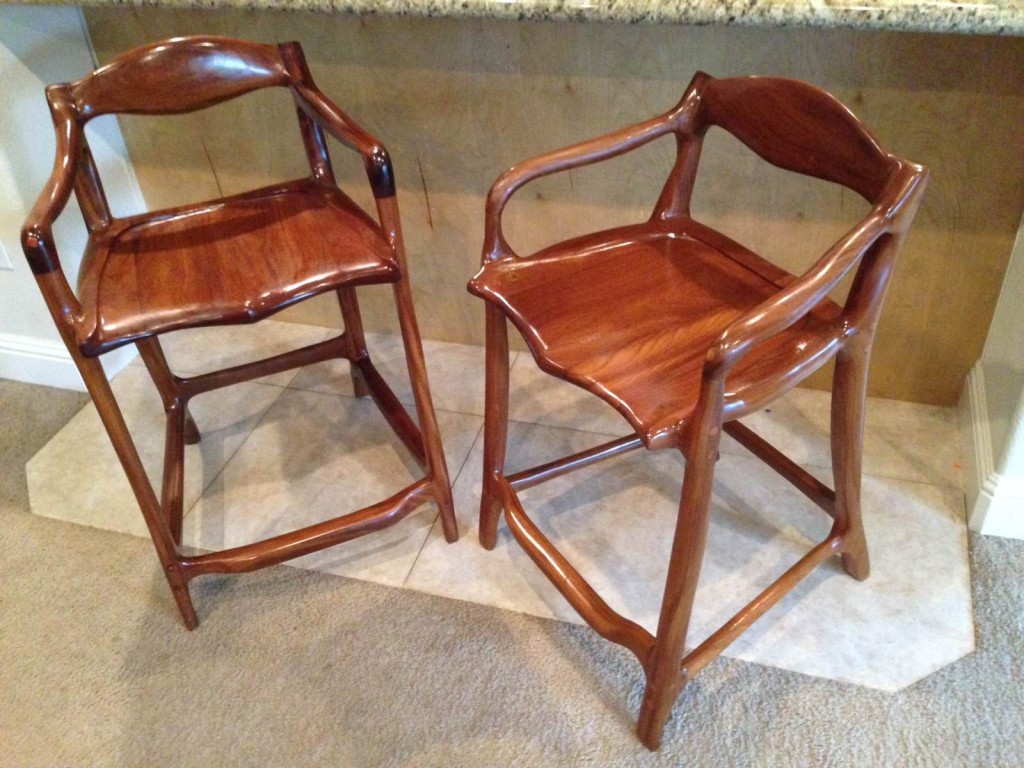 Hi Scott, Here are my recently completed barstools made from Amorosia. I made them for my son, Scott and his family. Yes somewhat ironic. I've had so many challenges in my life as I know we all have had. The way we each accept and right the issues gives us the backbone to become an individual. Recently, i was treated for an illness on a 6 month program The treatment was the most a person can take at feeling horrible and the mental anguish you go through can torment you. Often I felt like I was outside my body and walking through a tar-like substance in the bottom of a sinking black hole. No dreams, this was real. So why do I share this with you? When I started treatment I happened to stumble over your DVD's. I went out to my shop and started adding on to my workshop to increase ventilation and also just to see if I could work safely with power tools. I felt relief from pain when I was working on the stools just by keeping busy and knowing I could make something precious. Your DVD's provided me with the will until I found that these were much harder to build than the rocking chair due to shaping the arms and contending with the number of joints on the stools. They are both a work of love and a crutch to build upon. Ahhhhh, wood and life.
Michael O.
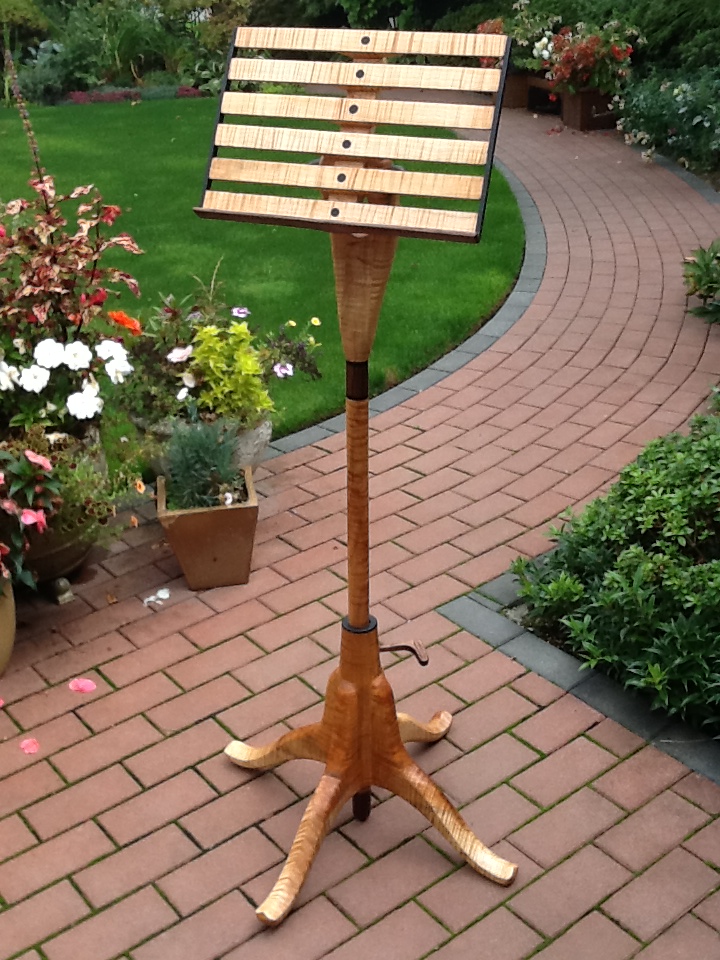
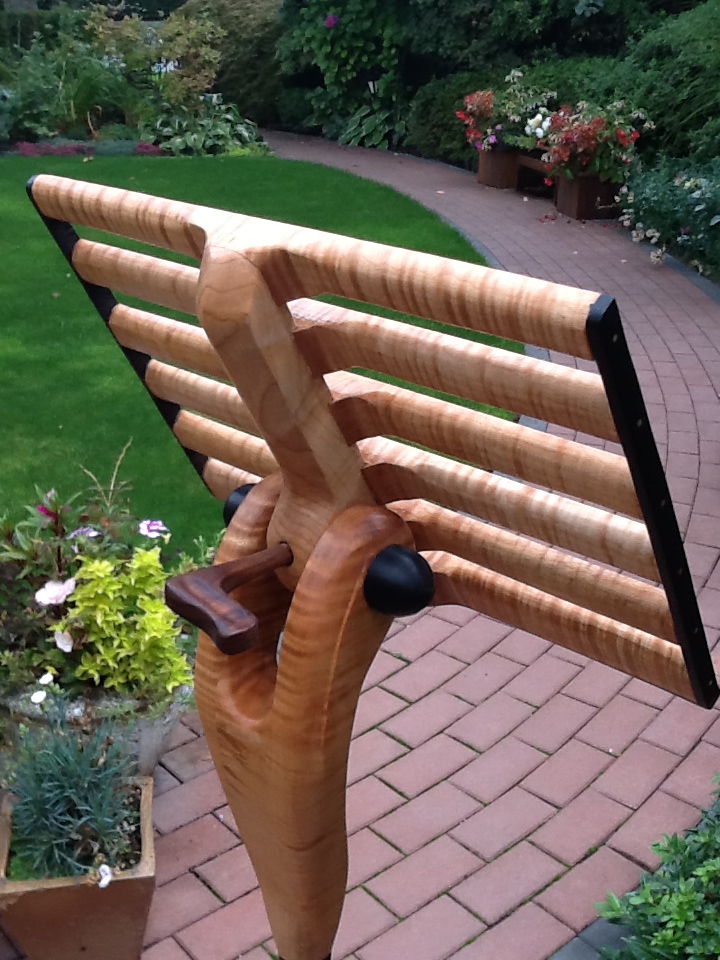 Hi Scott, well I read somewhere that you always cringe a little when asked to make one of these. I totally agree that it is at least for me a greater challenge than the rocker. That said it is one of the most satisfying projects I have ever made. If I may be so bold based on my experience of one to offer a few comments and suggestions. First I found the tools list a bit excessive. I never found an occasion to use the grinder and 24 grit paper and I found the threader kit to be very poorly made and impossible to adjust and after several tries with chipped unsatisfactory threads I threw it out and got the Beall kit from L-V which uses the small router bit and cuts perfect threads. I would highly recommend it. As I told you earlier I had a failed attempt at the base as during the routing I got terrible chip out on the ebony cap and had to try again. I think I have a good solution. Do not glue the ebony on before routing the coves. Route the coves and only raise the bit less than an eighth each pass. Then cut a perfect 1 1/2 hole in a quarter inch ebony piece with a Forstner and the glue it on exactly over the hole before you route the taper to the base. This gives a perfect clean hole and you can use a smaller piece of ebony. Further to the base-before I attached the legs I took a 45 degree router bit and knocked off the pointed corners between the legs, this gives a nice flat surface and you can carefully run the big carbide bit down the length of the leg cutting a cove to within a 1/16 inch of the legs. Then easy to clean up with sandpaper and not mark the legs. Re the legs you need to cut back the tenons just one inch leaving eight inches to set into the dadoes. When it came to shaping the neck I found it useful to set the neck in the vice with the fat base up and after setting the dowel in, placing the lower end of the post on the neck and tracing out the circle. Then it is easy to remove the post and rasp and sand down very close to the finished diameter and not scar the post. After the post is fixed in place fine sandpaper gets you to a perfect fit. Re the adjustment knobs, I found I could cut an L shaped blank out of slightly thicker that 1/2 inch stock and carefully mount the blank in the lathe and using a short rest turn the long end down to a perfect 1/2 inch which makes for nice threads. Watch your knuckles on the spinning short end! I also put a small cove on both sides of the short end. Makes everything look less clunky and feels good on your thumb as you turn the knobs. I have the luxury of a small Festool Orbital sander which I found very useful. A great investment. All in all it was a fun project and I thank you for your help and encouragement. What next? Still have to make the small side table to go with the rocker. Love the video! Oh one thing I found missing was the width of the base of the bottom rib. I made mine 1 1/4 inches which gave a 3/4 inch platform which seemed ok and looked right. No big deal most folks will figure it out. Attached a few candid snaps. I apologize for the outdoor photos but could not get enough light inside.
Bill T.
 Hi Scott, Teak chairs done. Turned out great. Used gorilla glue & two part epoxy, wiping surface with acetone first. Finished with Dalys Teak Oil. Four coats no sealer coat first. These chairs will go on my daughters covered deck in Long Beach California. Finishing last bubinga chair and then my wife want two bar stools. My family keeps me very busy.
Don P.
 Dear Scott, Here is a picture of my Simple Rocker.
Steve
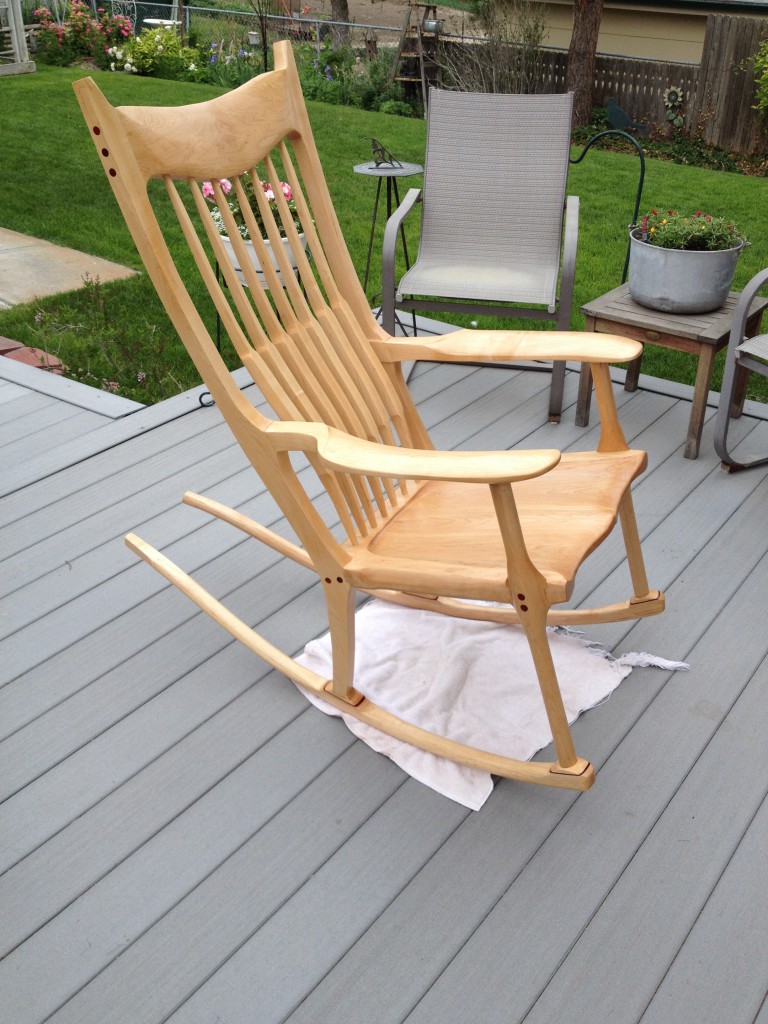
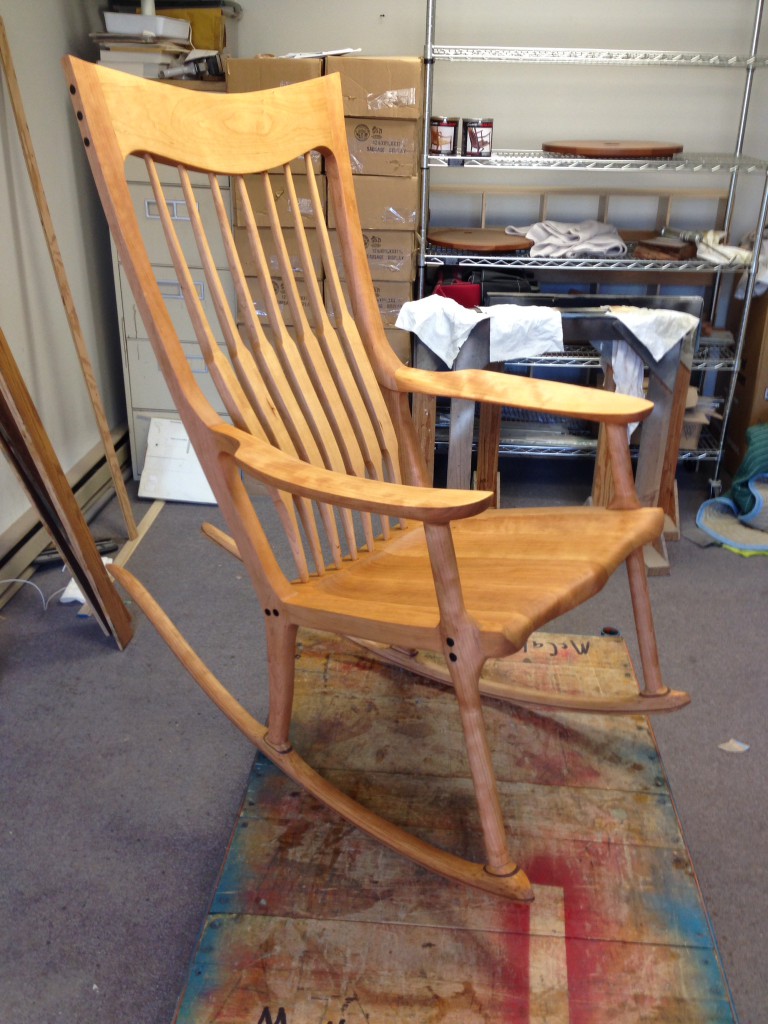
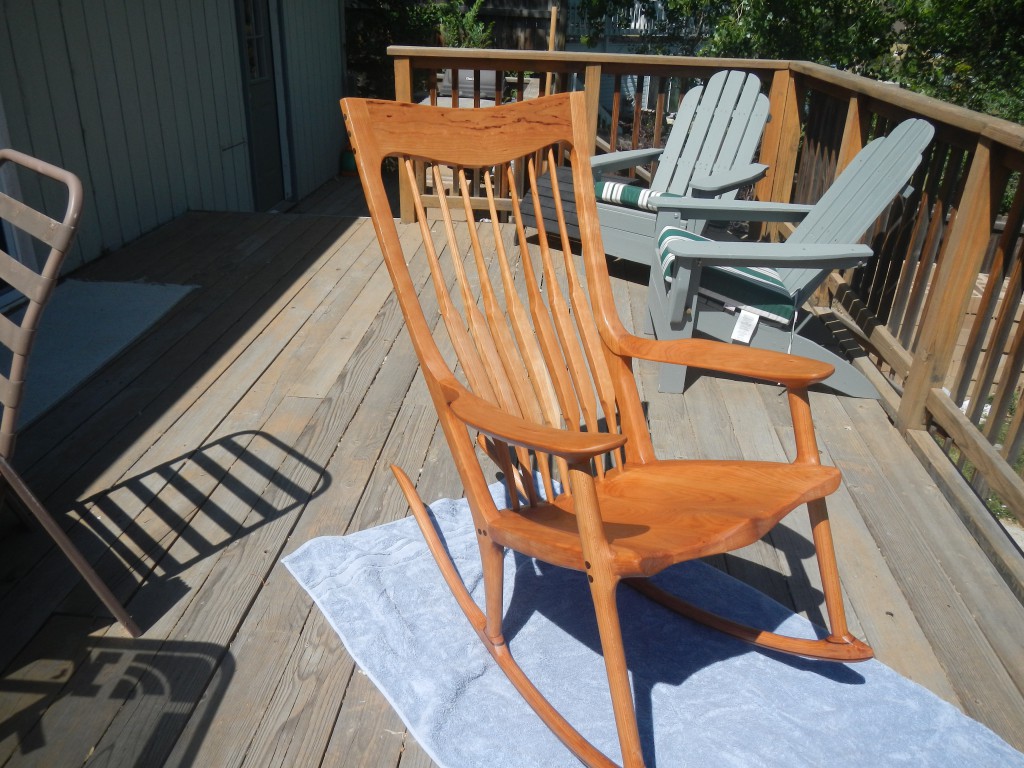 Scott Morrison, I have attached a picture of my Rocking Chair as developed from your video and patterns that I purchased. For the most part I am very pleased with the finished project. I made this for my Son and Daughter-in-Law so they may enjoy their new baby girl and my first grandchild. I used the medium pattern but found that for my 5'8" squaty body that it seemed a bit high although not uncomfortably so. In sitting in it my feet (as well as my daughter-in-law's) do meet the floor nearly flat but it seems that the seat could be lower. I plan on making another and possibly exchanging with them the one they now have and keeping this one here with me. So should I just use the pattern for the smaller length chair or is there a way to adjust the seat by moving it back on the round rockers or do you cut the front legs to match the shorter distance as directed by the pattern on the back legs?
Bill S.
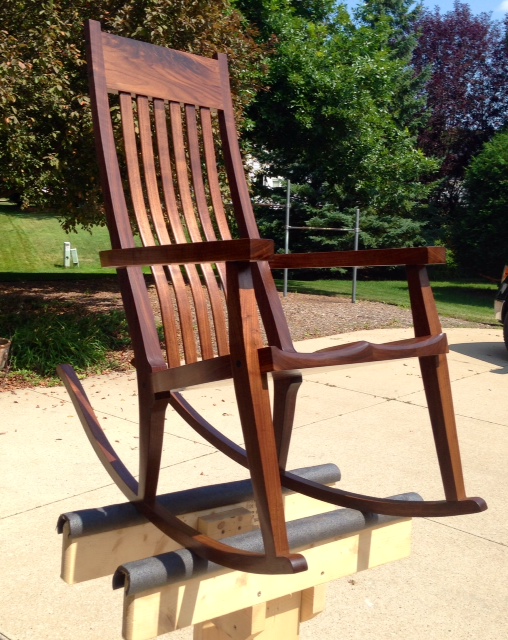
Scott, My son Max and I finished the chair with five spindles. Max is a BSBA and BFA candidate at WashU in St Louis. Theoretically it will support 300 lbs sitting on the front edge of the seat while someone tips it to the back of the rockers. Thank you for teaching me. My Father continues to make rockers according to your design. He’s now making one for his first grandson. I hope you and your family are happy and well.
Sean S

 Scott Morrison, Again, thank you for walking me through this dream of mine... To build a Maloof Rocker. Looking back on the process it has had its ups and downs, but has given me a large appreciation to the craft and those still working with there hands. As an employee of Woodcraft I have also been able to pay-it-forward with the knowledge you have given me to aid others in their chair projects. I have also been able to excite others and sold your DVDs for more tone challenged with. So a true huge thank you.
Craig H.
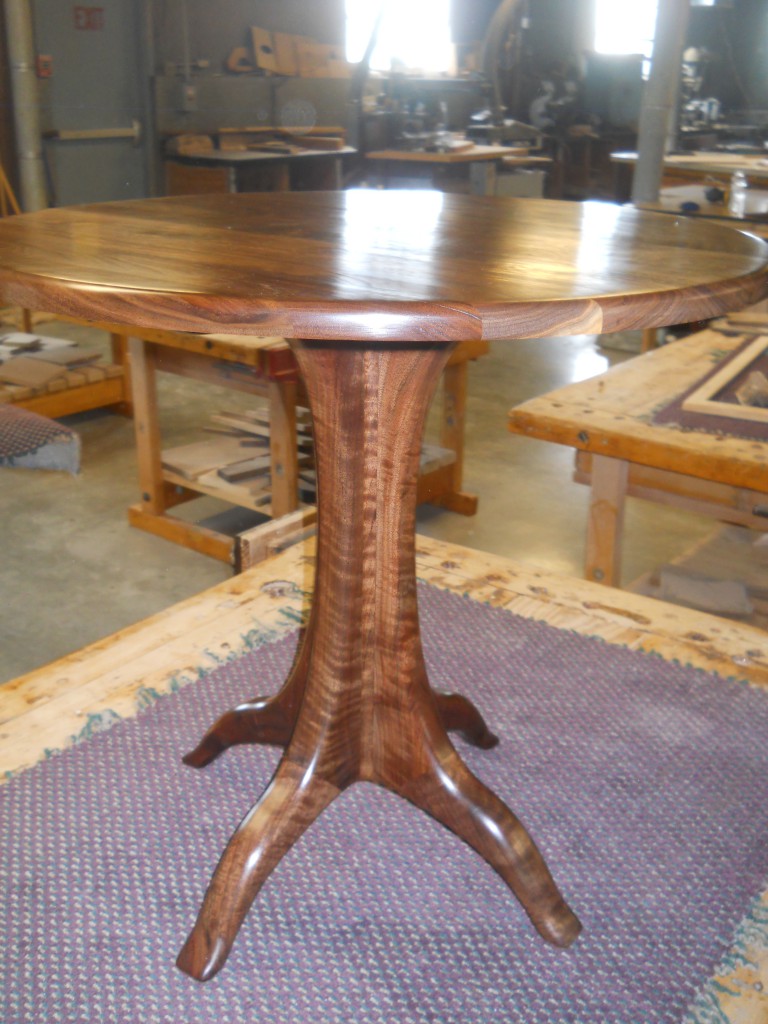 Scott, Been awhile since we last corresponded. I ordered your instructional CD and plans for the Maloof Inspired Sculpted Table last fall. Got busy making projects for a gallery for Christmas that I had to put it on the back burner. Been busy and finally got around to getting it built and complete. Attached are some shots of it. I decided to not router the bottom edge of the top for my personal taste. I think it came out pretty nice. I have to say again about how great your video was on this. Very innovative. I will be posting on Lumber Jocks, if for any reason to promote your video for this project. Thanks again for a great instructional package.
Scott S.
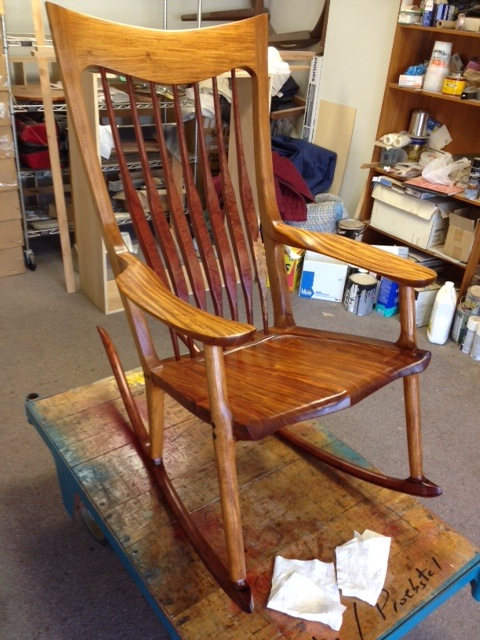
Scott I bought plan and the templates from you for a Montana rocker and I am done with it . It turned out awesom and I am ready to finish it do you still suggest Sam maloof finish or is there something else. It is walnut. By the way your DVDs are amazing. You explain everything so well. I enjoyed watching over and over. Your the Man!! Thank you
Larry B.
Hello Scott. Just wanted to tell you that I just ordered your rocker bundle. My 3rd lowback is sold and the rocker will be built for some friends. I had shown them pictures of your rocker saying it was my next project. They want it. How great is that. Once again, thanks for what you and your wife have done to teach and share. It is quite satisfying to build these pieces, and then send them off to a good home. All the best. Humbly, Rod S By the way, your web site looks great. It really displays your outstanding designs and workmanship.
Anonymous
 Scott, I've attached a picture of the latest chair, low back, which is still being finished. As I've struggled with the sanding I'm beginning to realize my random orbital sander, Ryobi, leaves a lot to be desired.
Jim B.
 Dear Scott, Final coats, Norwegian Rosewood and Babinga. Just the waxing left.
Don P.
 Will send a picture in a few days of my wife's Civil War quilt. This along with my chair will go to the Nebraska State Fair in late September. Already started on another walnut chair.
Jim S.
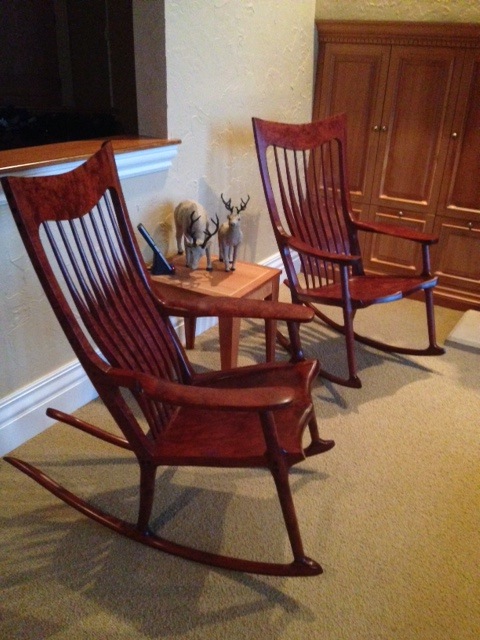
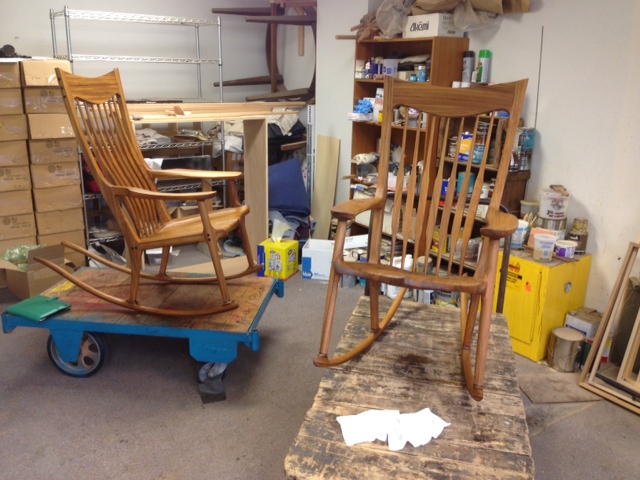
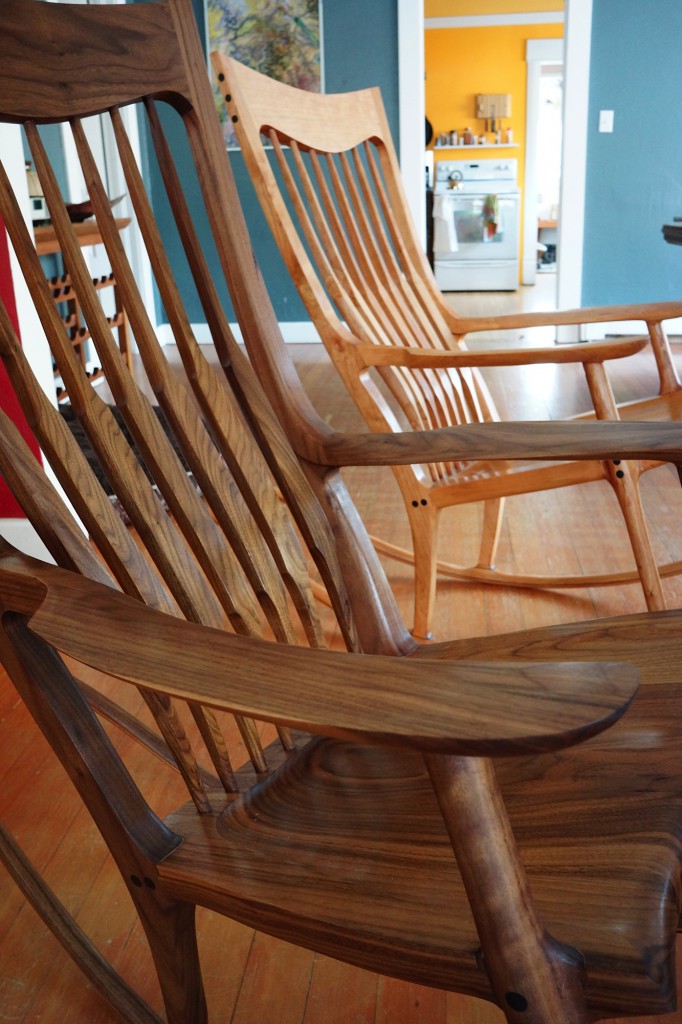
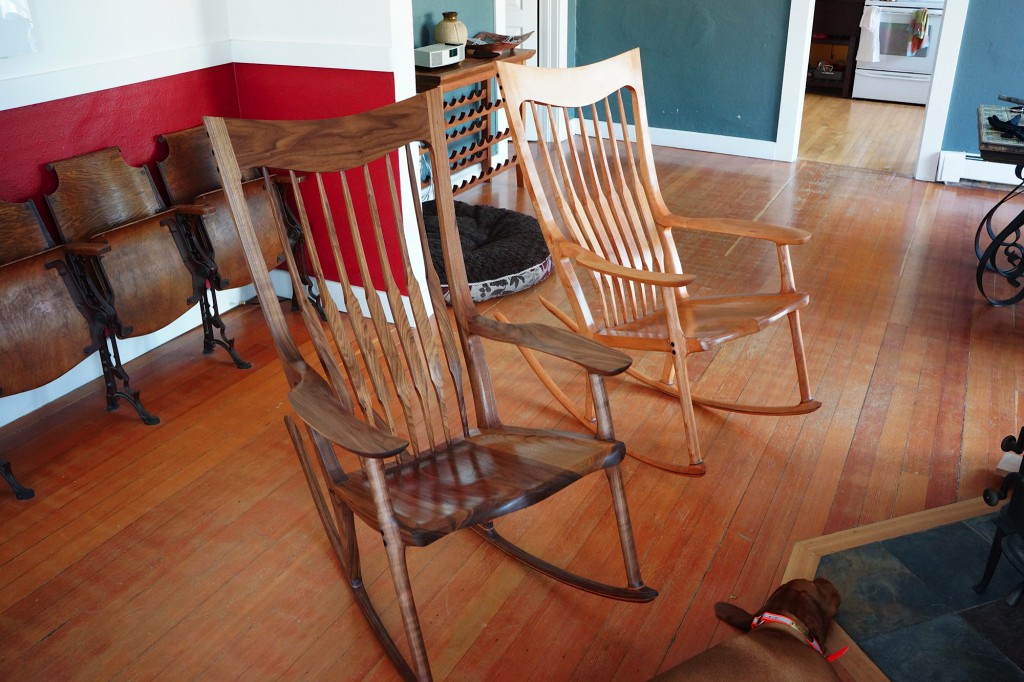
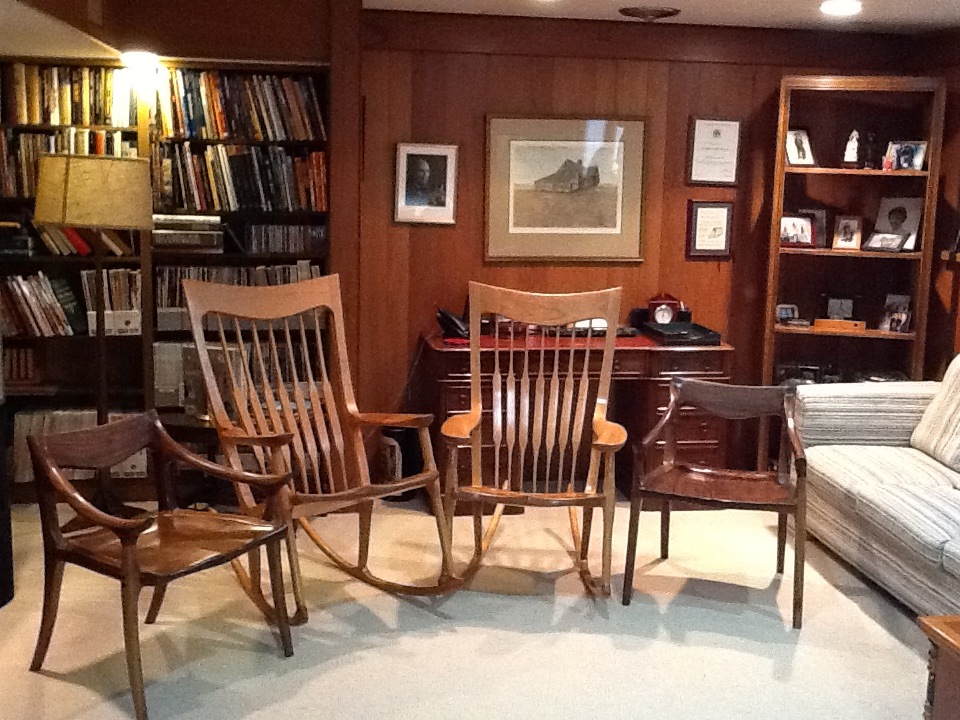 Hi Scott, thought you might like to see my two most recent chairs, I made a smaller version of the Rocker and another walnut low back. It is certainly much easier and faster the second time through. The photos show last years models and the recent ones. The two rockers the new one in the foreground. I have some wood left over and thought I might make a couple of side tables. What I really want to do is that chair with your special joint. When might you have that available? My wife unfortunately has been suffering from a rather severe depression with the result that I can't leave the house very often so I have a lot of shop time which helps to keep me occupied. Trust all is well and business is good. Regards
Bill T.
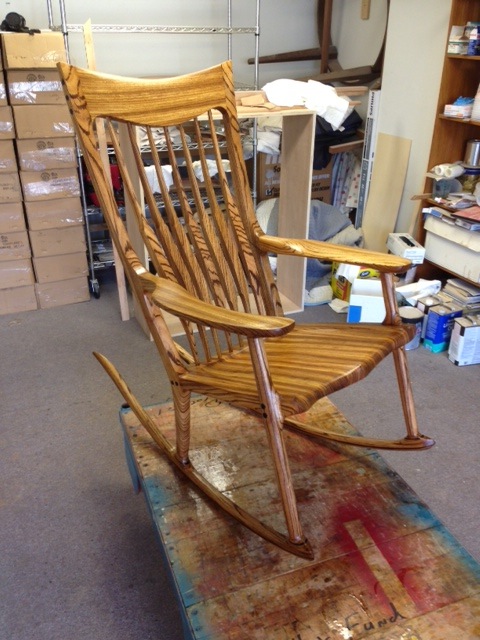 Dear Scott, Just put on last coat finish to Zebra Wood Rocker. Thinking about applying wax, what do you recommend? Thanks.
Don P.
 Scott: Well, it's finished and, all things considered, it turned out far better than I expected. Actually, I'm overjoyed with how it looks...even with all the "maker's marks". Thanks for all your help along the way. Chair #2 should be so much easier.
Jack S.
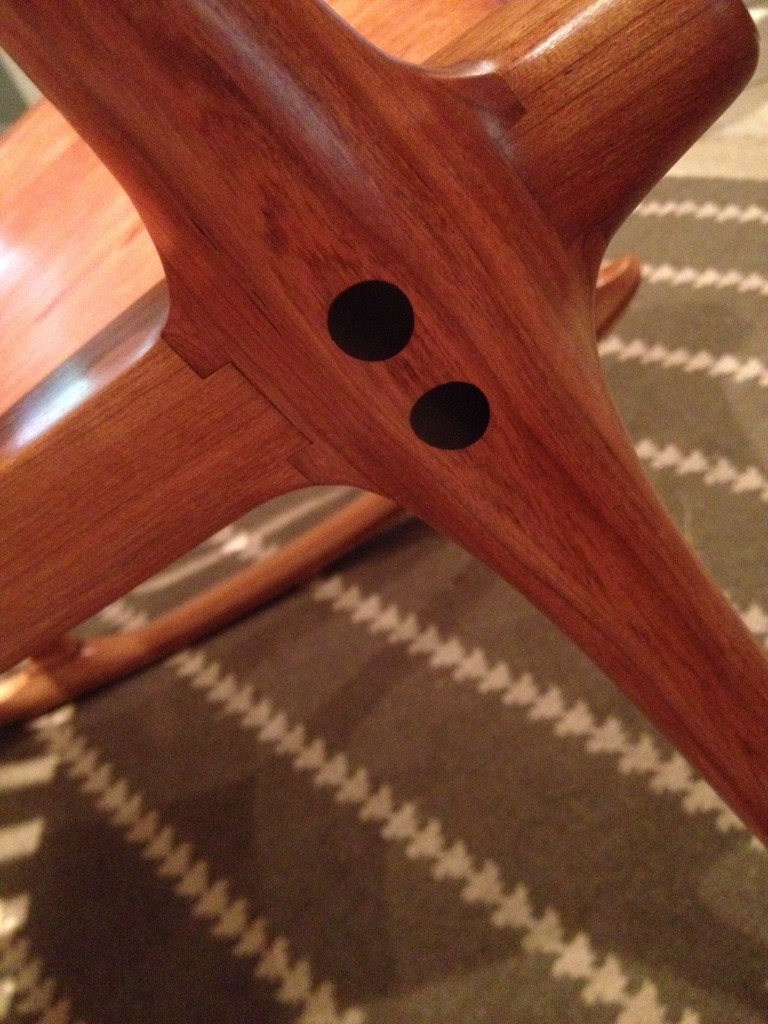
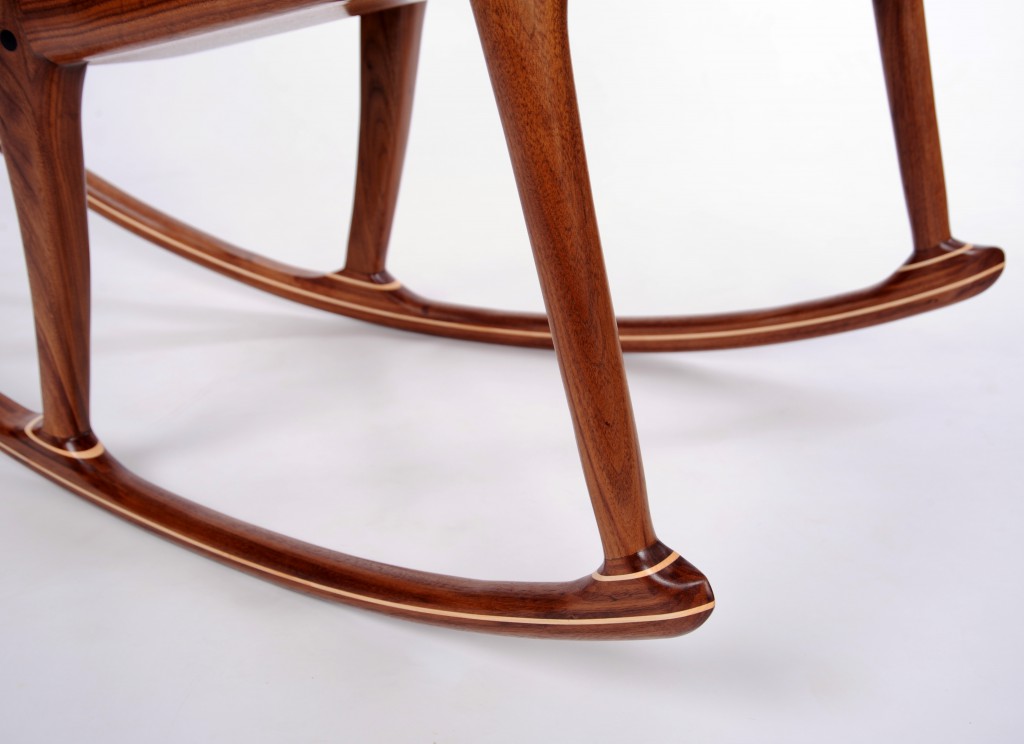
 Scott, We crossed the finish (pun) line today and set the rockers up on the patio. Thanks for all the help and i'm already thinking of a set of replacement dining room chairs. I've sent some photos, including a close-up of the rockers with 1/4" strips. Steam bent first then glued up. Thanks again,
Dick R.
 Scott, I finished the first of two barstools and wanted to send you some pics. I'm really happy with the way this one turned out. This was the first piece of furniture I have ever attempted and really one of the first real woodworking projects I have ever done. I truly appreciate all of your help. It still amazes me to think about staring at that pile of walnut and then see the finished barstool. Your DVD's contained everything I needed from start to finish. This would have been way too ambitious and intimidating without them. I read a lot of Sam Maloof's "Woodworker" and remember he said he felt his furniture should be used and lived in. This turned out so nice I haven't embraced that yet but I'm working on it. I hope you enjoy the pics and a second group will follow.
Steve M.
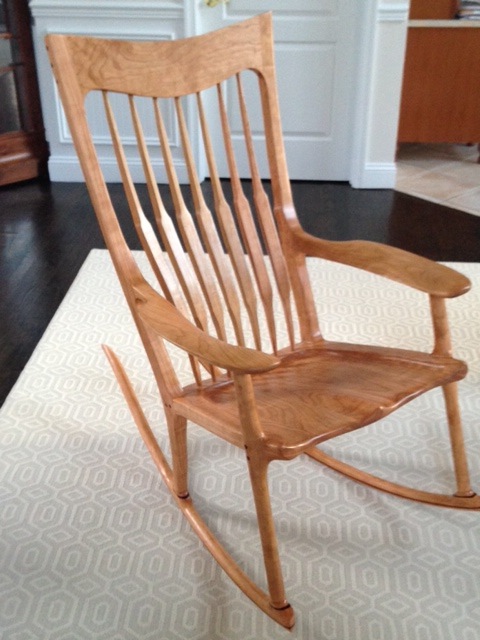
 Hello Scott Morrison— I built a medium-size version of your simple rocker (see below). It turned out great. People ooh and ah about how comfortable it is. Now my wife wants one. She’s 5’ 2”, so a chair for her would have to be smaller than the medium-size version. When she sits all the way back in it, her legs won’t bend over the front of the seat. So, bottom line, the seat has to be at least 1” less deep, probably more like 1 1/2” less deep. Making the seat less deep is no problem, nor is lowering the headrest to match where her head hits the back. My question about making a smaller chair has to do with the legs. On your template drawing for the rear legs you have a mark for a “small” chair that makes the rear legs shorter by about 1 1/8”. I’m wondering why you do that. Seems like making the rear legs shorter would alter the balance so that the sitter would rock back too far. What about shortening the front legs? Is that a good idea? In short, if you could share your wisdom about making a smaller version of the simple rocker, I would greatly appreciate it. I bought the drawings as well as the dvd for the simple rocker. Both were enormously helpful. THANK YOU!
Kelley G.
 Hi Scott, Just wanted to share a few photos of the Elegant Rocking Chair that I’ve completed. Your video was so important to understanding and guiding the process. Thank you so much for sharing your knowledge in such a clear, informative way.
Dennis I.
 Scott, I'm finished with chair #1. It was certainly an adventure. I have no idea how you would grade my work but I would be hopeful of a passing mark. Thank you for your unending supply of tips and encouragement. On your next trip to Toms River stop by. I pour the best Scotch in the area.
Jim
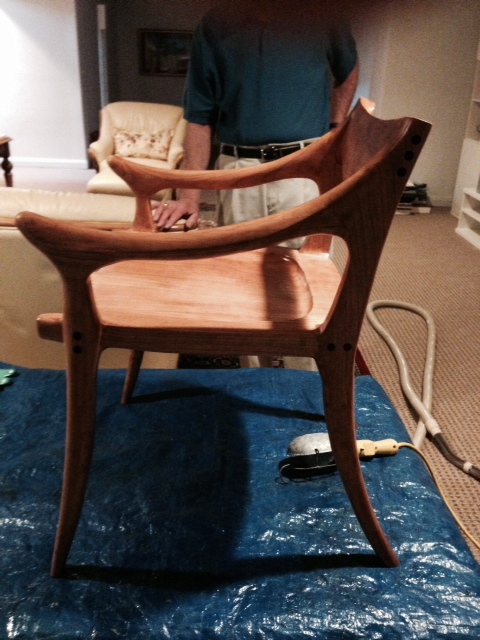
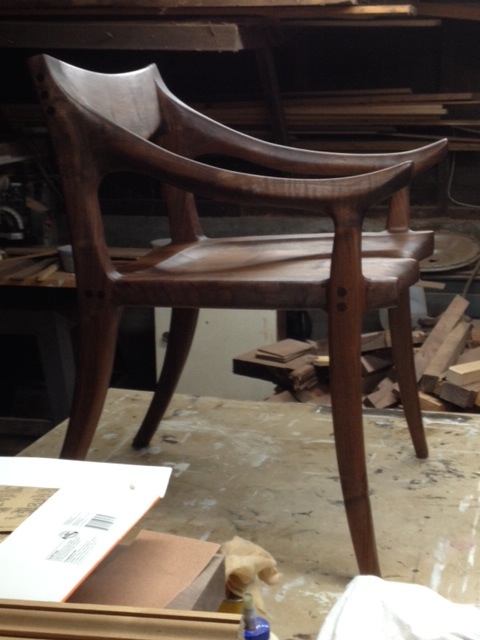
 Hi Scott, here is my just completed low back. Lots of fun and only one small goof. I carelessly attached the back rest before I screwed in the back arm joint. I of course hit the cross screw for the back. I backed out, moved up a bit and then plugged the hole. I am sure only I will notice. Last year I made my daughter a nice coffee table of quarter sawn white oak. I thought perhaps I would try making a low back of the same. Have you ever seen such? Would it do the design justice? I posted my work on the Canadian woodwork Forum which I follow and gave a shout out to your videos which are terrific. Hope some of my Canadian colleagues jump on board! By the way I am calling my chair " my Olympic chair" as I finished it on the day Canada won hockey gold. All the best to you and thanks again til my next project.
Josh P.
 Thanks for making a great set of plans. I loved every part of the project, except for maybe all the sanding. :) My wife and parents are super happy with them.
Josh Livingston, MT
 Hey Scott.
Just wanted to personally thank you for your DVD's. It has been an awesome experience. Sam's genius is unmistakable, and without your help, this chair would be unattainable for someone like myself. I just did my legs to seat glue up for #2 last night. It's nice to find something that really connects in your life. I liked the assembly, the shaping, and even the sanding. Thanks again - you really did a great job putting this together.
Hey Scott.
Just wanted to personally thank you for your DVD's. It has been an awesome experience. Sam's genius is unmistakable, and without your help, this chair would be unattainable for someone like myself. I just did my legs to seat glue up for #2 last night. It's nice to find something that really connects in your life. I liked the assembly, the shaping, and even the sanding. Thanks again - you really did a great job putting this together.
Ron S.
 Just completed my first chair and now in the finish process. Thank you for the instruction videos I enjoyed the challenge and have started three more chairs. Concerning the finish, on the can it says not you use on some exotic woods like Zercote, Ebony, or Rosewood. My next chairs are Zebra, Babinga & Narra. Do you use different finishes for different type woods? Thank you for your help.
Don P.
 As you probably concluded by the picture that I had sent and the pictures included here that I have finished the rocker. I found it an interesting experience leaving me with a number of questions that I would like to discuss in a discussion group with others that have built similar rockers.
I have noted that some builders use a simple 2 piece seat without the coopering as is done in your plan. I would guess there are reasons to do both methods and pros and cons on both sides. Some plans it appears do not use the 5 degree cut (and special bits) on the rear legs but add a block to the joint area that is then cut at a 5 or 6 degree angle. Again I am sure there are reasons for both methods. The back slates are solid in your plans and I have seen similar laminated back slates in others. Again it would be interesting to hear the arguments pro and con. Some builders have elected to use a coopered headrest where yours is solid one piece and virtually flat.
Another question comes from images of the front leg to arm joint where it appears that a block seems to be added to the bottom of the arm, It is just that I have questions and not sure where one would get answers without some discussions between a few builders of rockers. I have built a low back chair using a plan from another supplier and now your rocker just leaves me with questions. Being bored and needing a project I found myself building a chair like a dinning chair using much of what I learned from the above two chairs. I am using fir that I have in my rack of wood available and am finding the process interesting. I also have a yen to try the armless bar stool and may have ago at that next.
I will probably build another rocker but hesitate to invest a further $500 in wood when I have not sold the first one. I am not sure I started this with any plans to make and sell the rocker but I have a problem justifying having 2 rockers in the house and none of my kids have volunteered to take the first one off my hands nor have they volunteered to buy the wood for the next chair. Thanks
Jake

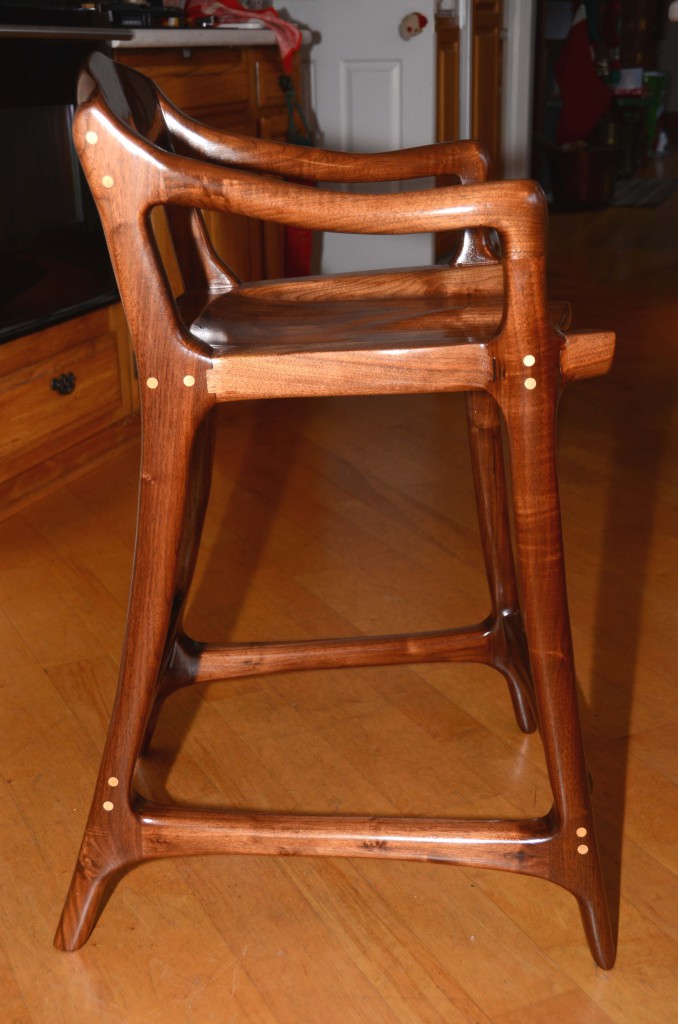 Hi Scott - After about two years, my pair of barstools is done! You were very helpful in your prompt feedback to my questions as these stools were undoubtedly the hardest thing I have tackled to date. Fortunately, I had the excellent professional assistance of my good friend and cabinetmaker Dave Lutz since these were well above my pay grade. In any event, it was a lot of fun and very satisfying and I thank you for the nice DVDs and email assistance. I used General Finishes clear sealer and urethane varnish topcoat a la David Marks and was very pleased with the ease of application. Attached is the proof being sent in two emails. Best wishes for a great 2014!
Gary