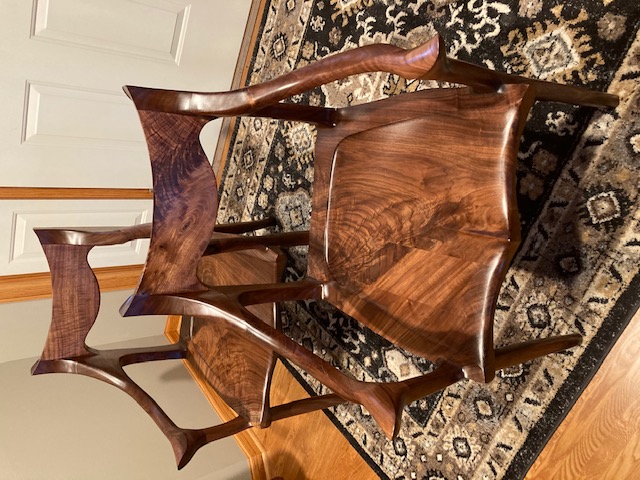
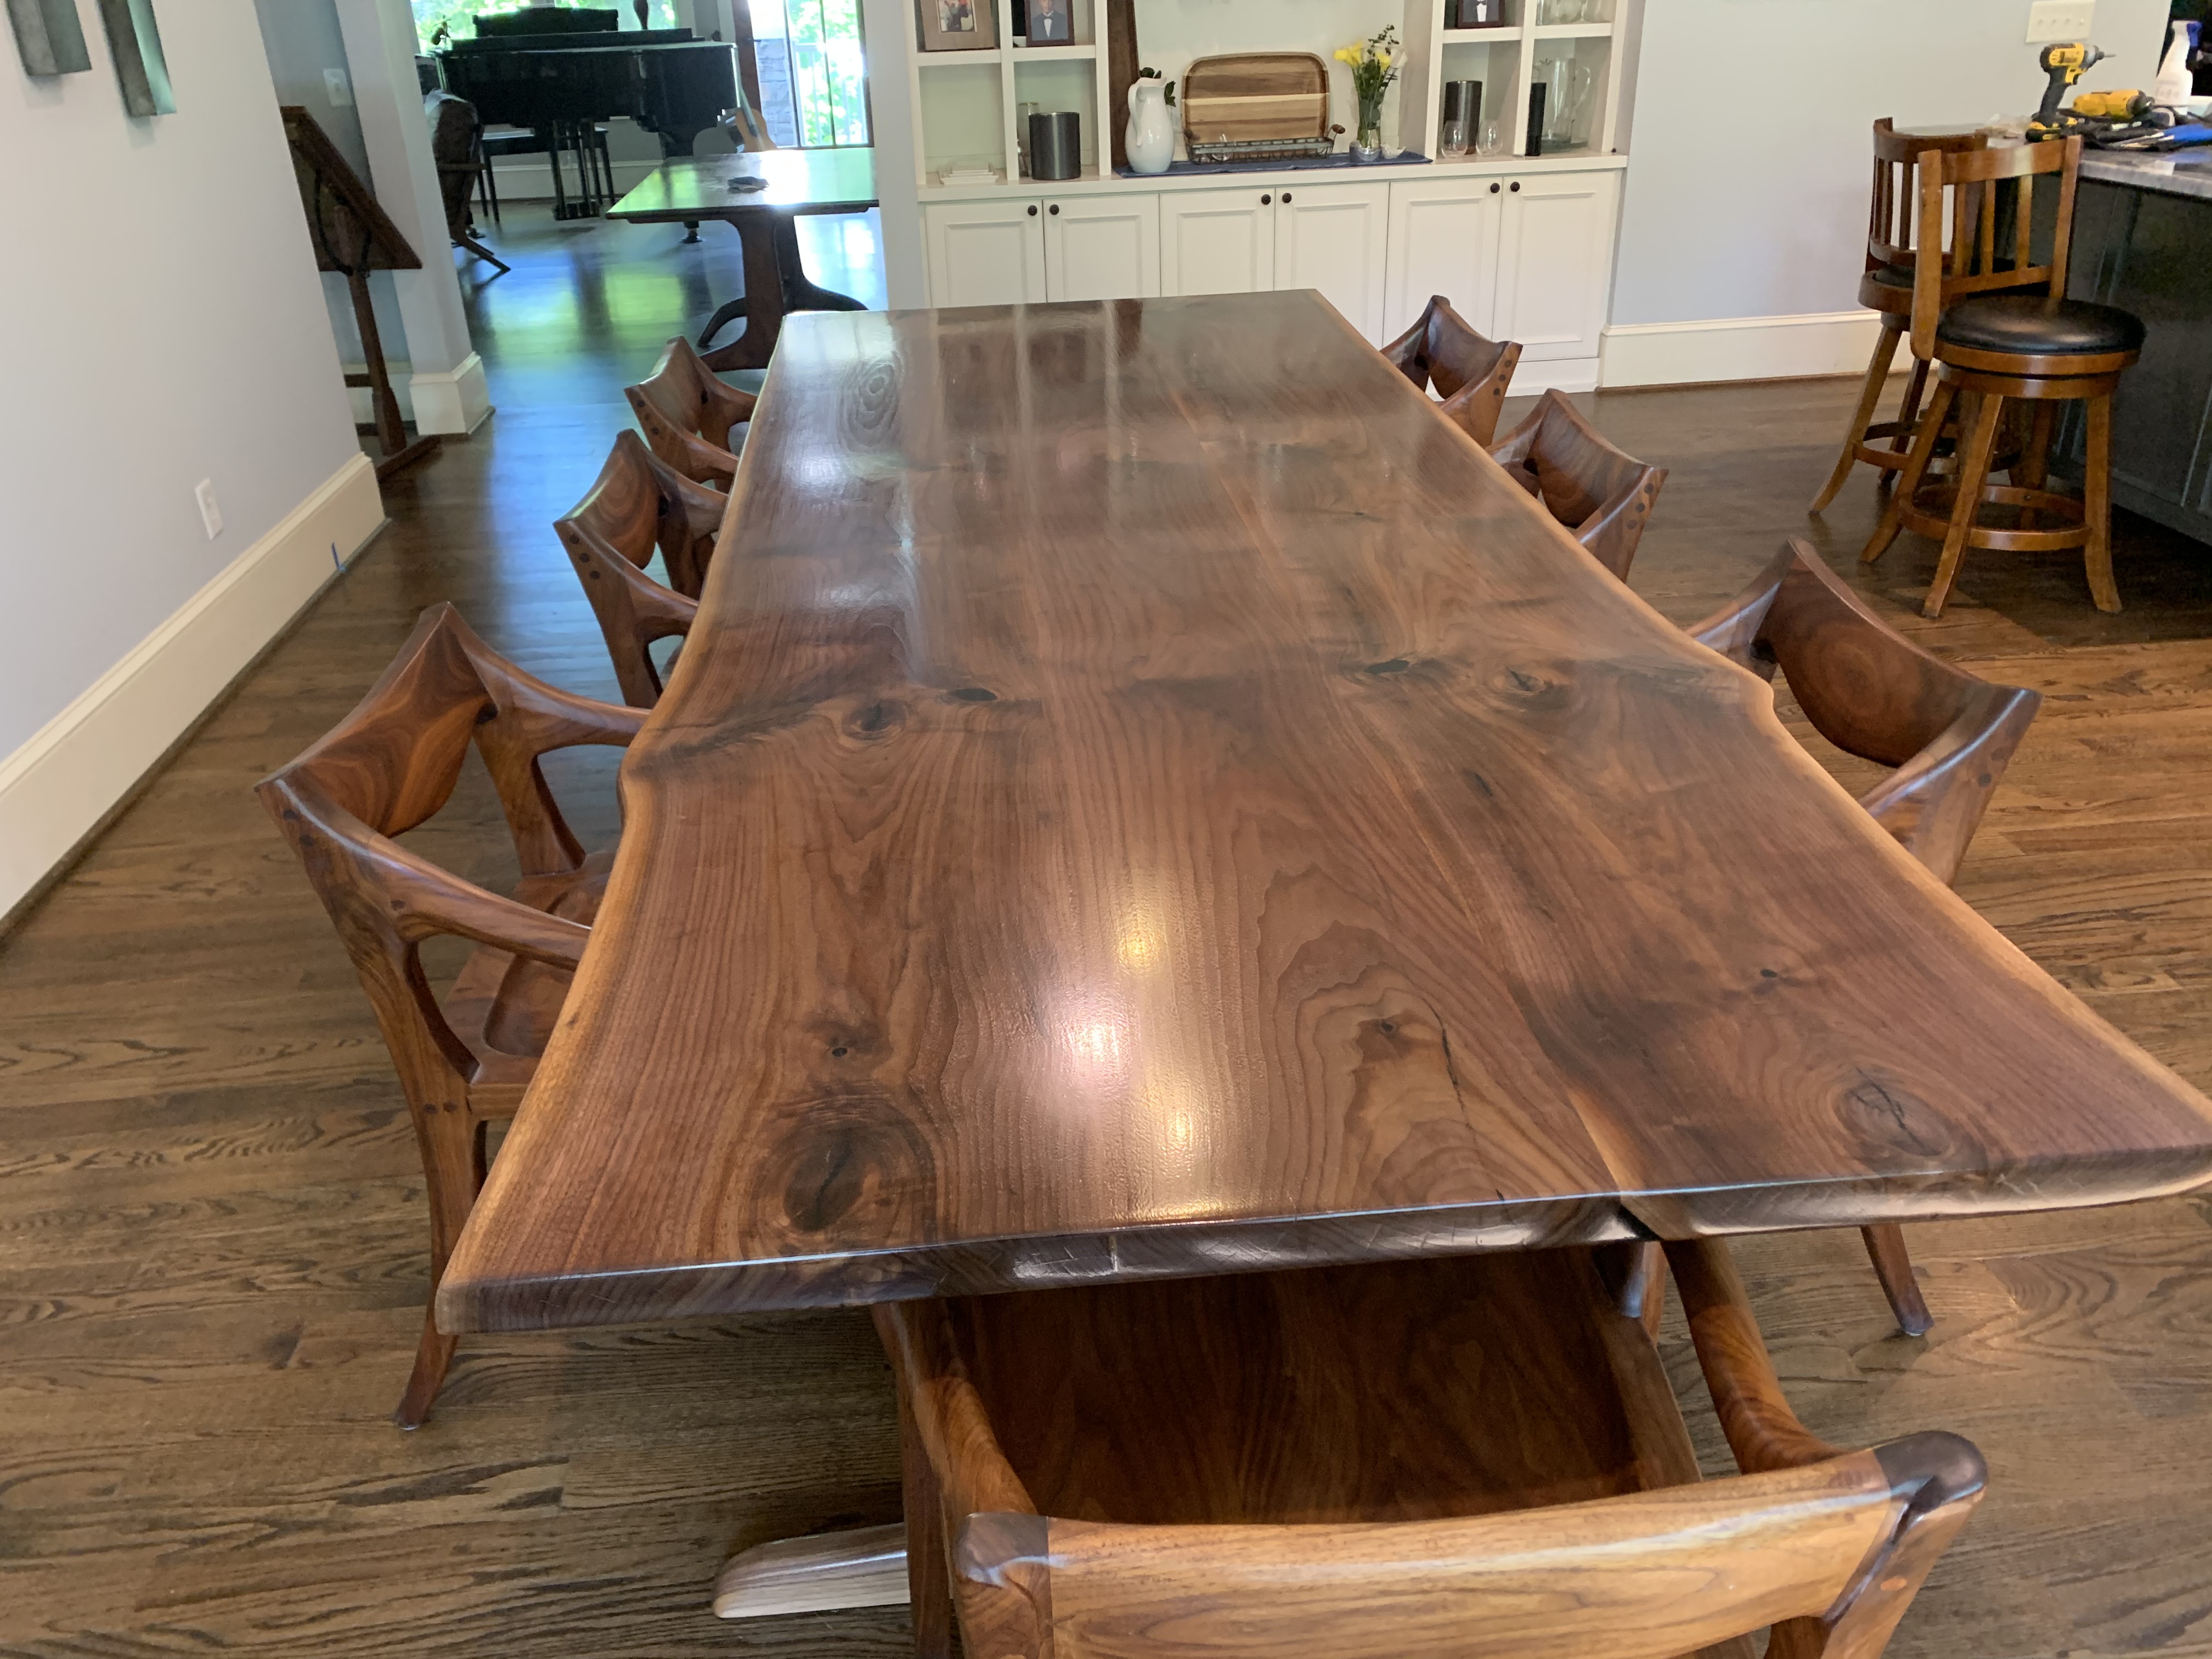
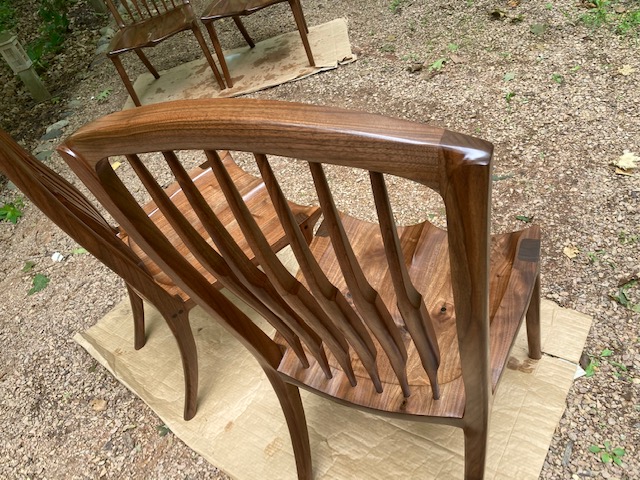
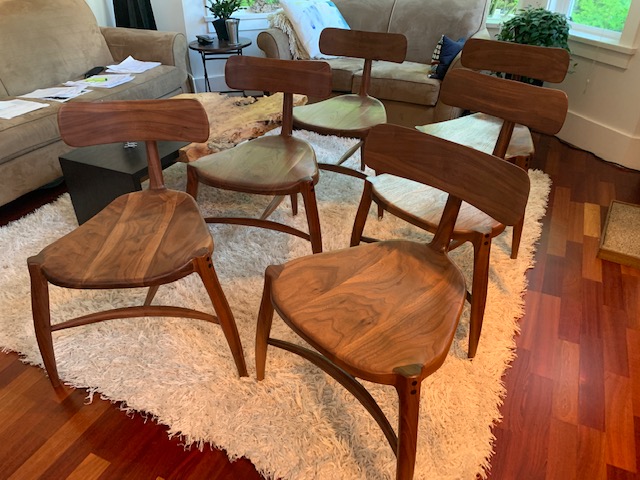
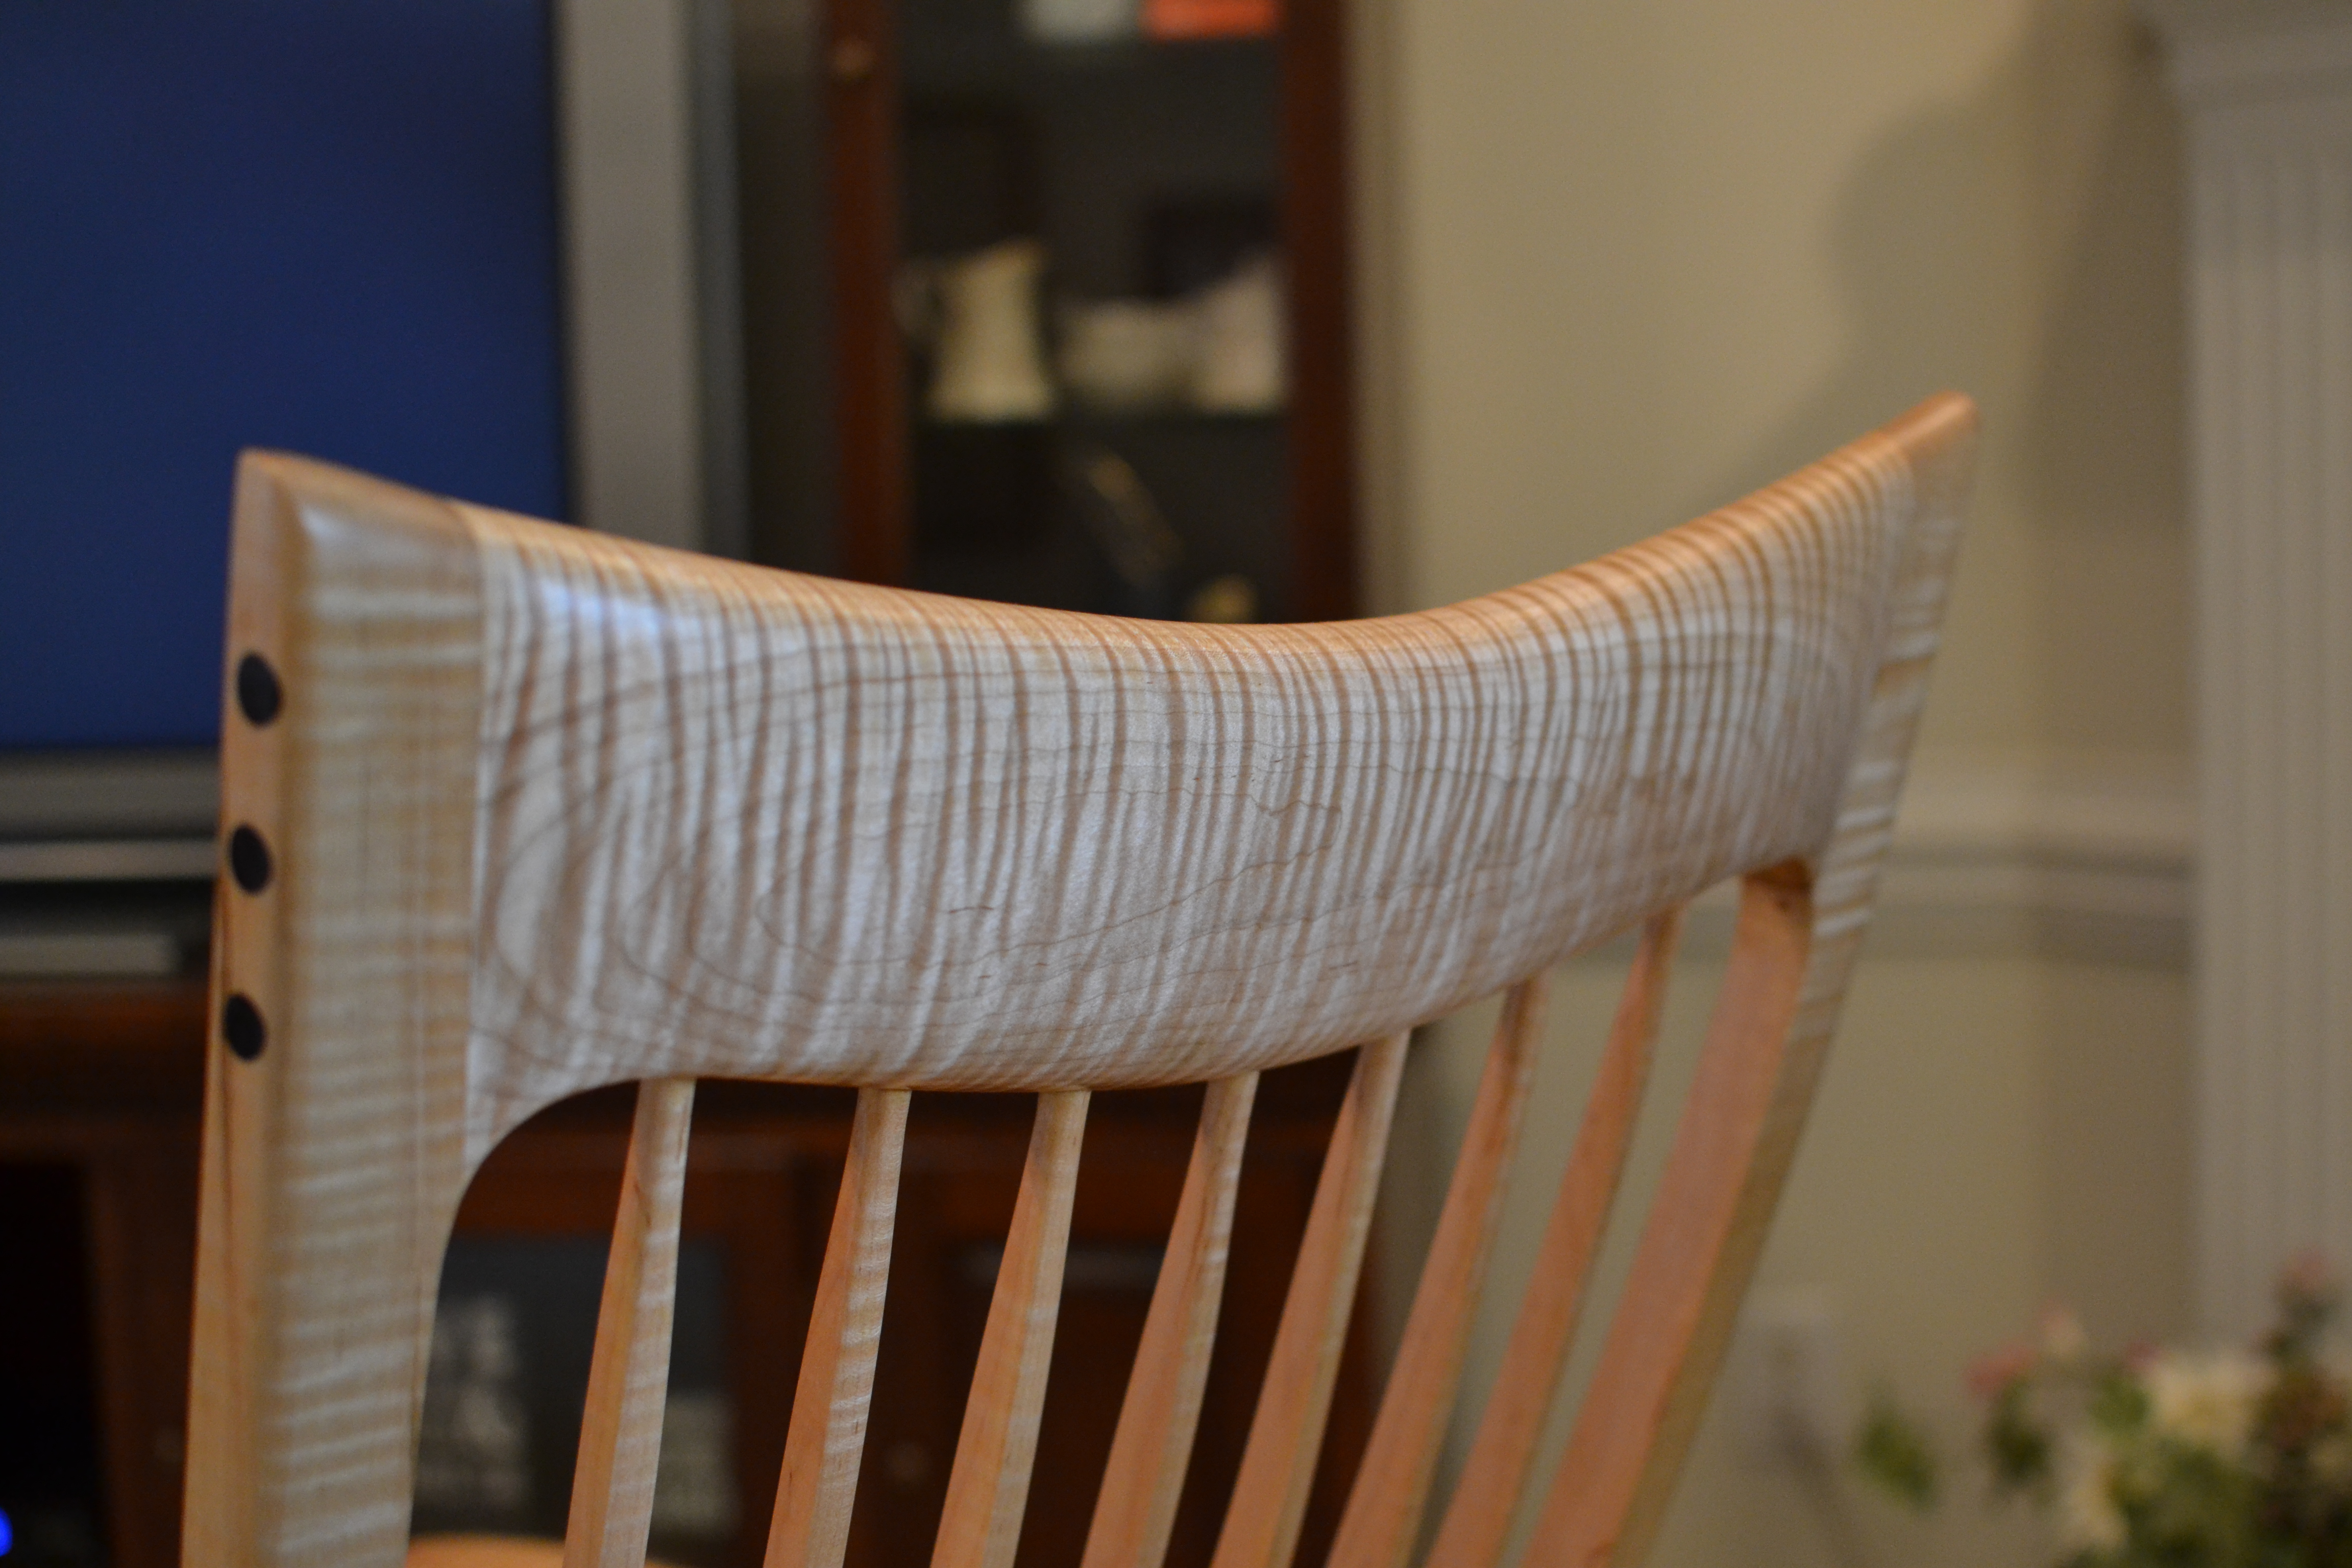
 Hi Scott, A couple of low back chairs. I actually used your templates from the dining chair and some from elegant rocker. The wood was from a slab that measured almost 30” wide. So got all seat boards from one width. It’s been harder to find dimension lumber with all the slab work being done. Tables and all.
Koko W.
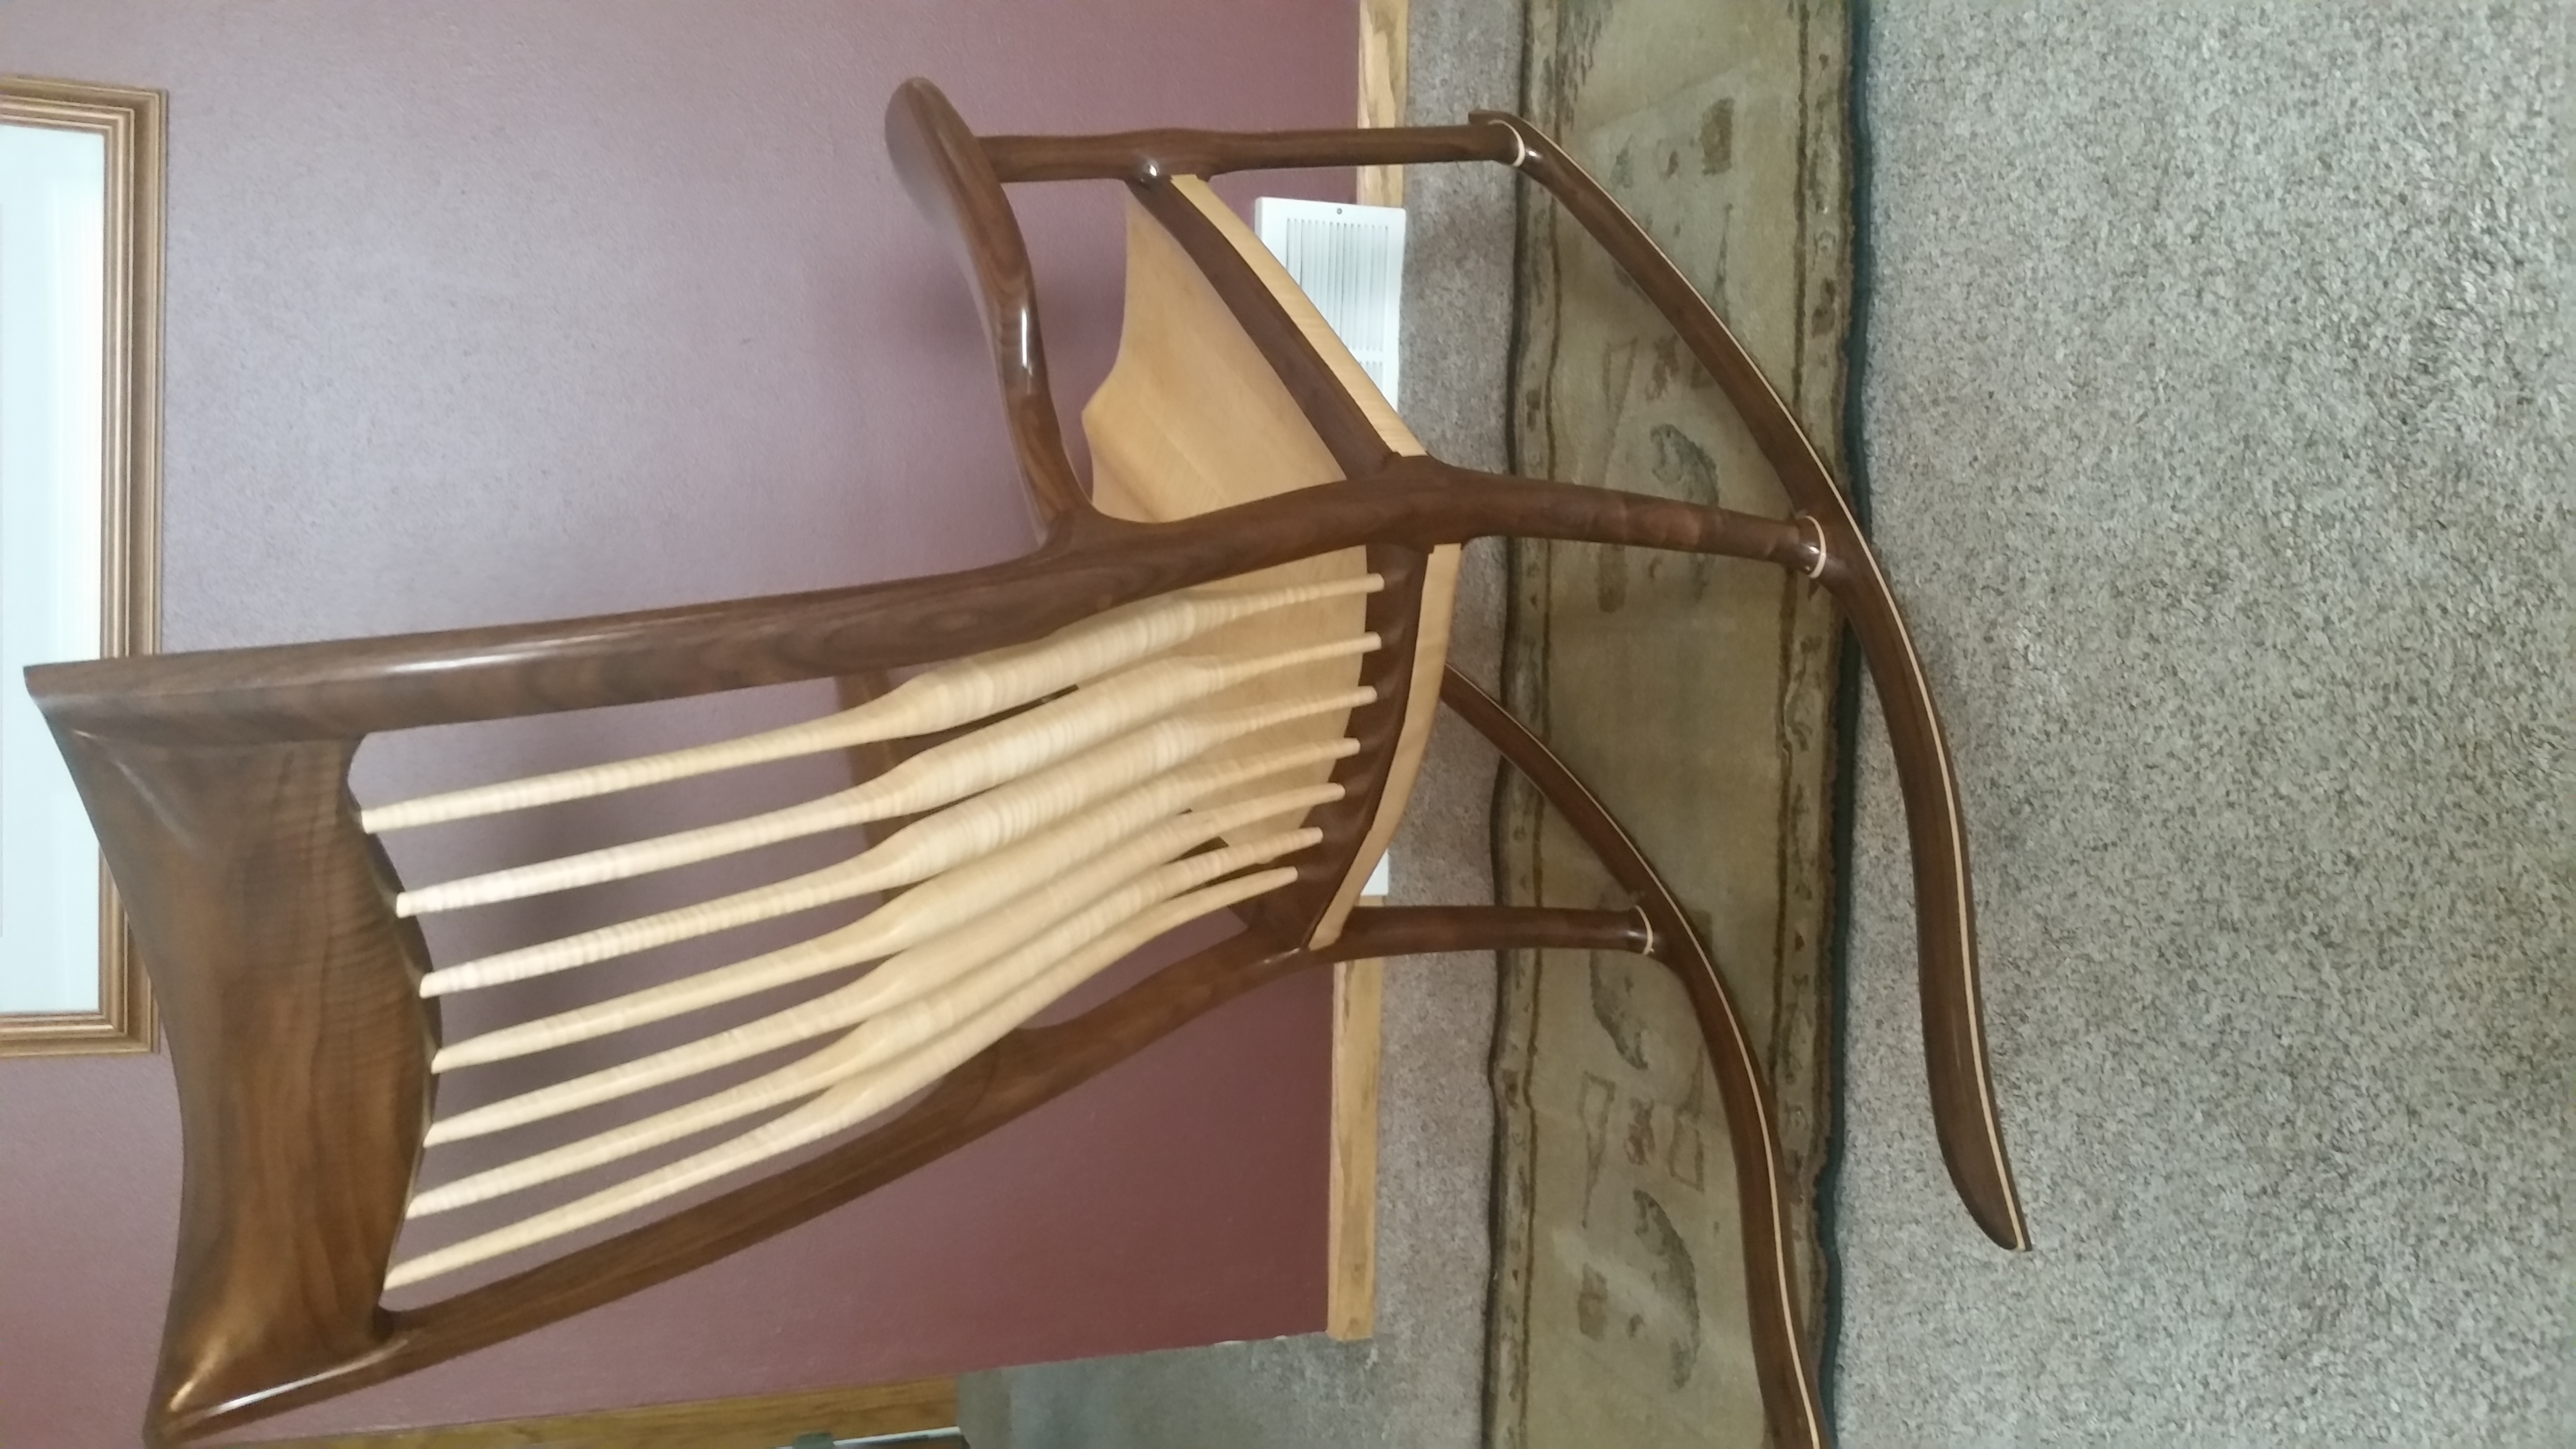
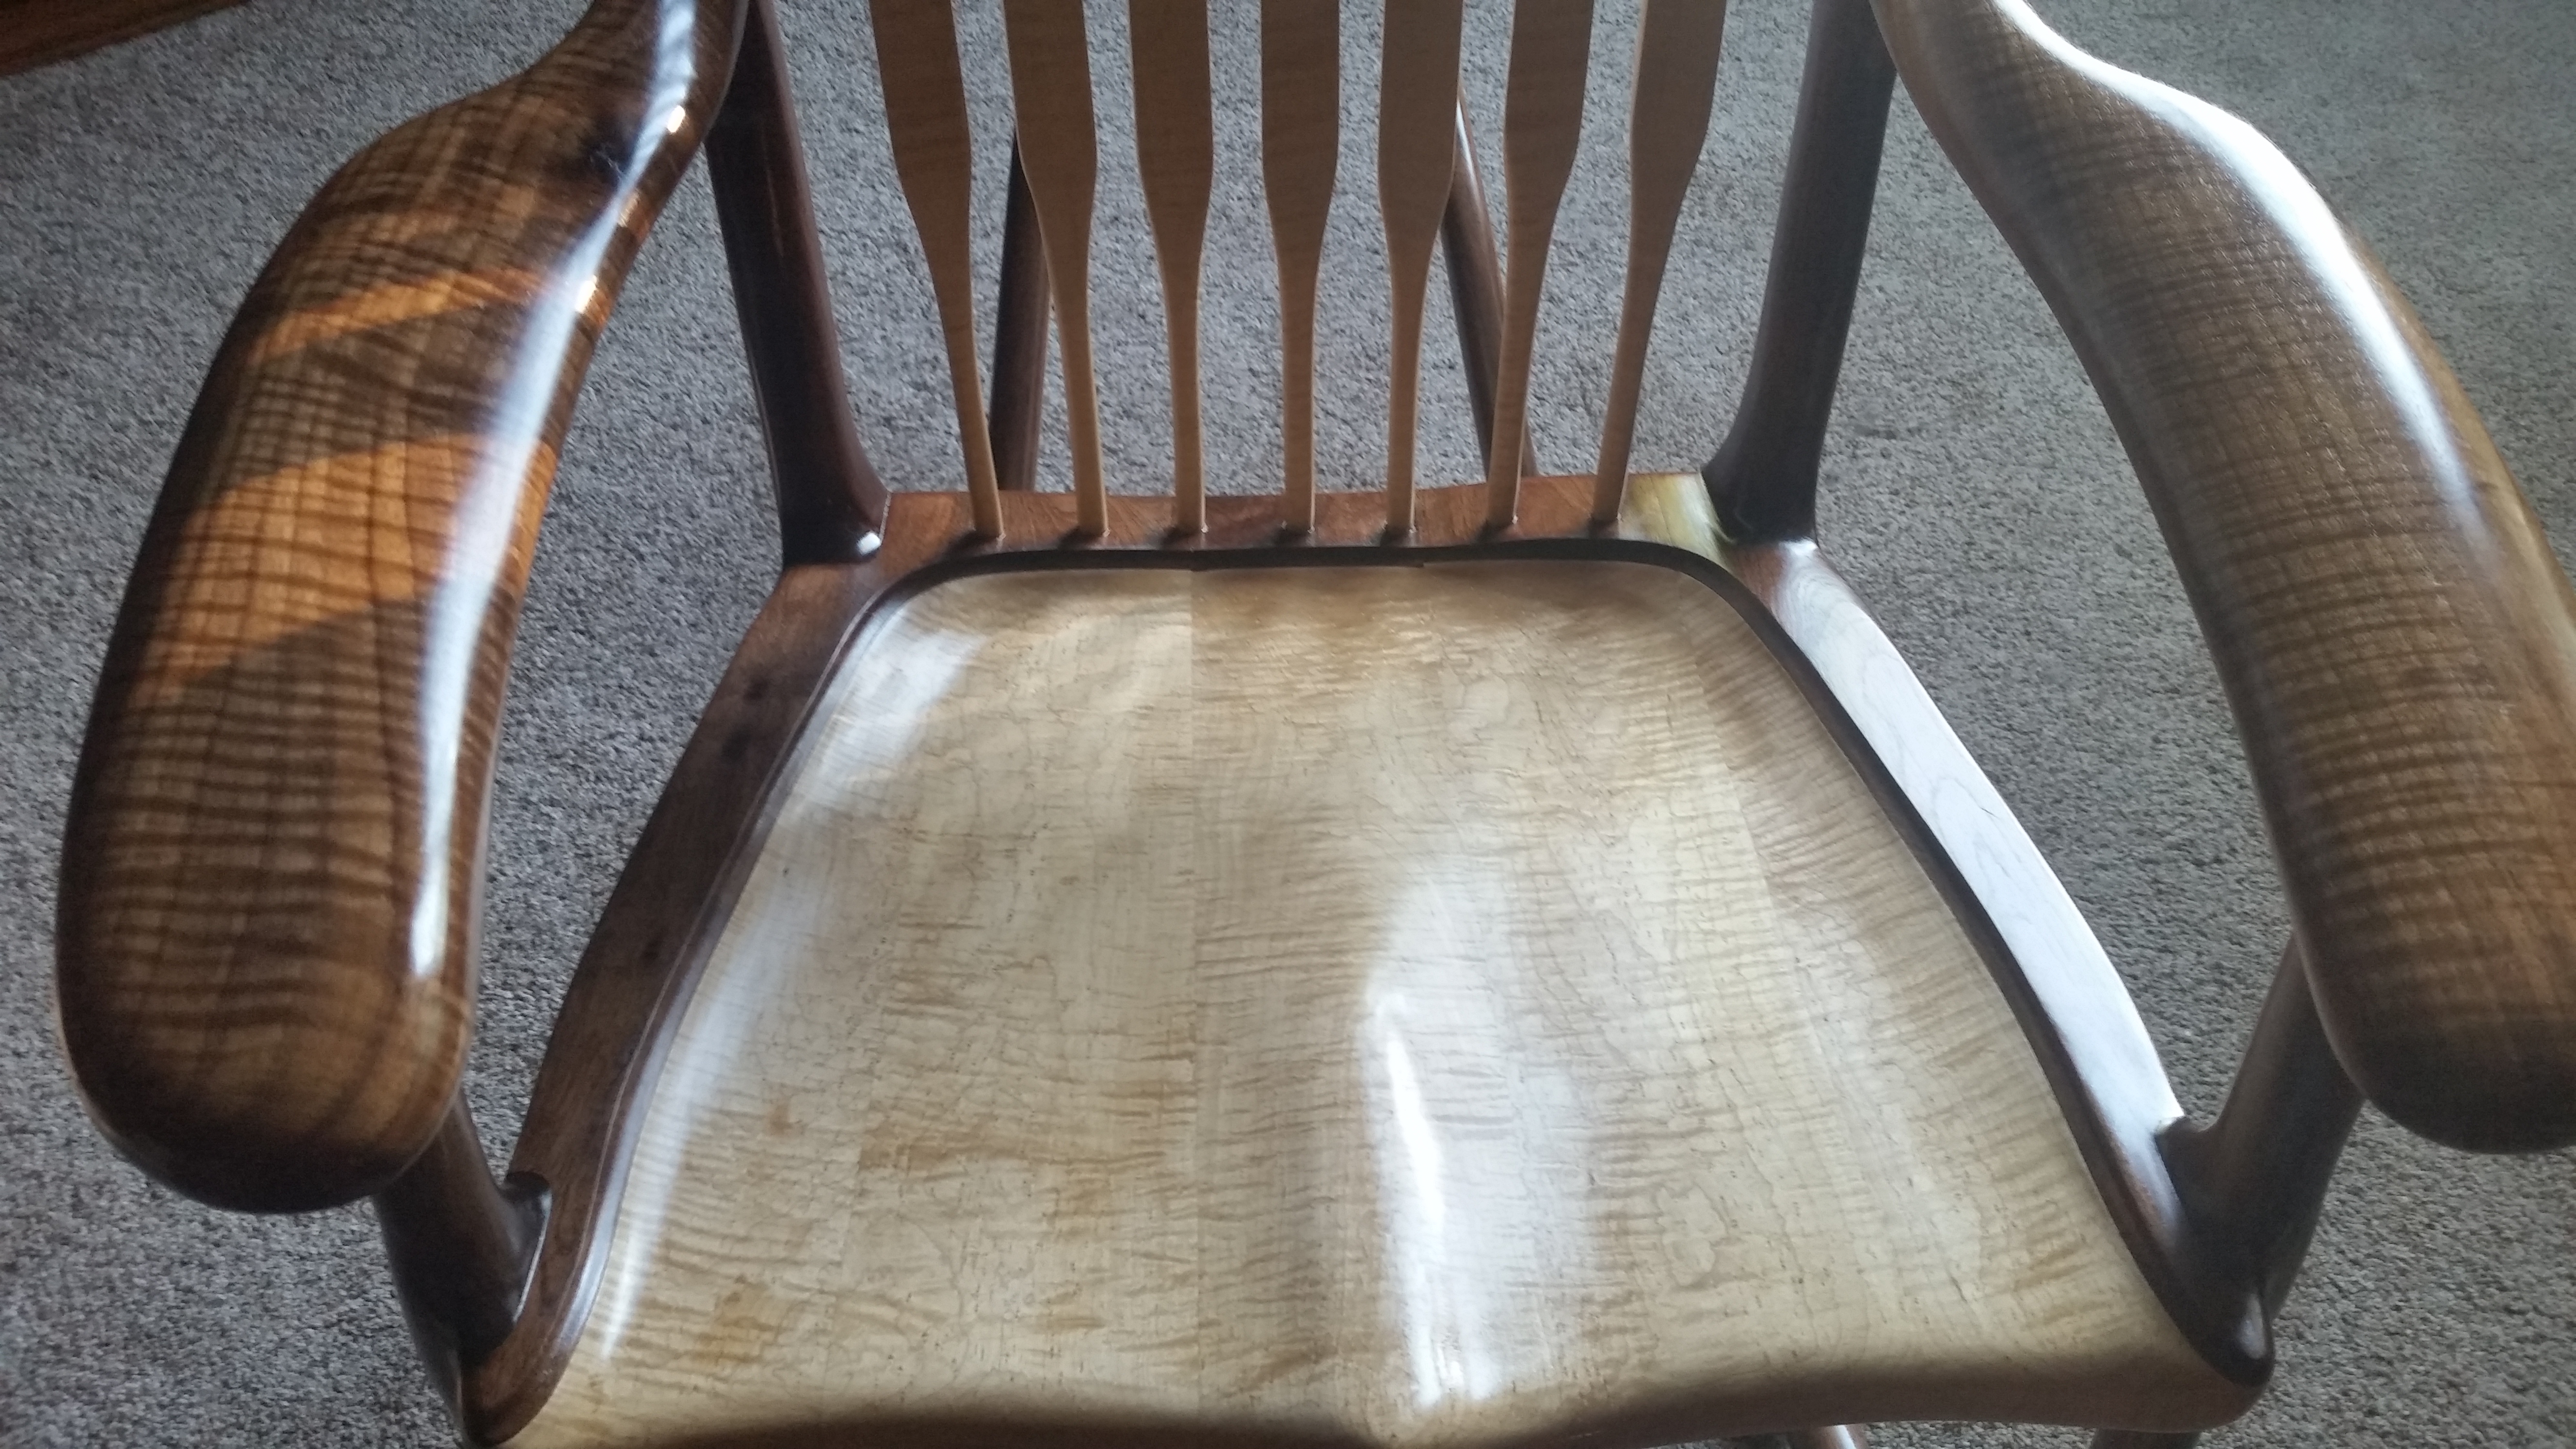
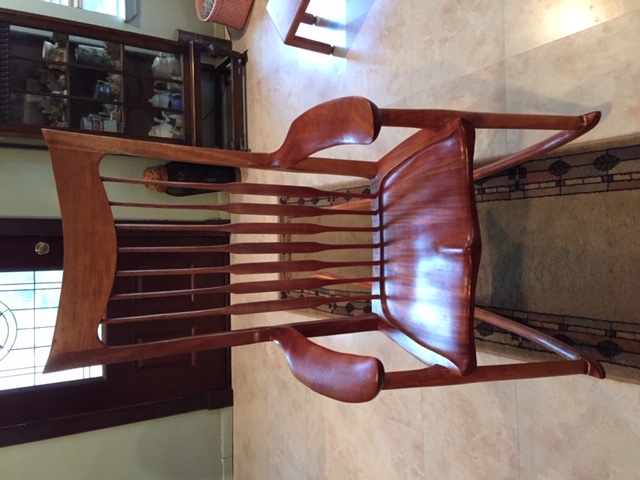
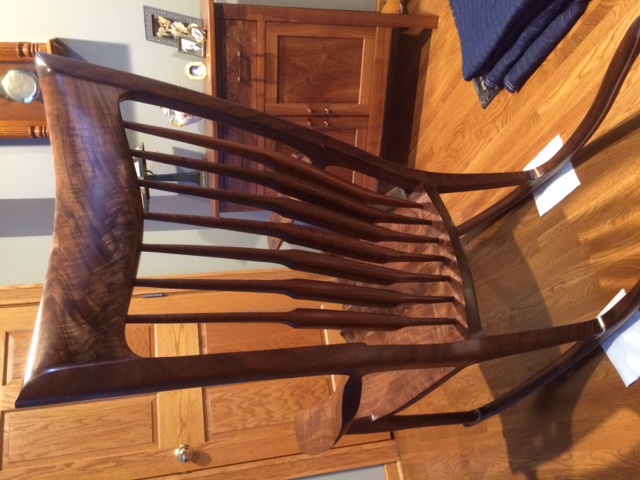
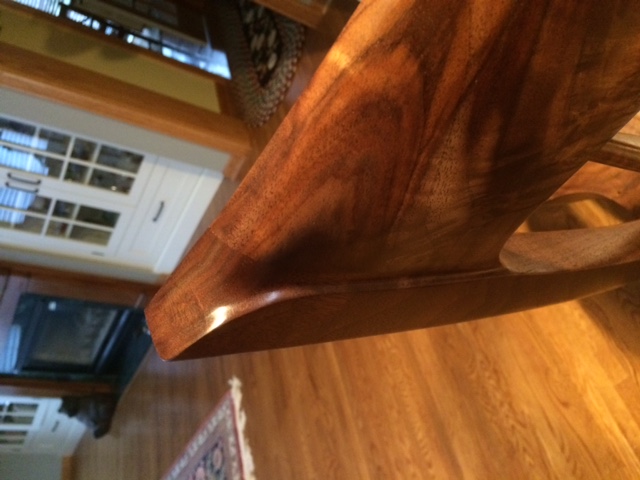
 Hi Scott, My chair spent a lot of time in “timeout” while I was working things through in my head. I’m a retired surgeon and would have rather been dealing with a ruptured aorta than making my initial tapered rabbets in the seat. It worked out and I’m ready to start on the next 3 for my family. Thank you for your video and instructions. This was my 1st attempt at a piece of furniture. It was preceded by the rocking horse in the background of the photo. Why try to make something that I know I can do; I like to push the boundaries. I learned while making a cedar strip kayak that epoxy plus sawdust will hide a lot of “oops”. The worm hole in the top left is actually a poorly aimed screw. Can’t tell the difference between the two and now I know how to aim. Thanks again
Rick F.
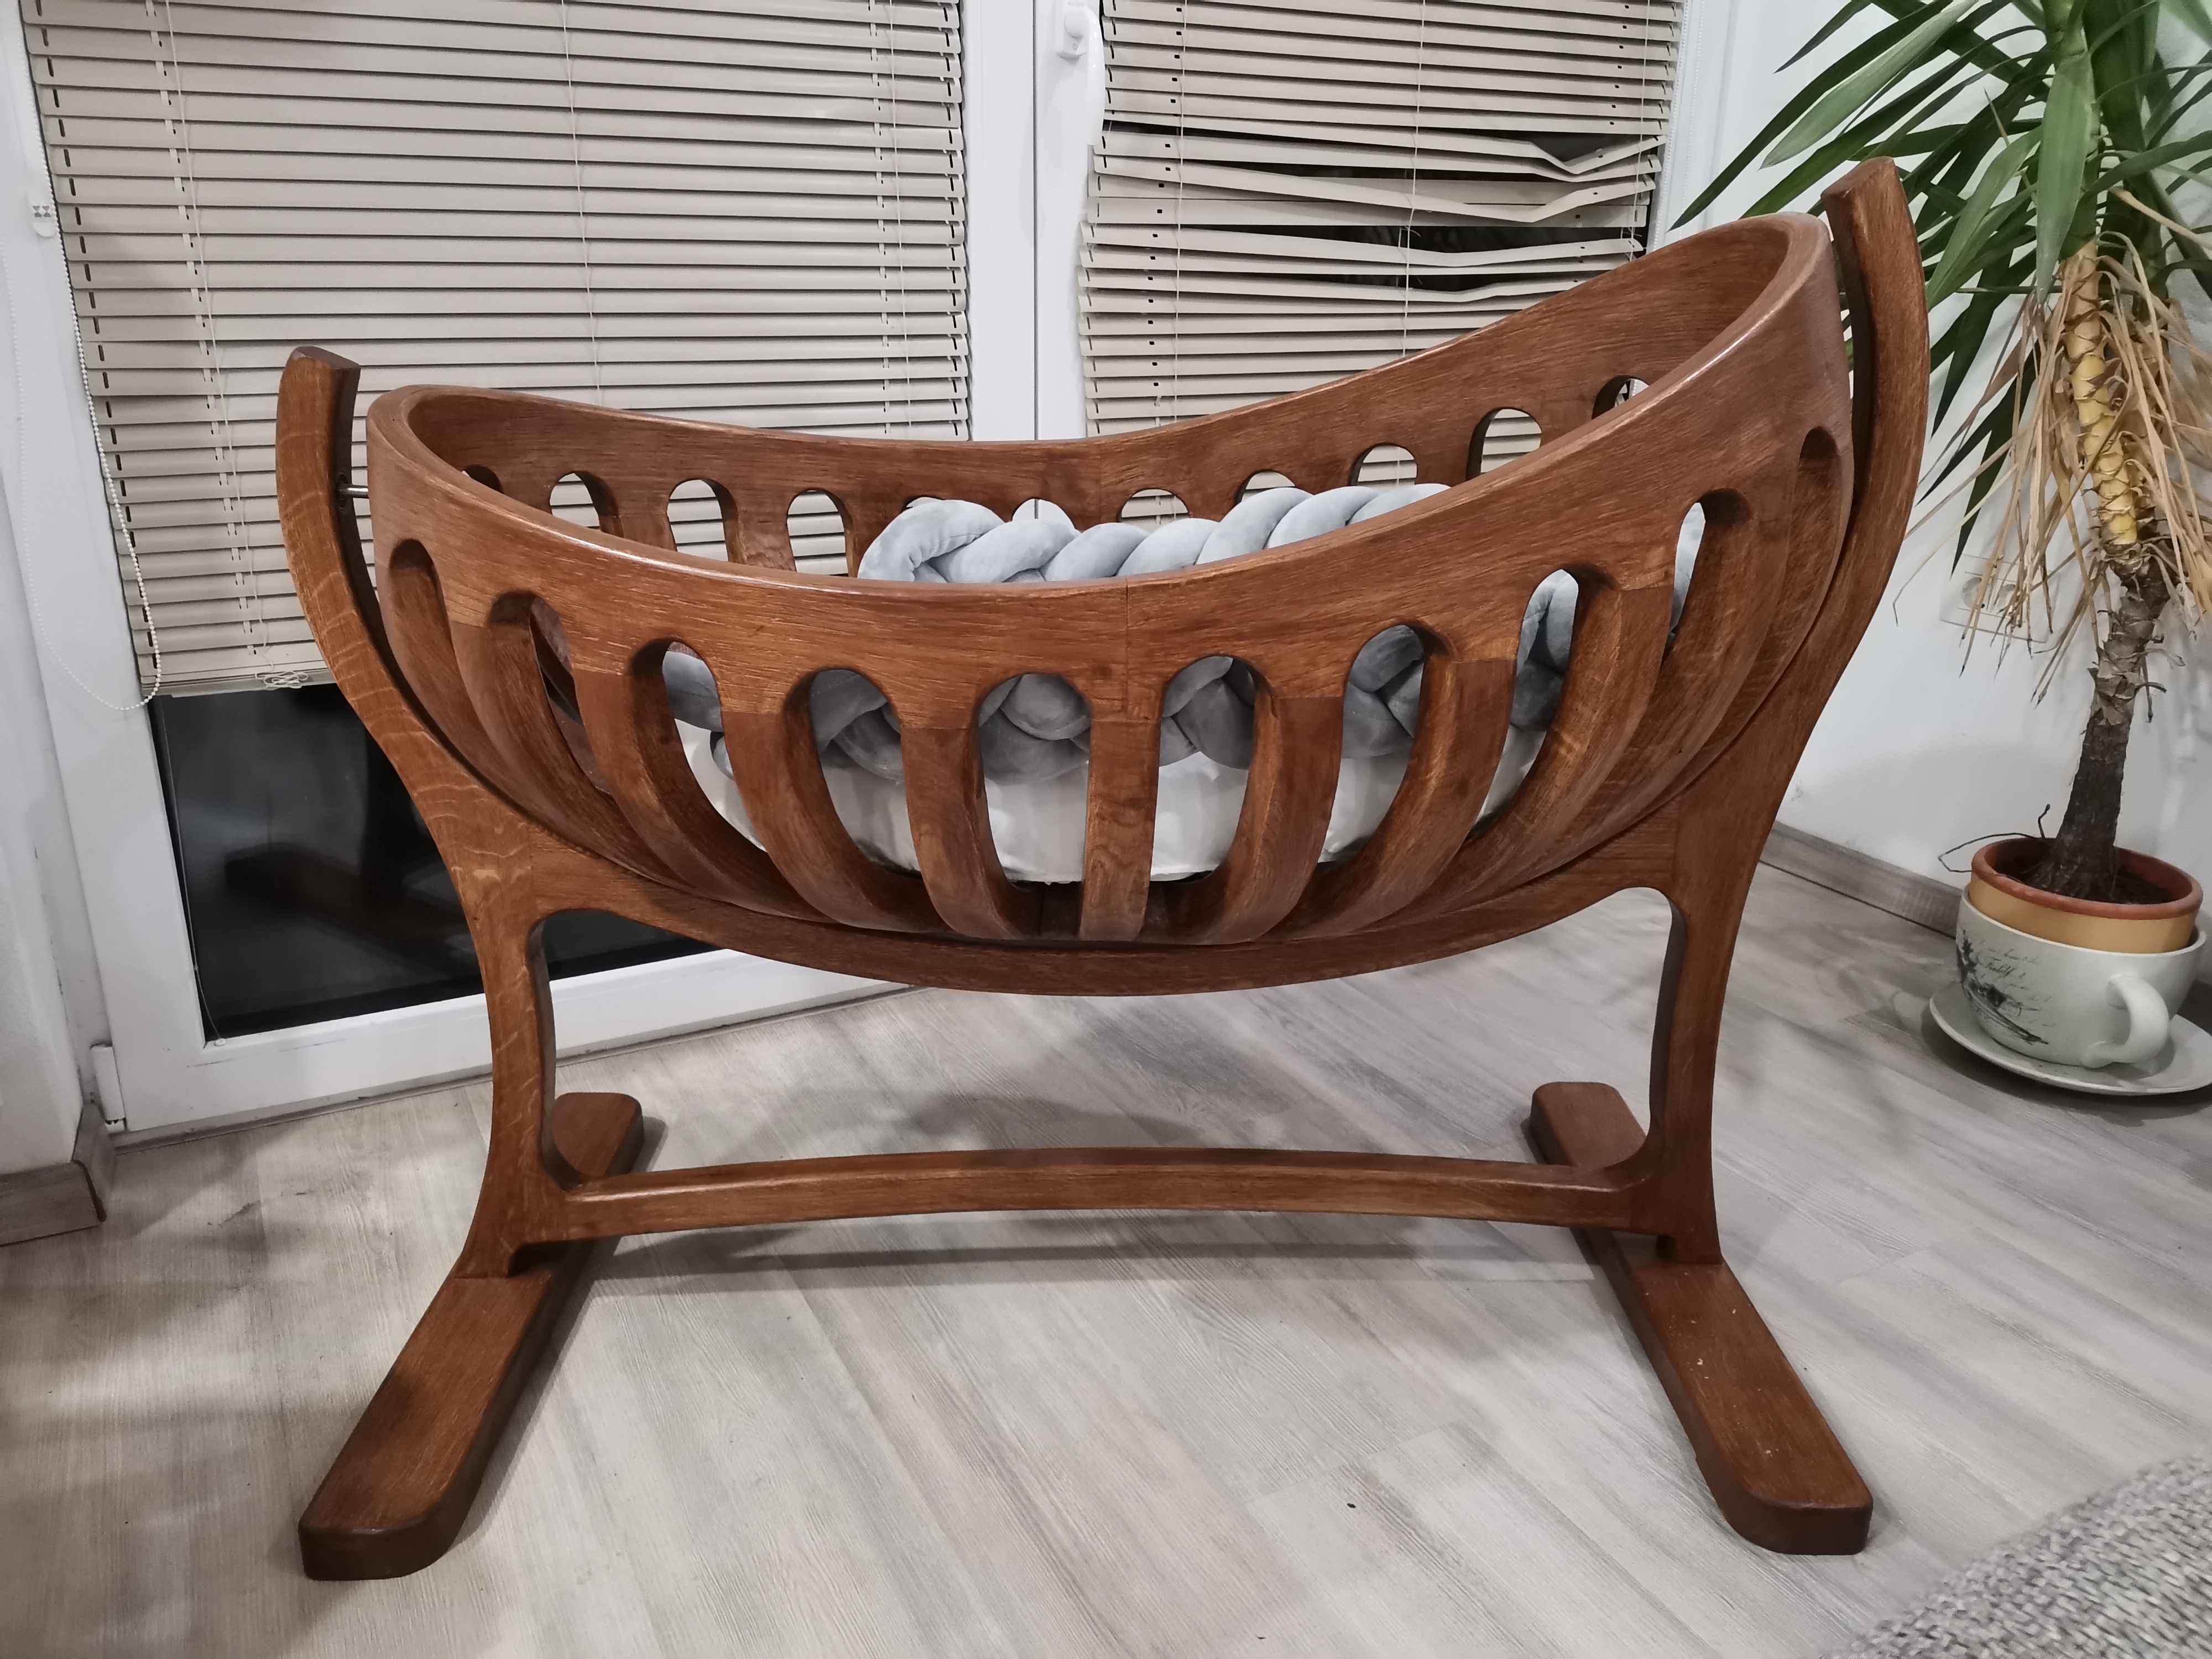

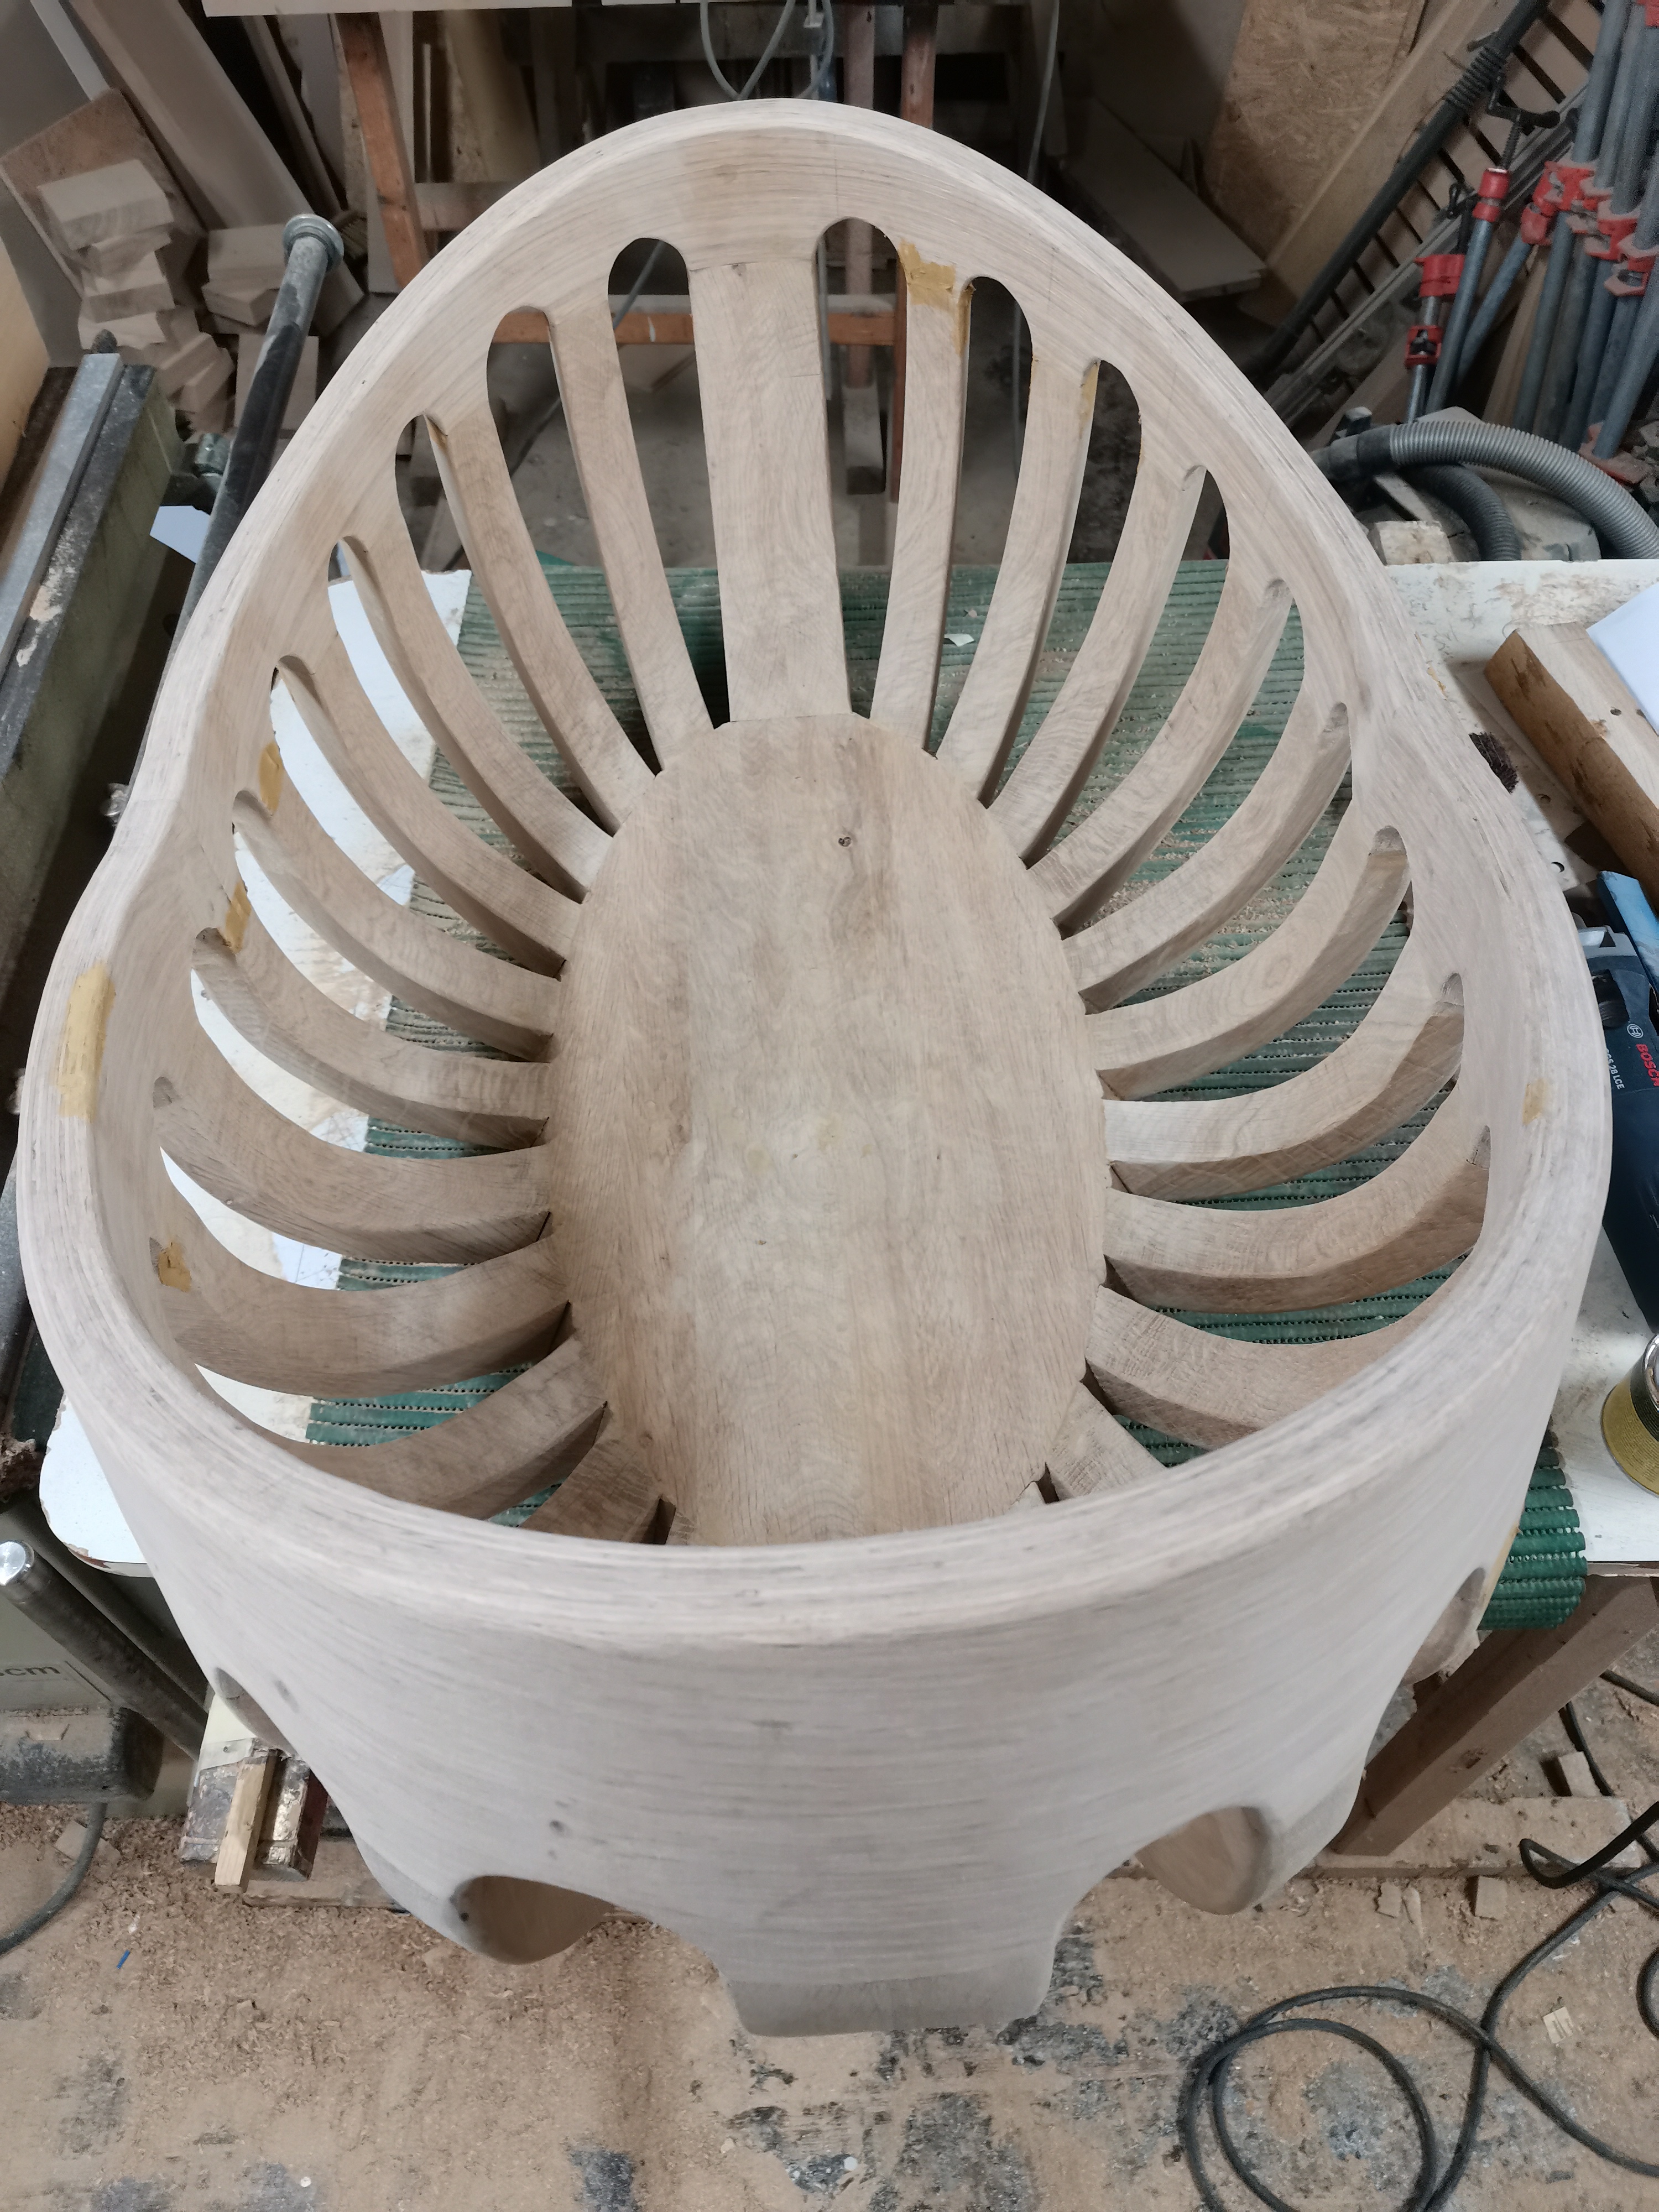 Dear Mr. Scott, Thank you once again for your help. I managed to glue up cradle last night! Based on the photos you sent me and photos of your cradle I have drawn lots of templates and plans. Basically everything was drawn in cad, except the ribs which would require strong logaritmical knowledge or 3D model. Eventually I decided to go with rasp shaping using templates to know how deep to go. Once again, Thank you. I might manage to finish on time 😅
Sandi
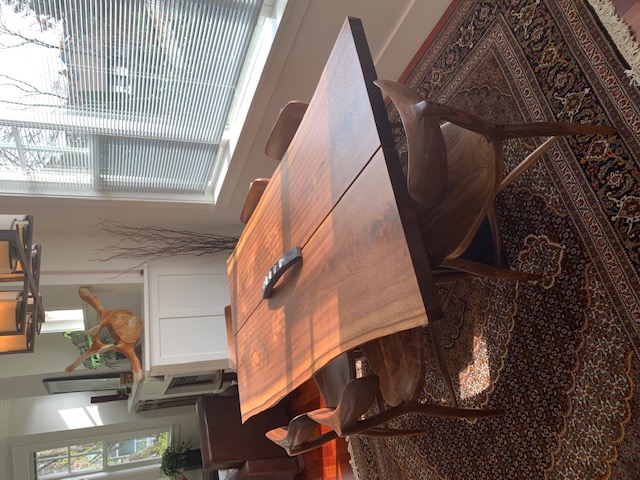
 Dear Scott, Here are a couple of photos.
John R
Hello Scott, I finished my elegant rocking chair in April. I call it my COVID chair because I built it while I stayed home on quarantine. I have been building furniture for myself and friends for 45 years. The rocker was the best project I have ever done. I followed the DVD exactly and it turned out fantastic. I would like to now build 8 dining chairs, but I don’t see how to order a DVD for them. Are the techniques exactly the same as the rocker? Do the plans on the dining chair explain things like how much wood to buy and which joints to use where and where to put the screws, etc. Is there a DVD just for the dining chairs? Thanks for your help.
Donnie L.
 Scott, When looking at pictures of different rocking chairs on the internet, I stumbled across yours and it really caught my eye. I was looking for a chair to make for my daughter who is expecting our first grandbaby. I was pleasantly surprised to find out that I could purchase the DVD set and templates as this was my first time attempting a project this complicated. I found the DVD to be extremely helpful and the templates to be right on. I added a few little twists of my own like the walnut trim in the seat and in some of the shaping. I was very pleased with the way it turned out and my Daughter loves it. Thanks for everything and your quick response to a few questions that I emailed to you.
Matt R, Poynette WI
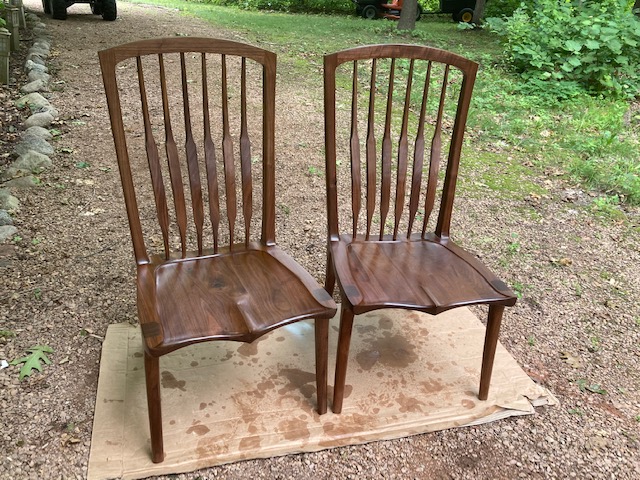
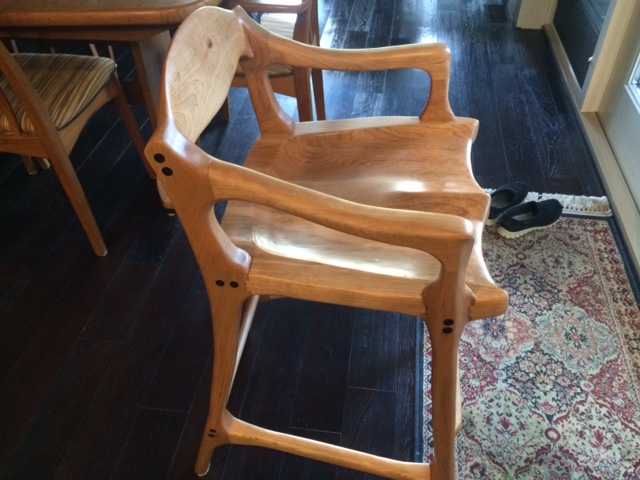
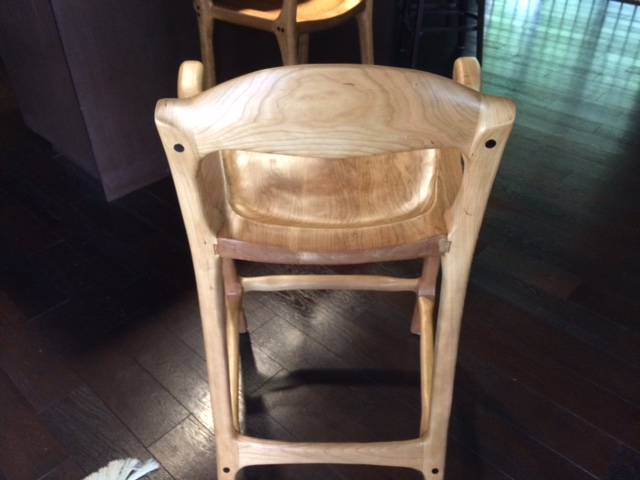
 Hi Scott I finished for chairs. They are for my son and he did not want arms so they are armless!! On another note: not to be cheap but if I wanted to make a tea chair and I have templates for the elegant rocker, dinning chair, and contemporary bar stool does the tea chair use any common templates or should I purchase a set for that chair as well. The main one would be the rear leg, for the rest I can probably wing it. Thanks
Neal
 Greetings Scott. It’s been a couple of years since I emailed you and bought the Rocking chair package. I’ve made four chairs since that time, two walnut, one cherry and one African mahogany. They all turned out exceptionally well. I can’t seem to let go of them although I have given one to my daughter and one to a 95 year old lady for her birthday so she could sit and watch the birds and squirrels. As you may have noticed, I just ordered the Elegant Rocker package again. I have had injections in my back and have been scheduled for another round next week. The surgeon recognized me as a woodworker on my first go round (I assured him I was an entry level woodworker) and asked as many questions as he could, prior to my procedure. I thought I would give him my drawings and videos to help him along but I don’t want to be without a set myself. A question I have for you is are you ever going to make a set of drawings and videos for the baby cradle? I would really like to give that a shot. Looks very hard but you have an amazing way of instructing and teaching, which I know would get me through the build. I hope that one is in the near future if not already produced. I hope life is good for you and the wife and wish you continued success. Your friend in Dallas,
Art P.
 Hi Scott, This is Gary in Nampa, ID. I was the one who wrote to you about having a problem with having clamped the seats too tightly and getting the #1 and #5 seat boards bowed up. I appreciated your quick response to my question about any possible fixes. Your ideas were certainly correct but you have to realize that you are talking to a guy who is on a fixed income and spending $90 on more cherry wood to make 2 new seats just wasn't in my budget. It was time to put the thinking cap on and do what I do best- make it work. What I did was realize that the angle was only off by about 1 1/2 degrees and I visualized pivoting the rear legs out to the 5 degrees. By making the pivot point at the top of the Maloof joint, I would have to increase the angle in the top of the joint by undercutting the top rabbet, shave a little off of the tenon on the seat and undercut and increase the angle on the bottom rabbet. I did all of the cuts on the seat so that if I had to finally throw in the towel I would still have the front and back legs in the original condition. After getting all of the angles re-cut and the legs re-fitted, I cut a piece of 3/4" plywood with 5 degree angles on the ends and cut to fit against the seat and tall enough to fit between the arm rest connection. When this was clamped in place the legs had the proper angle. I used epoxy and cherry sanding dust on the joint and it practically disappeared. The front legs presented me with the same problem. I pared the joint the same way that the rear legs were done and used the holes in the top and bottom of the legs to put dowels in and use a piece of 1x2 with matching holes to keep the legs equal distance and put another piece of plywood clamped between the legs to keep the legs at 90 degrees to the seat. More epoxy and dust and 24 hours later I was on the way to getting them done. I don't think I've ever mentioned that I was actually doing 2 chairs at the same time and I did the same thing to both seats. The rockers were actually finished May 2nd but I have been busy with a complete bathroom remodel and finishing up making 2 Shaker style nightstands for the bedroom. I also make lighted wooden bases for a lot of glass blowers in the northwest-mostly along the Oregon coast but I have other clients in Wash., Cali., Idaho, and even one in the Upper Peninsula of Mich. I also don't do all of this by myself. I have a friend who does a lot of work with me and any time I say "I" it can be interpreted as "we". He loves his chair. He has had 4 back surgeries over the years and it feels really good when he sits in it. My sister-in-law saw a photo of the chairs that I sent my brother. She emailed me and said she wants one. Now I'm getting ready to make her one out of walnut. I'll be starting soon. I hope you are like me and are using the covid-19 to get lots of projects done. Hope you are staying healthy and safe. I want to thank you again for your help and the nice videos. Without the videos and templates I would have never attempted these rockers. I have learned a lot. By the way, I won't be going into the rocker business; this is only a friends and family thing and they will have to be good friends and close family. Thanks again,
Gary B.
 Hi Scott: Hope you are doing well in these crazy times today. I am thinking you have had minimal impact due to Covid 19 in your area. We are also fortunate to live in an area (near Nelson. B.C.) where we were still able to enjoy our outdoor activities. I bought the DVD and templates and received them in January. The DVD was very well done and the key instructions were very good. I completed two of the bar stools in cherry and am quite happy with the way they turned out (although I have to admit, I think I would have been happier if they were walnut). I am planning on doing two more, but am thinking of making them armless. I like what you have done with the backrest on that version. Previously, you had mentioned that to do so, all you had to do was omit the arms, cut the front legs flush and remove the joint on the rear legs. Just wanting to confirm that you didn't add an inch or two to the top of the back legs to allow the backrest to slope down at the top. Any little bit of information would be appreciated as it may save me some trial and error. Regards,
Warren J.
 Dear Scott, Finally done. Next a rocker. How high is the back of your rocker off the ground?
Jim M.
 Scott, Previously, when I asked you a question about finishing Tiger Maple chairs (dye or no dye), you requested I send you pictures of my completed rocking chair. This is my fourth chair; this one is for our USAF fighter pilot son. He is home on leave from Okinawa, Japan; he is finally permitte4d to head back to Japan tomorrow. He is the individual sitting in the chair in one of the photos. I love the hand-rubbed finishing technique you recommend; the finished products elicit numerous positive comments on the ultra-smoothness of the finished wood surfaces. Next year I will be starting a double rocker (using your templates); planning to build it out of black walnut. Will definitely be doweling the joints in the seat pan due to its width. I am truly appreciative of your instructional DVD and template sets; look forward to building several more for other family members.
Bo C. Harrisburg, NC
 Hi Scott I finished my rocker, one coat of Minwax tung oil, three coats of poly/oil. l will wait a couple of weeks and apply two coats of wax/oil. This finish went on great thanks for the tips. I especially like the no sanding between coats, just using steel wool to buff out during application of the oil/poly. Thank you for all your help when I got stuck!
Neal
.jpg)
 Hi Scott, I’ve built two of your rockers and one Tea Party Chair. I’m ready for a couple more Tea Party chairs. I can’t remember the amount of material I used. Can you tell me the approximate BF of 8/4 you suggest? Everyone loves these chairs to look at and sit in. Thanks.
Darrel W.