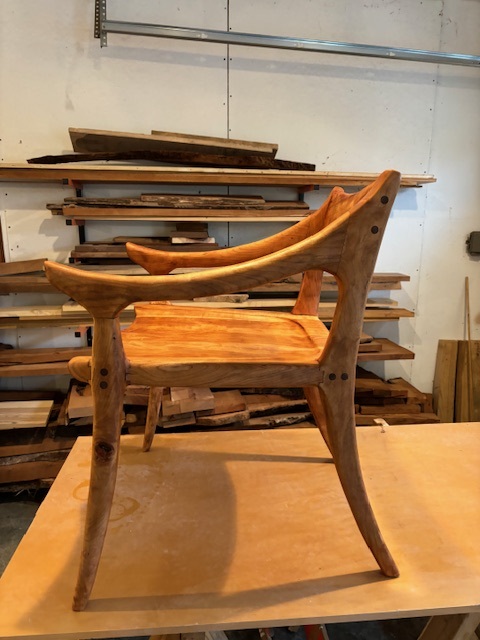
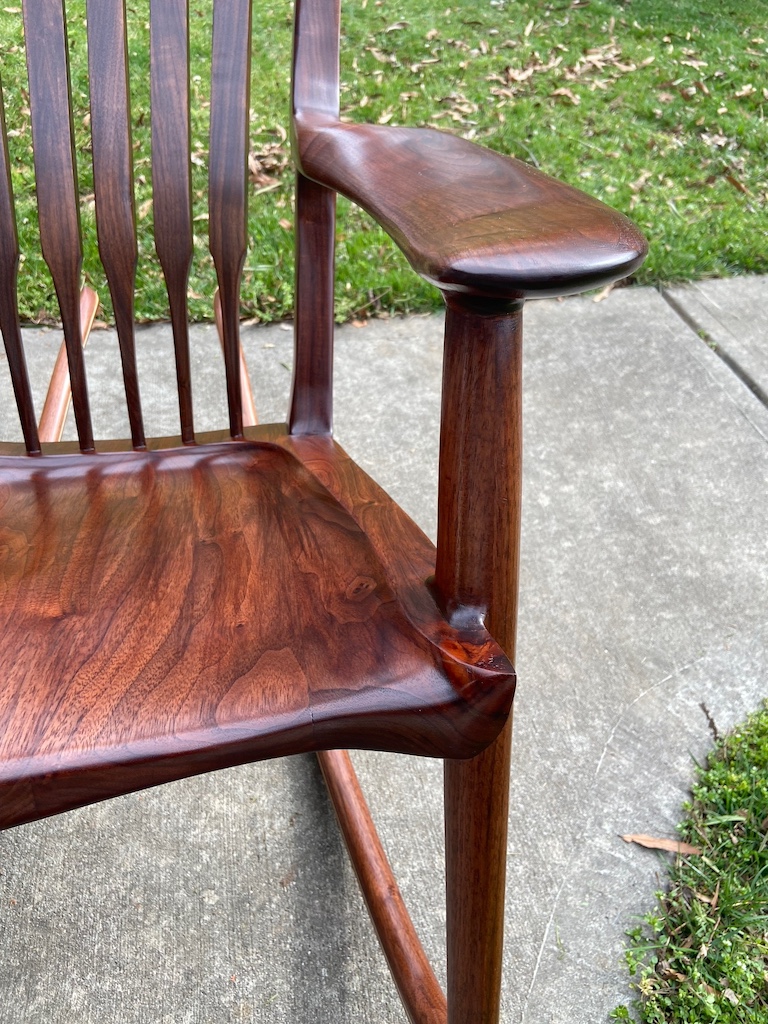
 So many thanks for your help and guidance. Lots of imperfections but most people won’t ever notice em. Overall they came out really nice-and the curves really add a nice touch A lot of sanding and I probably could have sanded a few more hours. But. But but. Really reminded me how important it is to have good plans when you start. Thanks again. David.
David W.
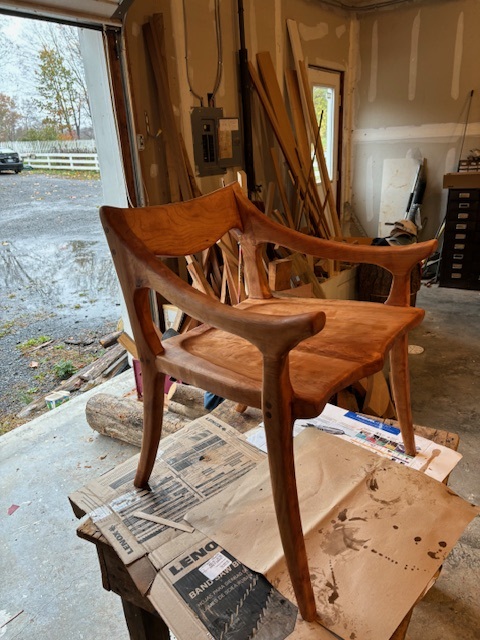
 Hi Scott
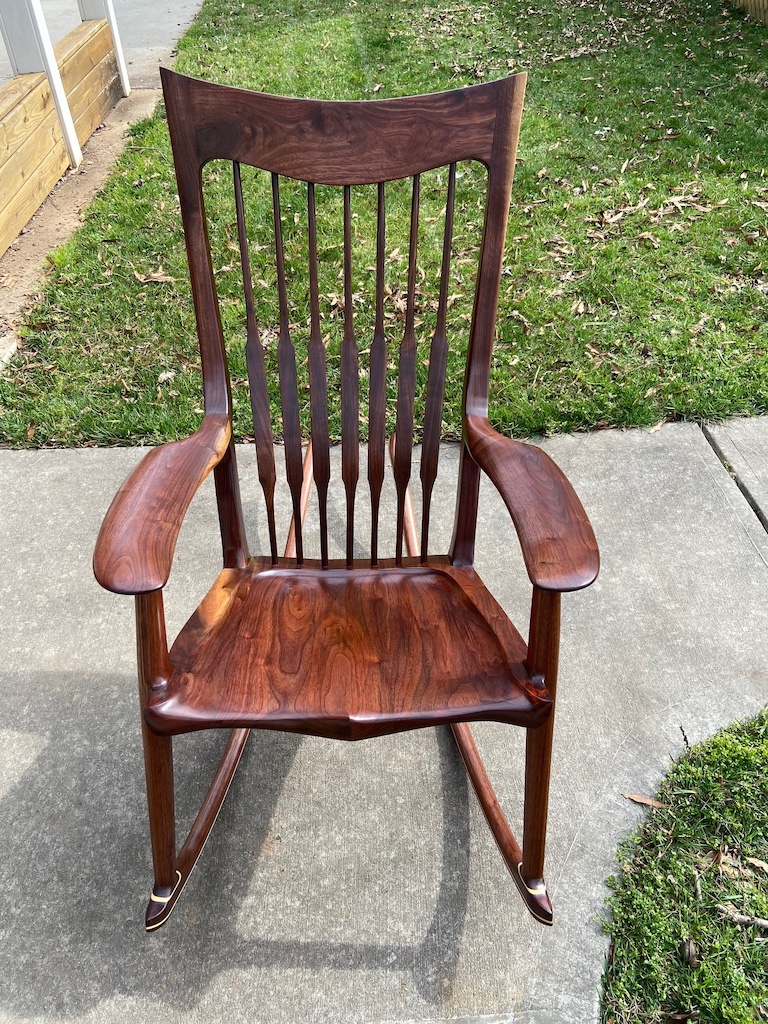
Waiting for my finishes to arrive; one final sanding to do. There is a minor issue. As you can probably tell from the photo, the balance point is a bit forward. I can’t quite decide yet whether it is a serious matter, and I am pondering options for correcting it
In your video, you only mention the balance point AFTER the rockers are epoxied on! I suppose that earlier, when first positioning the chair on the rockers to mark where the dowel holes should be drilled, this balance point could have been checked?
Anyway this has been quite an exciting adventure for me. Thanks for inspiring me to take it on.
Hi Scott
Waiting for my finishes to arrive; one final sanding to do. There is a minor issue. As you can probably tell from the photo, the balance point is a bit forward. I can’t quite decide yet whether it is a serious matter, and I am pondering options for correcting it
In your video, you only mention the balance point AFTER the rockers are epoxied on! I suppose that earlier, when first positioning the chair on the rockers to mark where the dowel holes should be drilled, this balance point could have been checked?
Anyway this has been quite an exciting adventure for me. Thanks for inspiring me to take it on.
Alexis D.
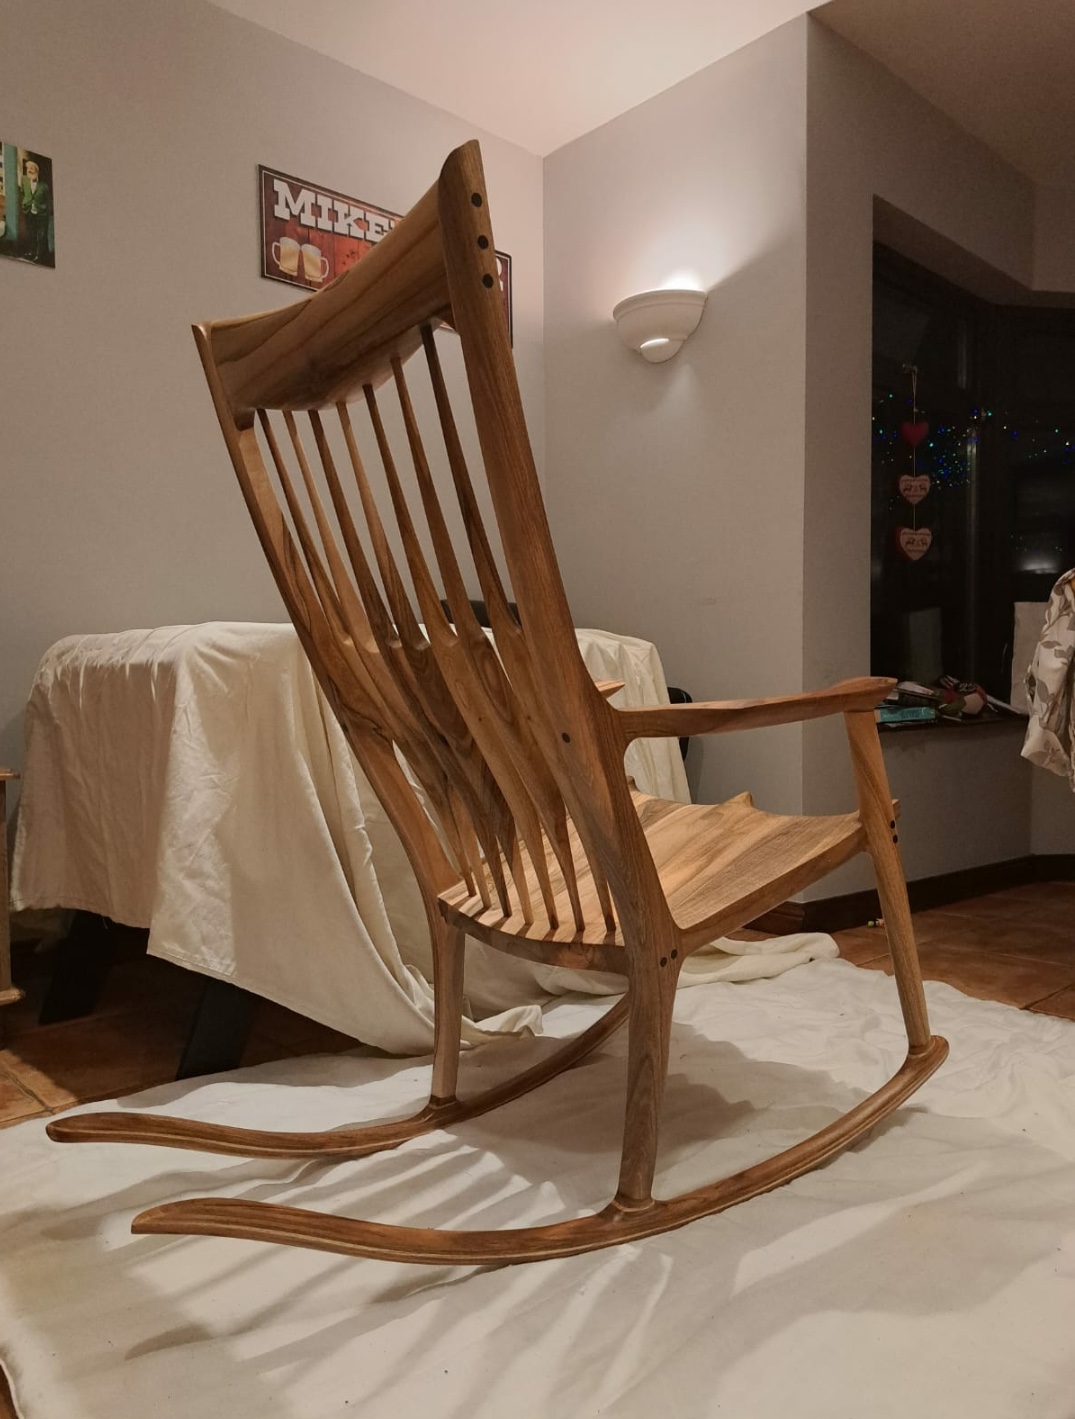
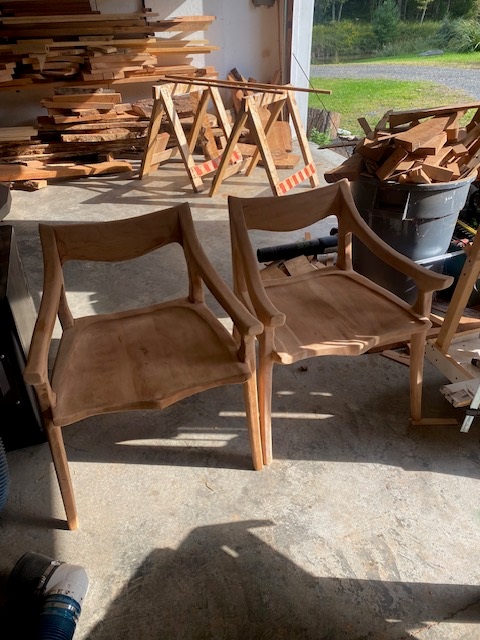 I just wanted to thank you for your advice and encouragement and help as I muddled my way through these two chairs. I’ve had to stop for about a month as we’ve been moving and we’re also going on vacation. too much going on to work on the chairs but they’re mostly done but for the final sanding which will take many hours. I’ll start again at the end of October but they’re looking good Not perfect but I’m not looking for perfection and I really appreciate your help. Thanks again David.
David W.

 Scott,
Thank you for the fantastic videos and inspiration. Fun project for sure.
Scott,
Thank you for the fantastic videos and inspiration. Fun project for sure.
Brian C.
 Hi Scott,
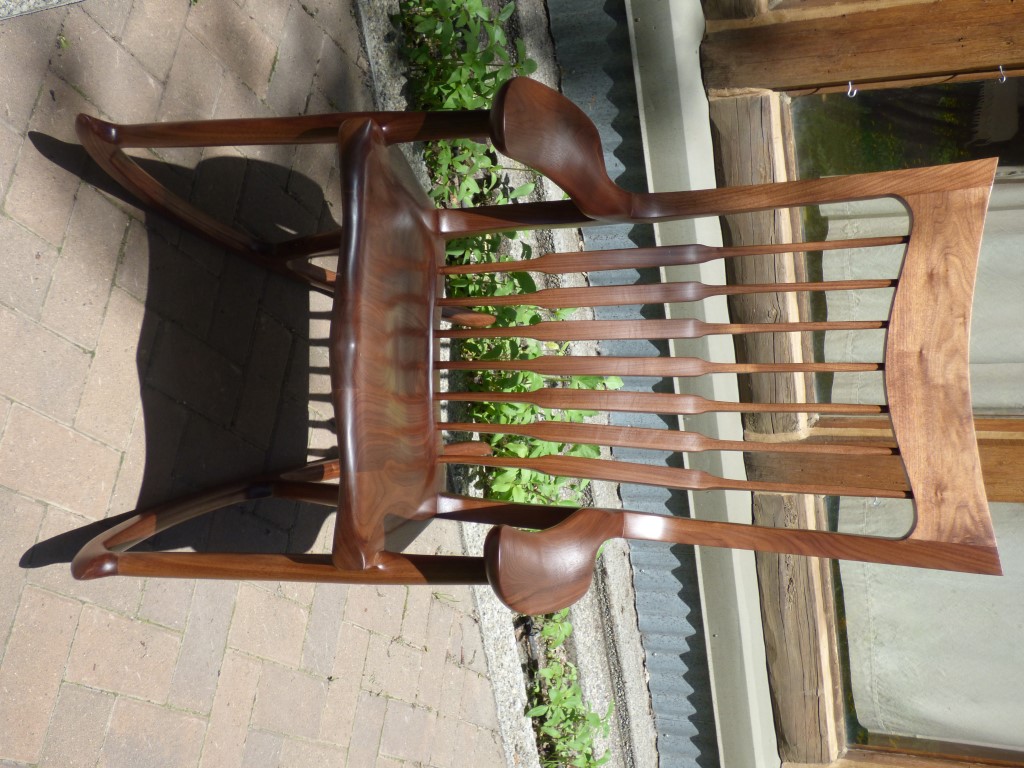
I finished the walnut chair, and wanted to send a few pictures. Your video was very good. My chair looks pretty good, but doesn't really pass my muster on close inspection. Multiple reasons. I did dish out the seat to 1 1/4" at its deepest, but could have done better. My Maloof joints were not quite as good as they were on my first two chair attempts when I cut them by hand. That, I think, is my biggest criticism of my work. The angle on the back legs is slightly wider and the front legs toe in ever so slightly because I removed the end boards from the seat, after it was already sculpted, and when I installed the new ones the angle wasn't perfect and they tipped down. slightly. I had some difficulty cutting perfect 1/8" strips for the rockers and, when put back together the way they came apart, I found that the top and bottom of the first rocker were not parallel. I discarded that one, reset the saw blade and tried a second time, but it doesn't take much of an error to cause that problem. So I simply alternated strips to make them perfect. However, they won't look like a solid piece of wood when you do that. The rockers, when glued up, were slightly higher than 1 1/4", so the roundover bit couldn't make them perfectly round. Because I don't have a horizontal boring drill, and I couldn't see a good way to make a jig to drill the leg bottoms, I decided to simply screw the rockers onto the legs with heavy 4" screws, like I did on my first two chairs. Then, when the chair was pretty well built, I changed my mind and drilled the legs by hand, simply doing my best to make the holes centered and straight. I found that when they were off slightly it caused me problems fitting the rockers to the bottom of the legs. I could go on, but won't. The chair did turn out pretty well, for all of that.
Hi Scott,
I finished the walnut chair, and wanted to send a few pictures. Your video was very good. My chair looks pretty good, but doesn't really pass my muster on close inspection. Multiple reasons. I did dish out the seat to 1 1/4" at its deepest, but could have done better. My Maloof joints were not quite as good as they were on my first two chair attempts when I cut them by hand. That, I think, is my biggest criticism of my work. The angle on the back legs is slightly wider and the front legs toe in ever so slightly because I removed the end boards from the seat, after it was already sculpted, and when I installed the new ones the angle wasn't perfect and they tipped down. slightly. I had some difficulty cutting perfect 1/8" strips for the rockers and, when put back together the way they came apart, I found that the top and bottom of the first rocker were not parallel. I discarded that one, reset the saw blade and tried a second time, but it doesn't take much of an error to cause that problem. So I simply alternated strips to make them perfect. However, they won't look like a solid piece of wood when you do that. The rockers, when glued up, were slightly higher than 1 1/4", so the roundover bit couldn't make them perfectly round. Because I don't have a horizontal boring drill, and I couldn't see a good way to make a jig to drill the leg bottoms, I decided to simply screw the rockers onto the legs with heavy 4" screws, like I did on my first two chairs. Then, when the chair was pretty well built, I changed my mind and drilled the legs by hand, simply doing my best to make the holes centered and straight. I found that when they were off slightly it caused me problems fitting the rockers to the bottom of the legs. I could go on, but won't. The chair did turn out pretty well, for all of that.
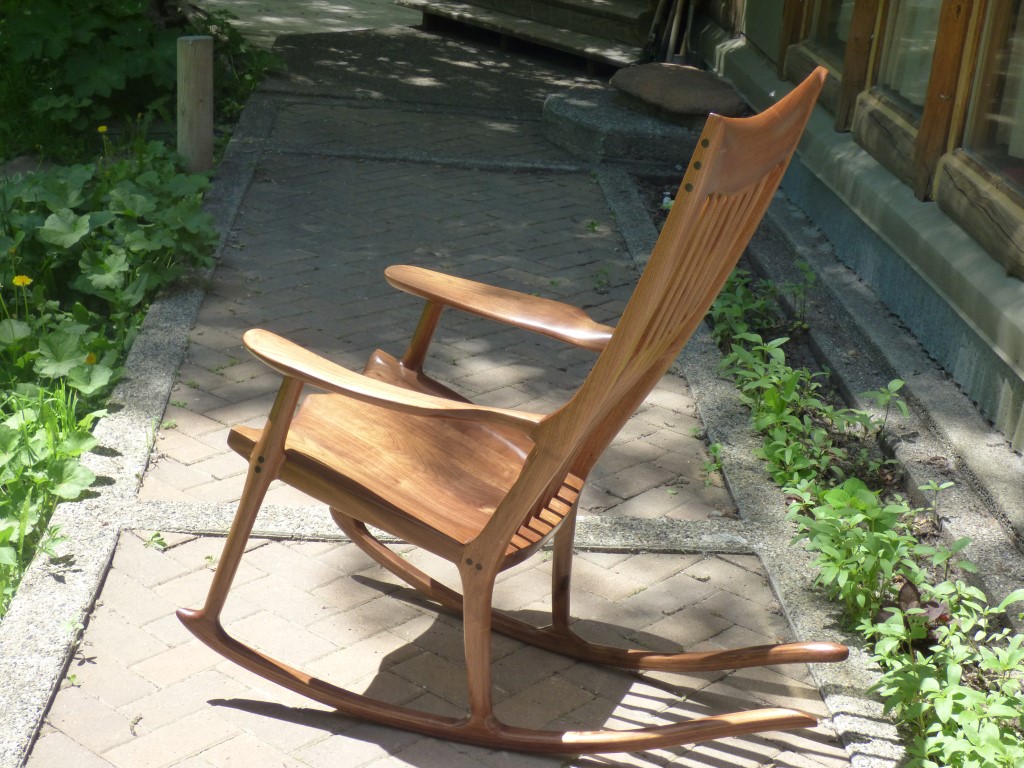
In 1992 I made my first attempt at a Maloof rocker. I used apricot wood from a tree that I had salvaged. I had enough 8/4 wood to make a 10 board seat, 2 front legs, and a head rest. The rest of the wood was 4/4 that I put back together to make 8/4. I made my measurements from pictures in his book, together with chairs in my house. I didn't realize at the time that the back legs angled outward. The chair was never as comfortable as I would have liked. Pictures 1 and 2 show that chair.
In 1996 I make a second attempt using bubinga. By that time I had seen a Maloof video and realized the back legs had to slope outward, but I made plenty of other mistakes. I did get the seat dished out deeper, but I still wasn't happy with the overall comfort. Pictures 3 and 4 show that chair.
Sometime after that, I sat in a Maloof rocker and realized how much bulkier and heavier my chairs were. The same lesson came home to me when I saw your chairs at the Sun Valley show and sat in one. I had not intended to try to build another, but when I saw that you had videos and templates available I decided to try again. I am now of the opinion that I can't try to build one of these chairs every 27 years and expect to get it right. If I was building them for a living, I might get it right after the first one or two, and they probably wouldn't take me 200 hours. I am 75 years old now, and this was probably my last try. It was an interesting project anyhow, and I do think your videos were very good. Any problems with my chair are due to my workmanship. My latest elegant rocker is shown in pictures 5 and 6.
Thanks for your help and input during this build.
Richard S.
 it dry. Heated it to liquid and applied with steel wool as directed. Sloshy/frothy kind of mixture as it cooled like a whipped butter. Soaking and rubbing for 20 min then cleaned off. 24 hrs and recoat. Has a luster but not really a shine. It has a soft feel that is very cool.
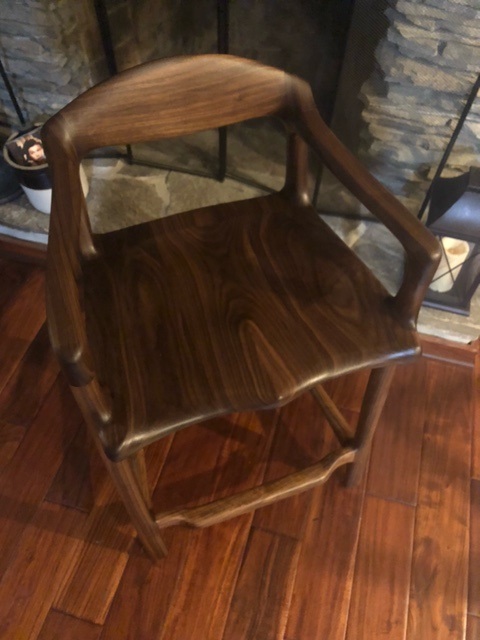
I am in process of making the next three for the kitchen. I will have 2 with and 2 without arms as I think some fat people will not be able to fit in them! I will make one more change- either sand to 220, finish with oil, resand to 320, then wax top coat or just sand to 320 and finish.
After the chairs, I have come up with a design for a table that I think fits with the Maloof look and will complement the chairs. I am enjoying the process but it frustrates the crap out of me not getting things perfectly square and chasing it!!
Thanks Scott.
it dry. Heated it to liquid and applied with steel wool as directed. Sloshy/frothy kind of mixture as it cooled like a whipped butter. Soaking and rubbing for 20 min then cleaned off. 24 hrs and recoat. Has a luster but not really a shine. It has a soft feel that is very cool.
I am in process of making the next three for the kitchen. I will have 2 with and 2 without arms as I think some fat people will not be able to fit in them! I will make one more change- either sand to 220, finish with oil, resand to 320, then wax top coat or just sand to 320 and finish.
After the chairs, I have come up with a design for a table that I think fits with the Maloof look and will complement the chairs. I am enjoying the process but it frustrates the crap out of me not getting things perfectly square and chasing it!!
Thanks Scott.
Brian C.
 Hi Scott,
I bought my first plans and DVD if yours probably 10 years ago. In the meantime I moved, lost a disc, lost the templates and reordered a new dvd and template set.
Hi Scott,
I bought my first plans and DVD if yours probably 10 years ago. In the meantime I moved, lost a disc, lost the templates and reordered a new dvd and template set.
With the first set of templates and dvd, I completed the seat. however, I forgot to do the rabbits before glue up and I couldn’t comprehend a workaround to get the angles, correct so I left it in my garage for 10 years.
In the meantime I lost the drawings, so I reordered those. I pulled out the sculpted seat I worked on 10 yrs ago last August and restarted with your DVD and plans. This has been a six month project and I just wanted to thank you for all the work you put into this DVD so many years ago. This is the single greatest creation other than my kids that I’ve made in my life.
Thank you so much for the instruction and explanation , it must be very rewarding to know that something you do years prior still has an effect on people today. I expect your plans in DVD to continue to entertain, teach and inspire people to continue to build this beautiful rocker.
David W.
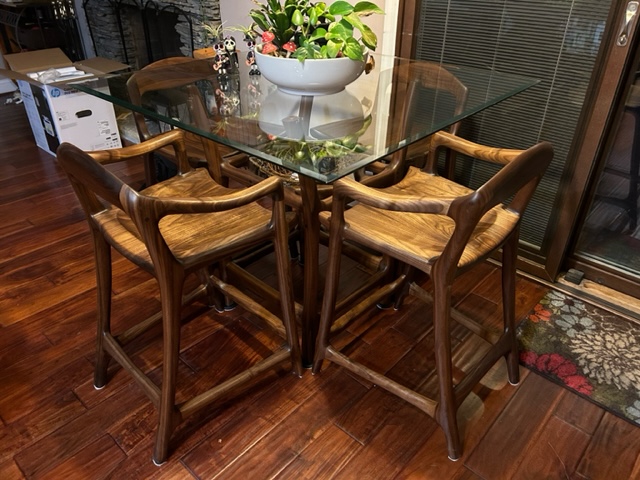
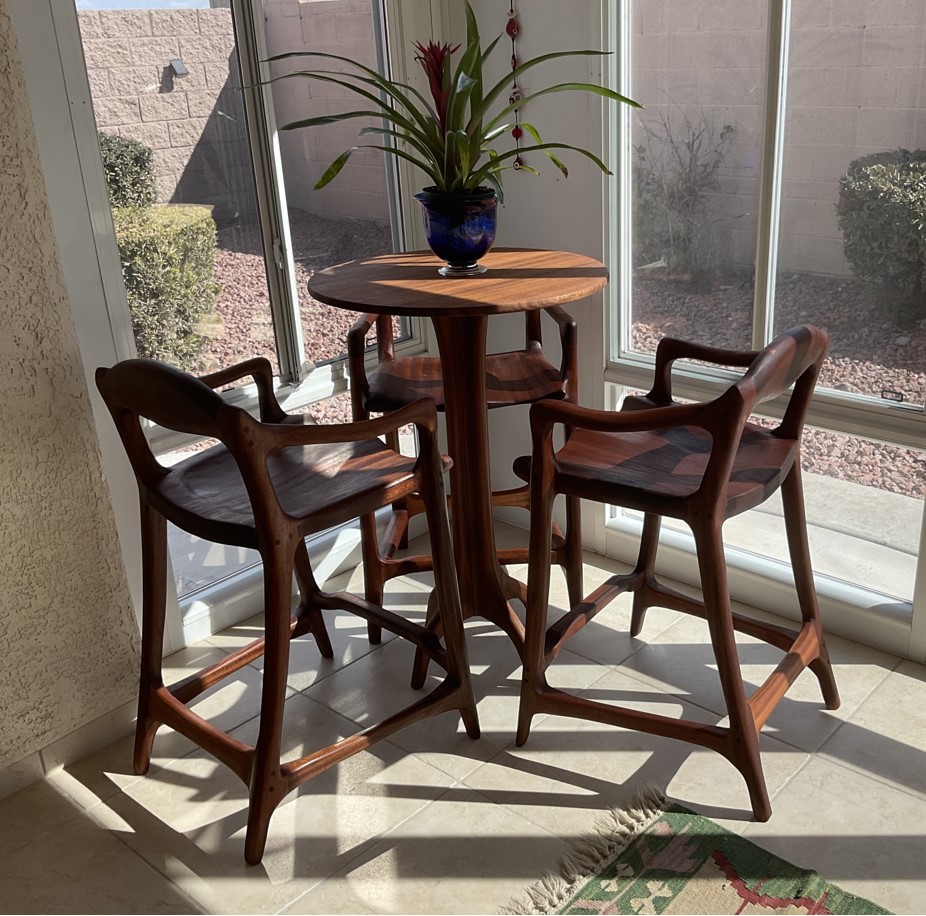 Hi Scott. This the second set of plans I purchased from you and I am impressed with their accuracy. The pieces you see in the picture sits in our sun room. I am waiting for the weather to warm up to enjoy the celebratory cigar with a glass of scotch. I made the chairs from Sapele and finished them with 5 coats of Watco Danish Oil. Finally applied a coat of Minwax Paste Wax. I am pretty happy with the results and get a lot of compliments. The high table, also built from Sapele, compliments the chairs very nicely.
Ahmet O.
 Hi Scott. I finished my rocking chair yesterday. I just wanted to commend you on the DVDs and templates. Such attention to detail. It was alot of fun to build. The sanding at the end did test my patience but was well worth it. I'll send a few pictures. Thanks again.
Mike O.